Learning Objectives
- Use simple Sequences of instructions
- Repeat sequences of instructions using Loops
- Use Selection to choose different sequences to execute
Getting Started
For this project, we’ll be programming a simple game for the BBC Microbit.
You’ll need to use the Microsoft Block Editor to create your program.
When you load the website for the first time, you should see a screen that looks something like this:
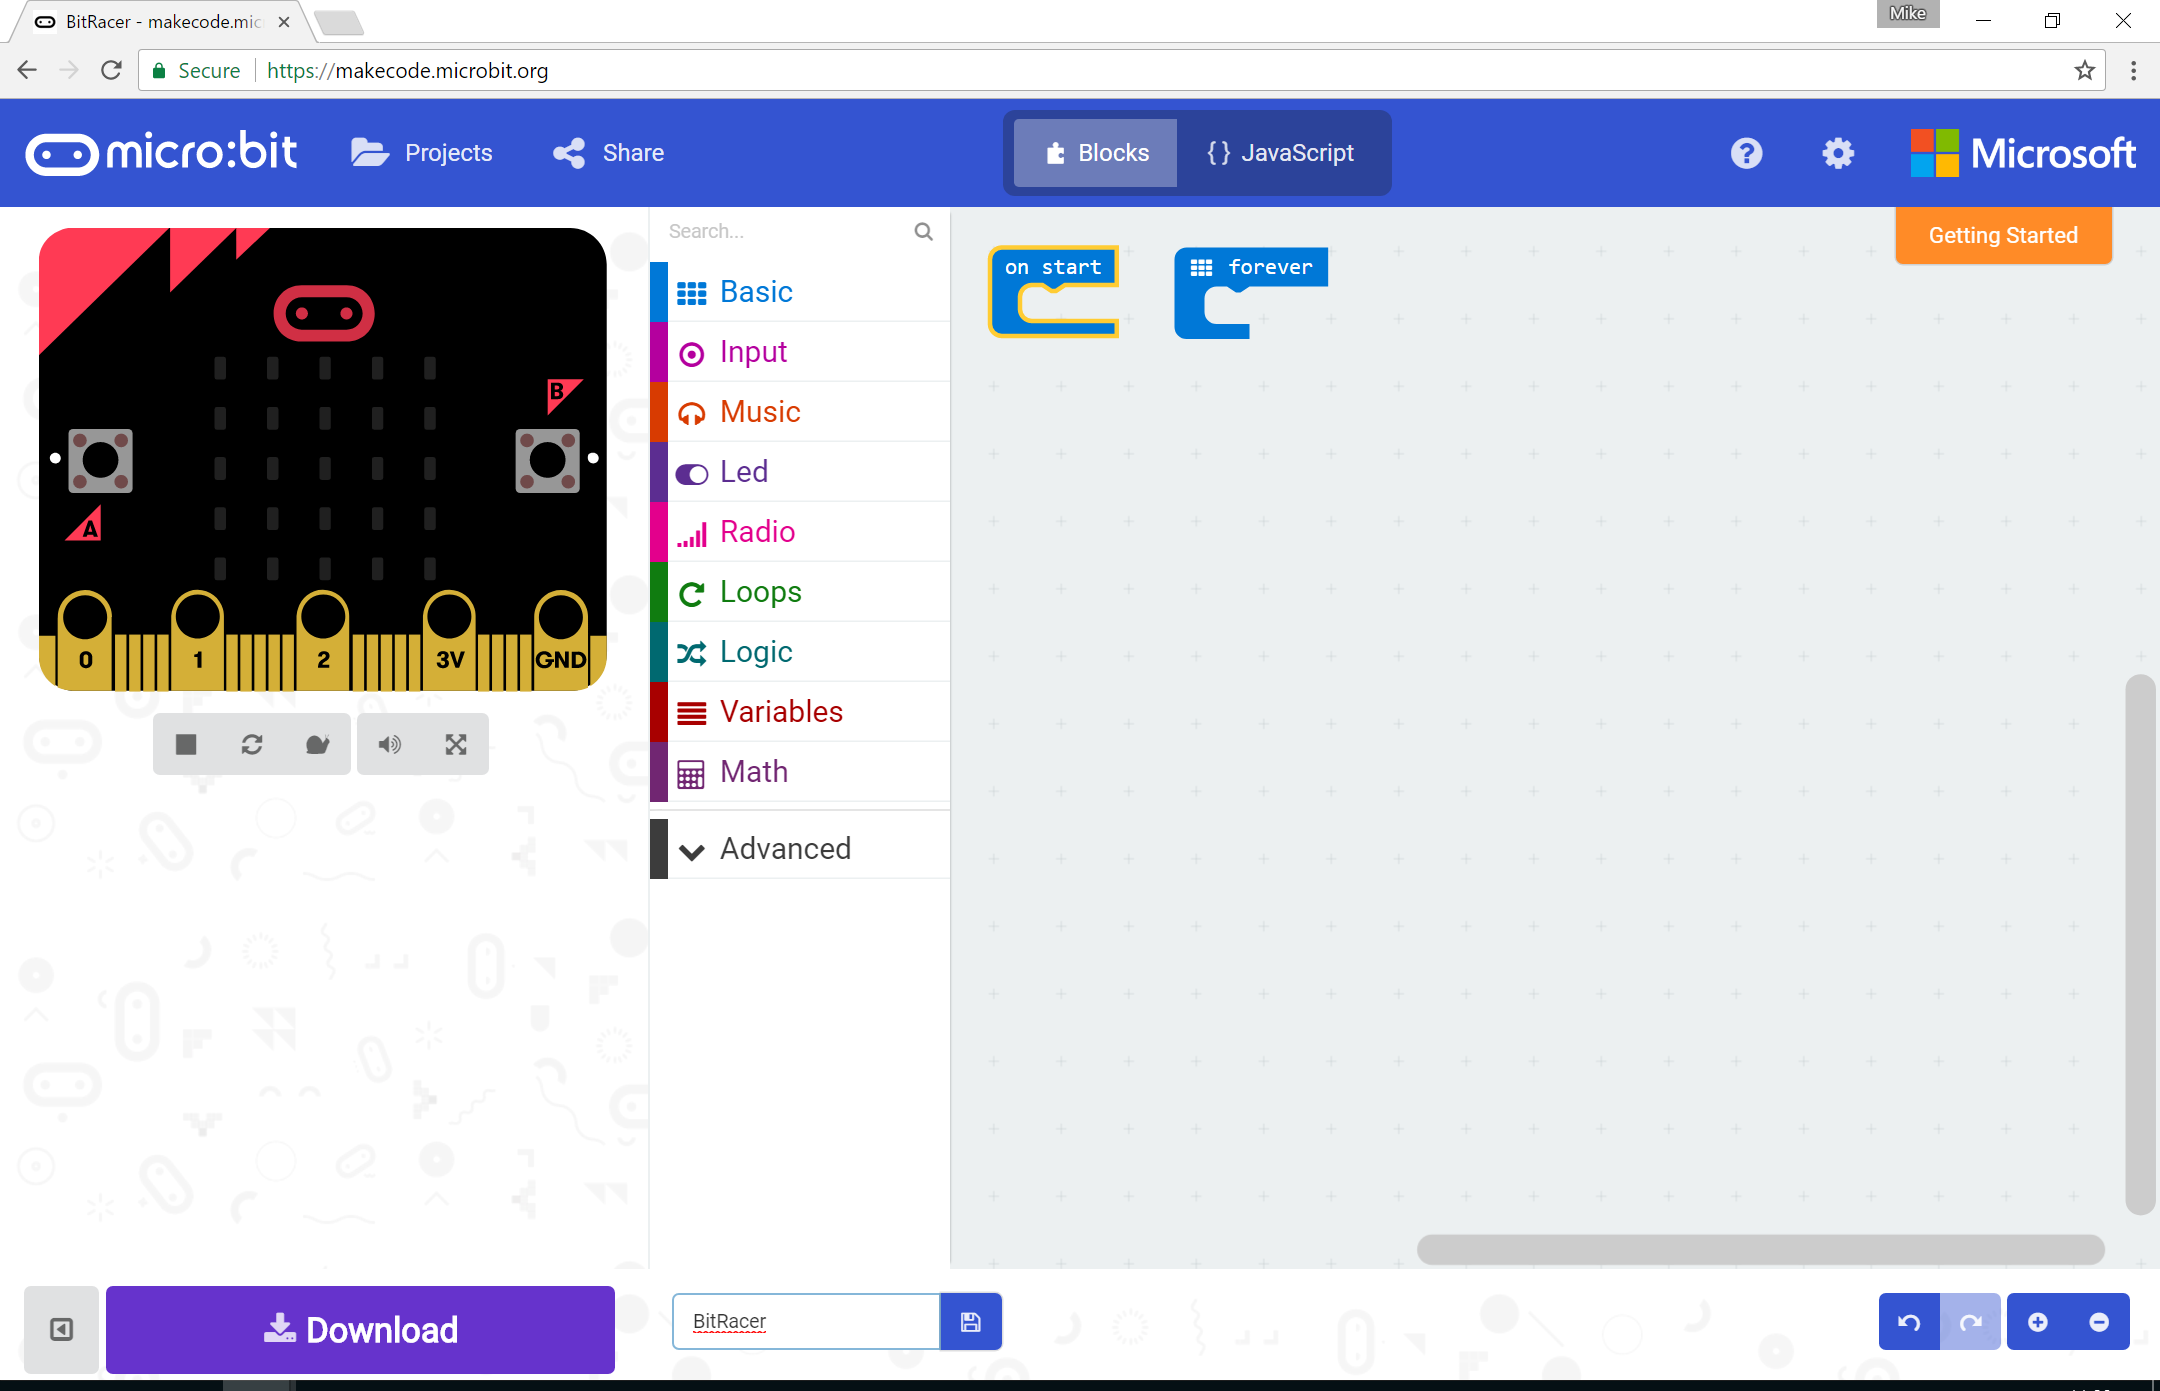
Initialisation
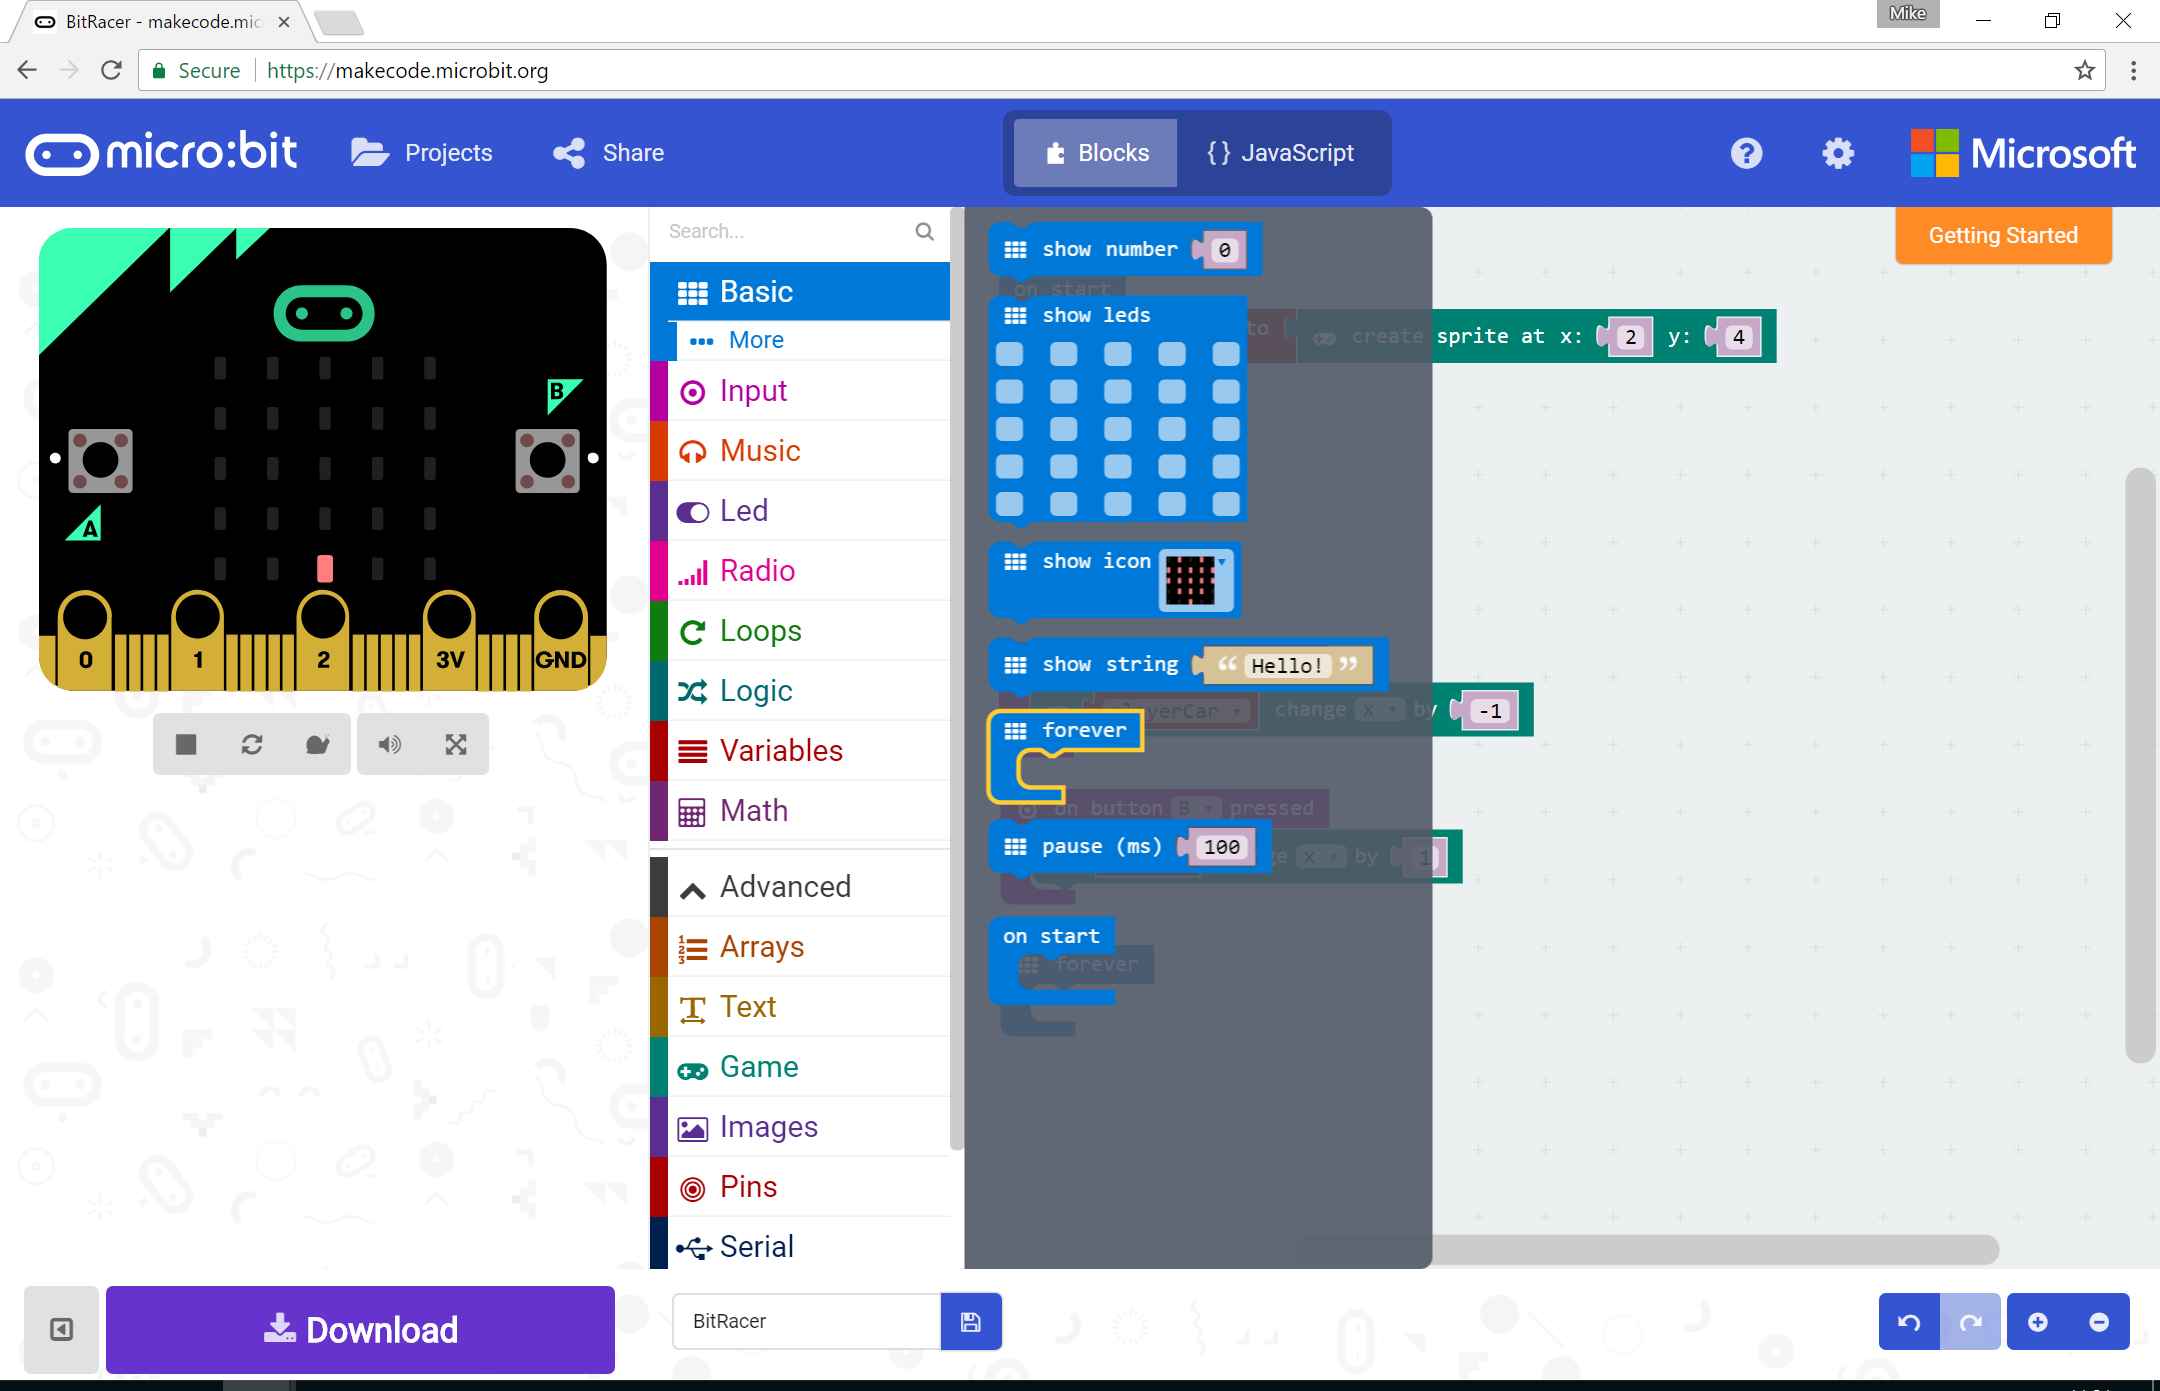
There are 2 blocks given to us in all new projects on start and forever.
- on start - blocks inside here run once as soon as the microbit is powered on.
- forever - once the
on starthas completed, blocks inside here will be repeated until the microbit is turned off.
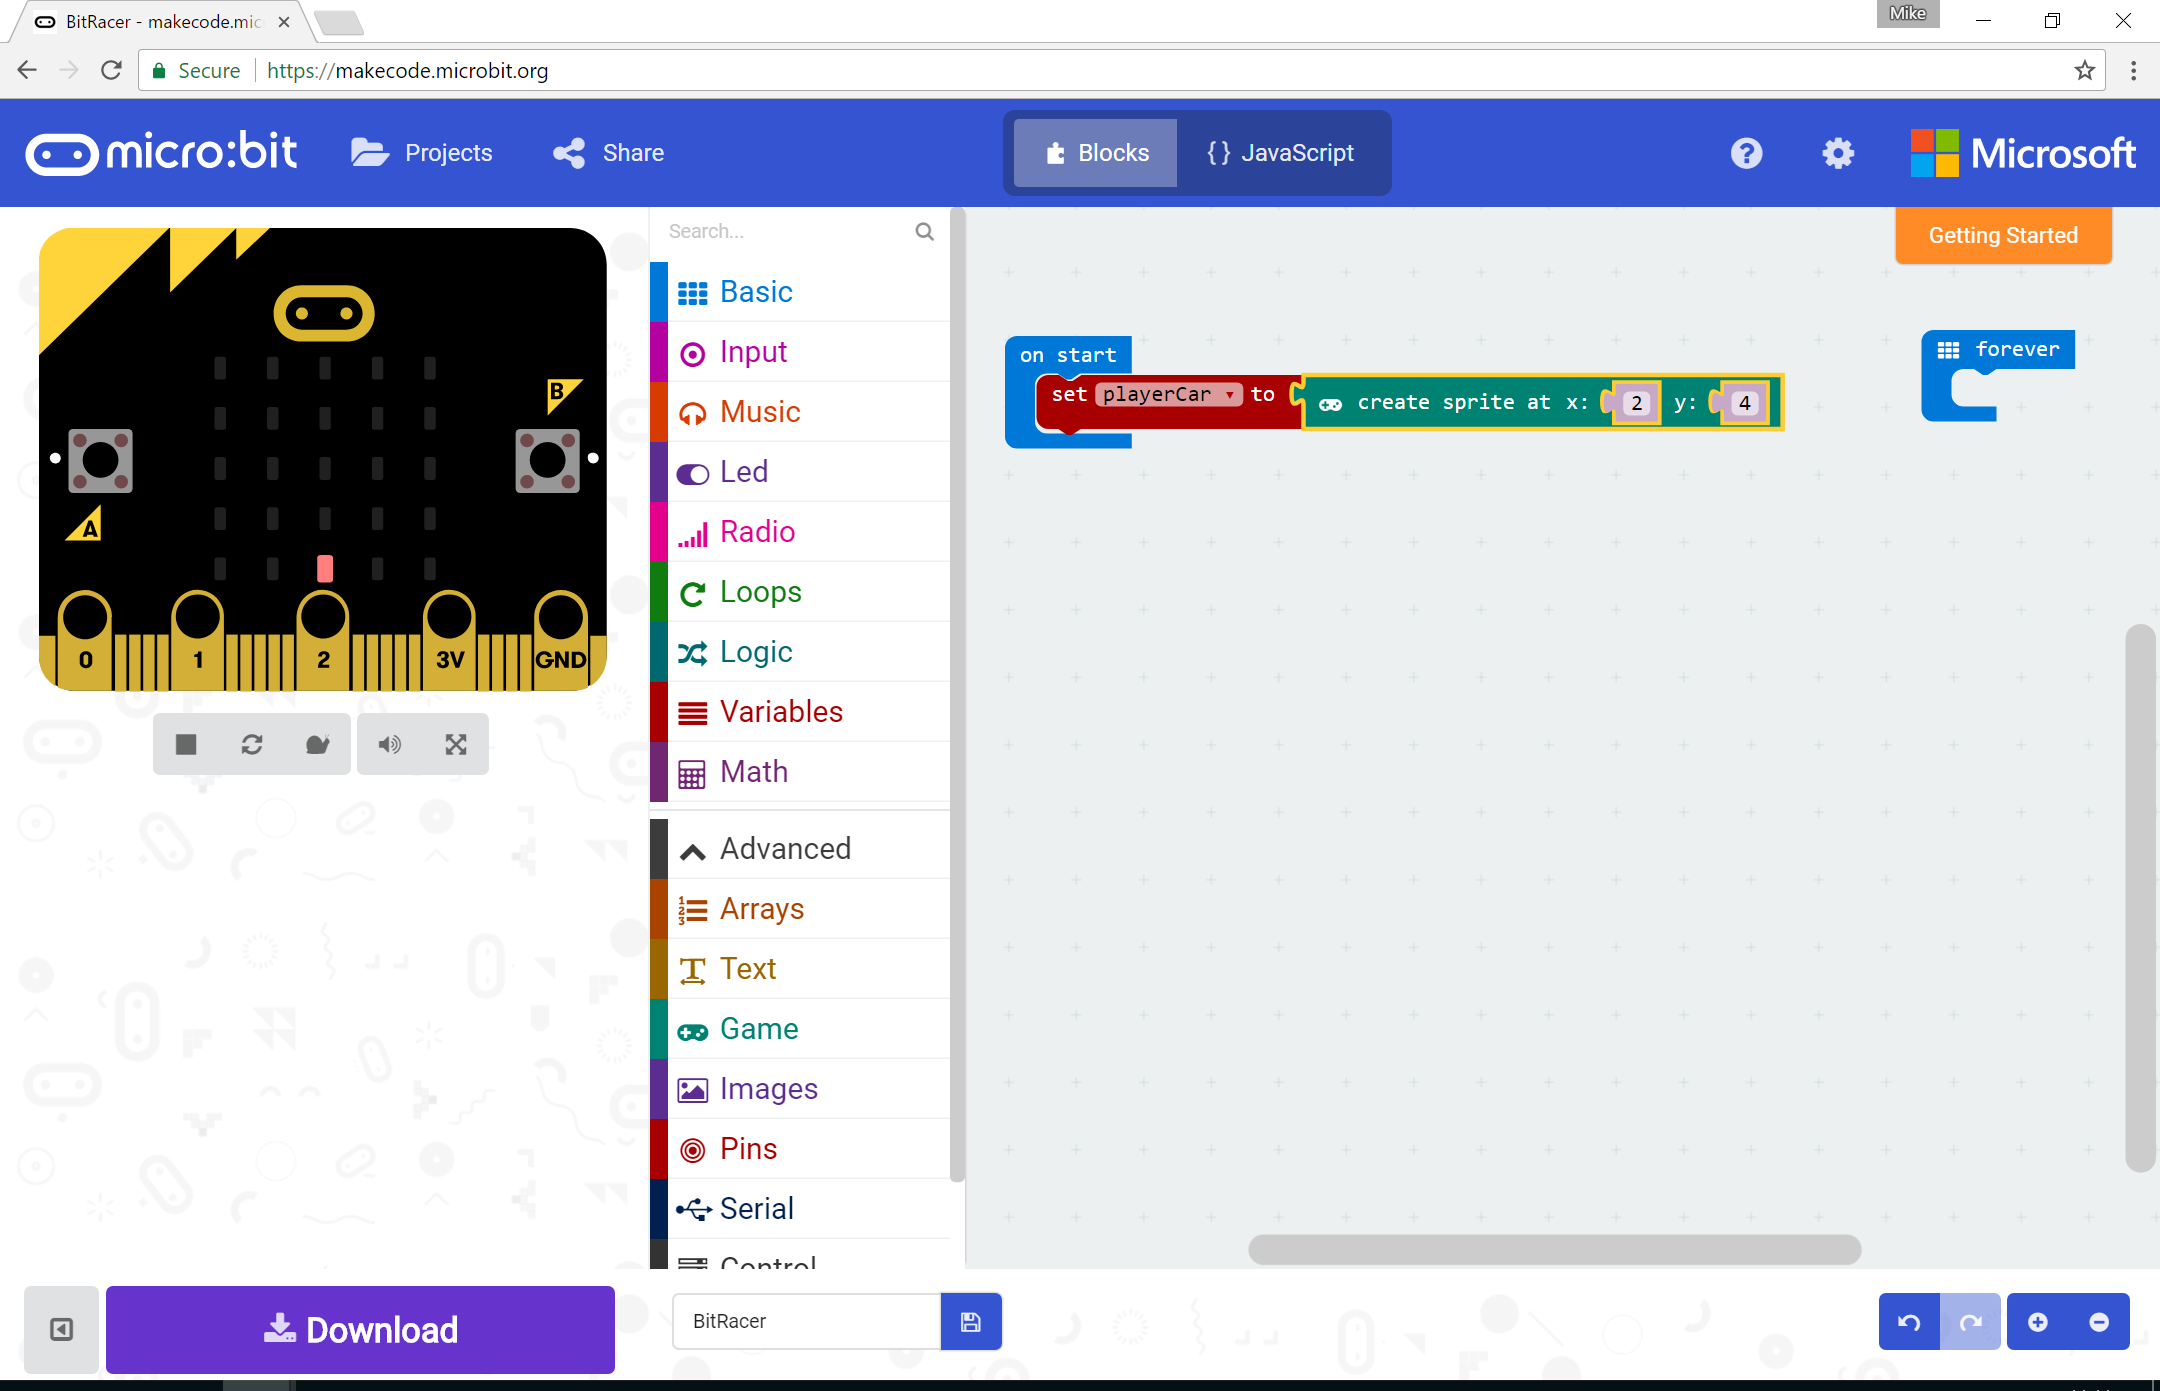
We use the on start block to initialise our programs, that is, to set things up to their starting values.
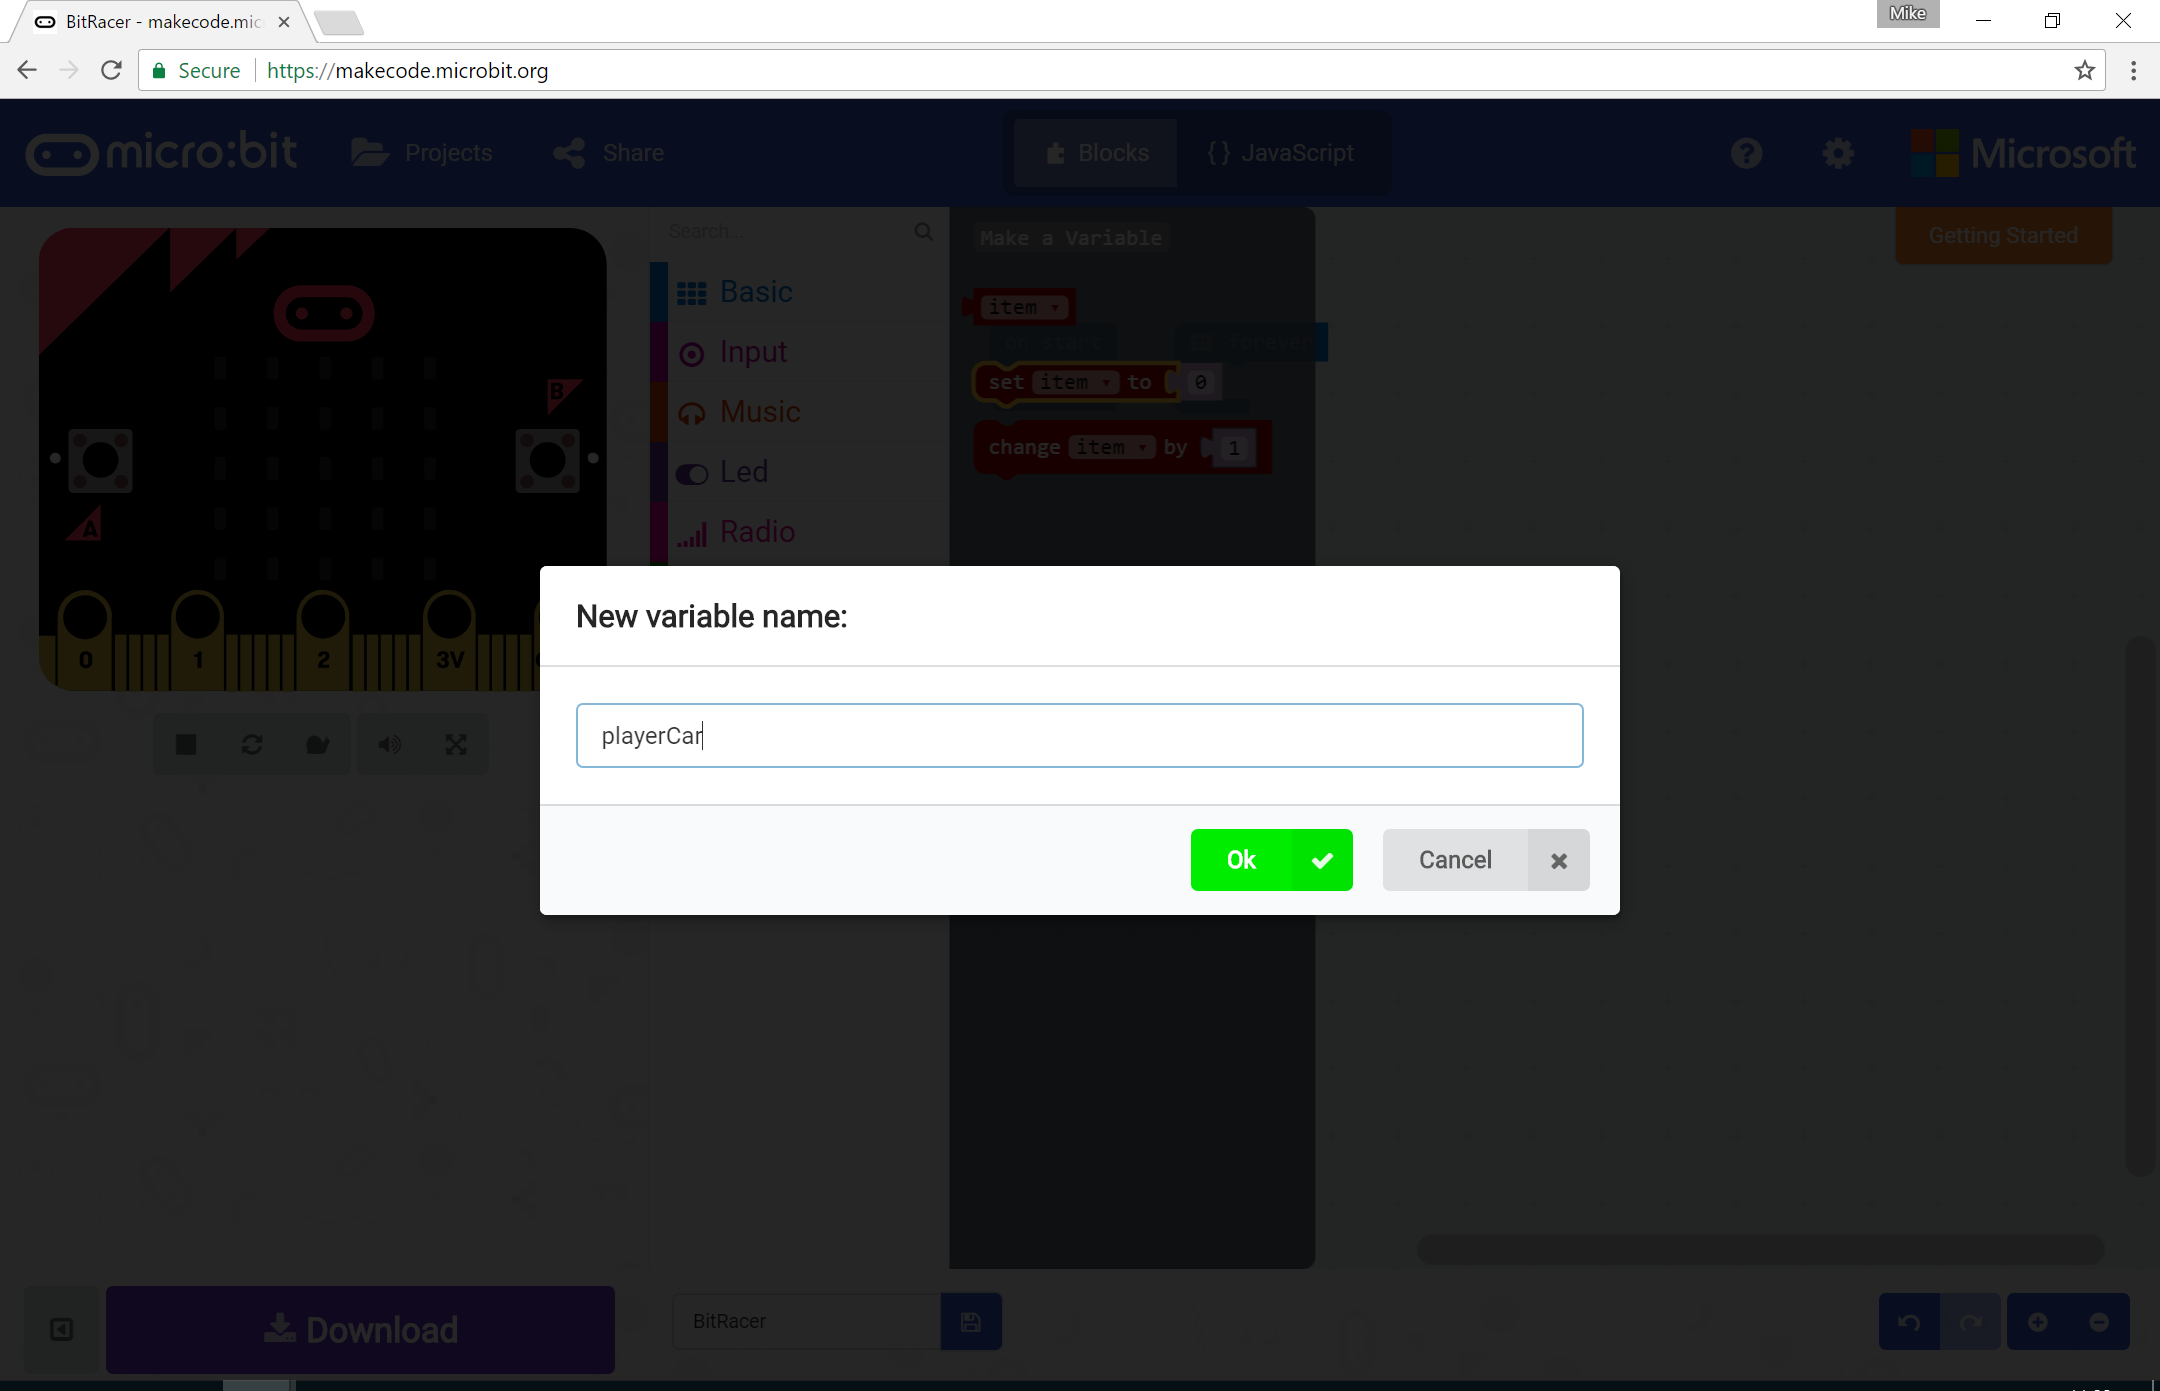
Let’s start by creating a playerCar variable and creating a new sprite.
In the Variables menu, click the Make a Variable button at the very top
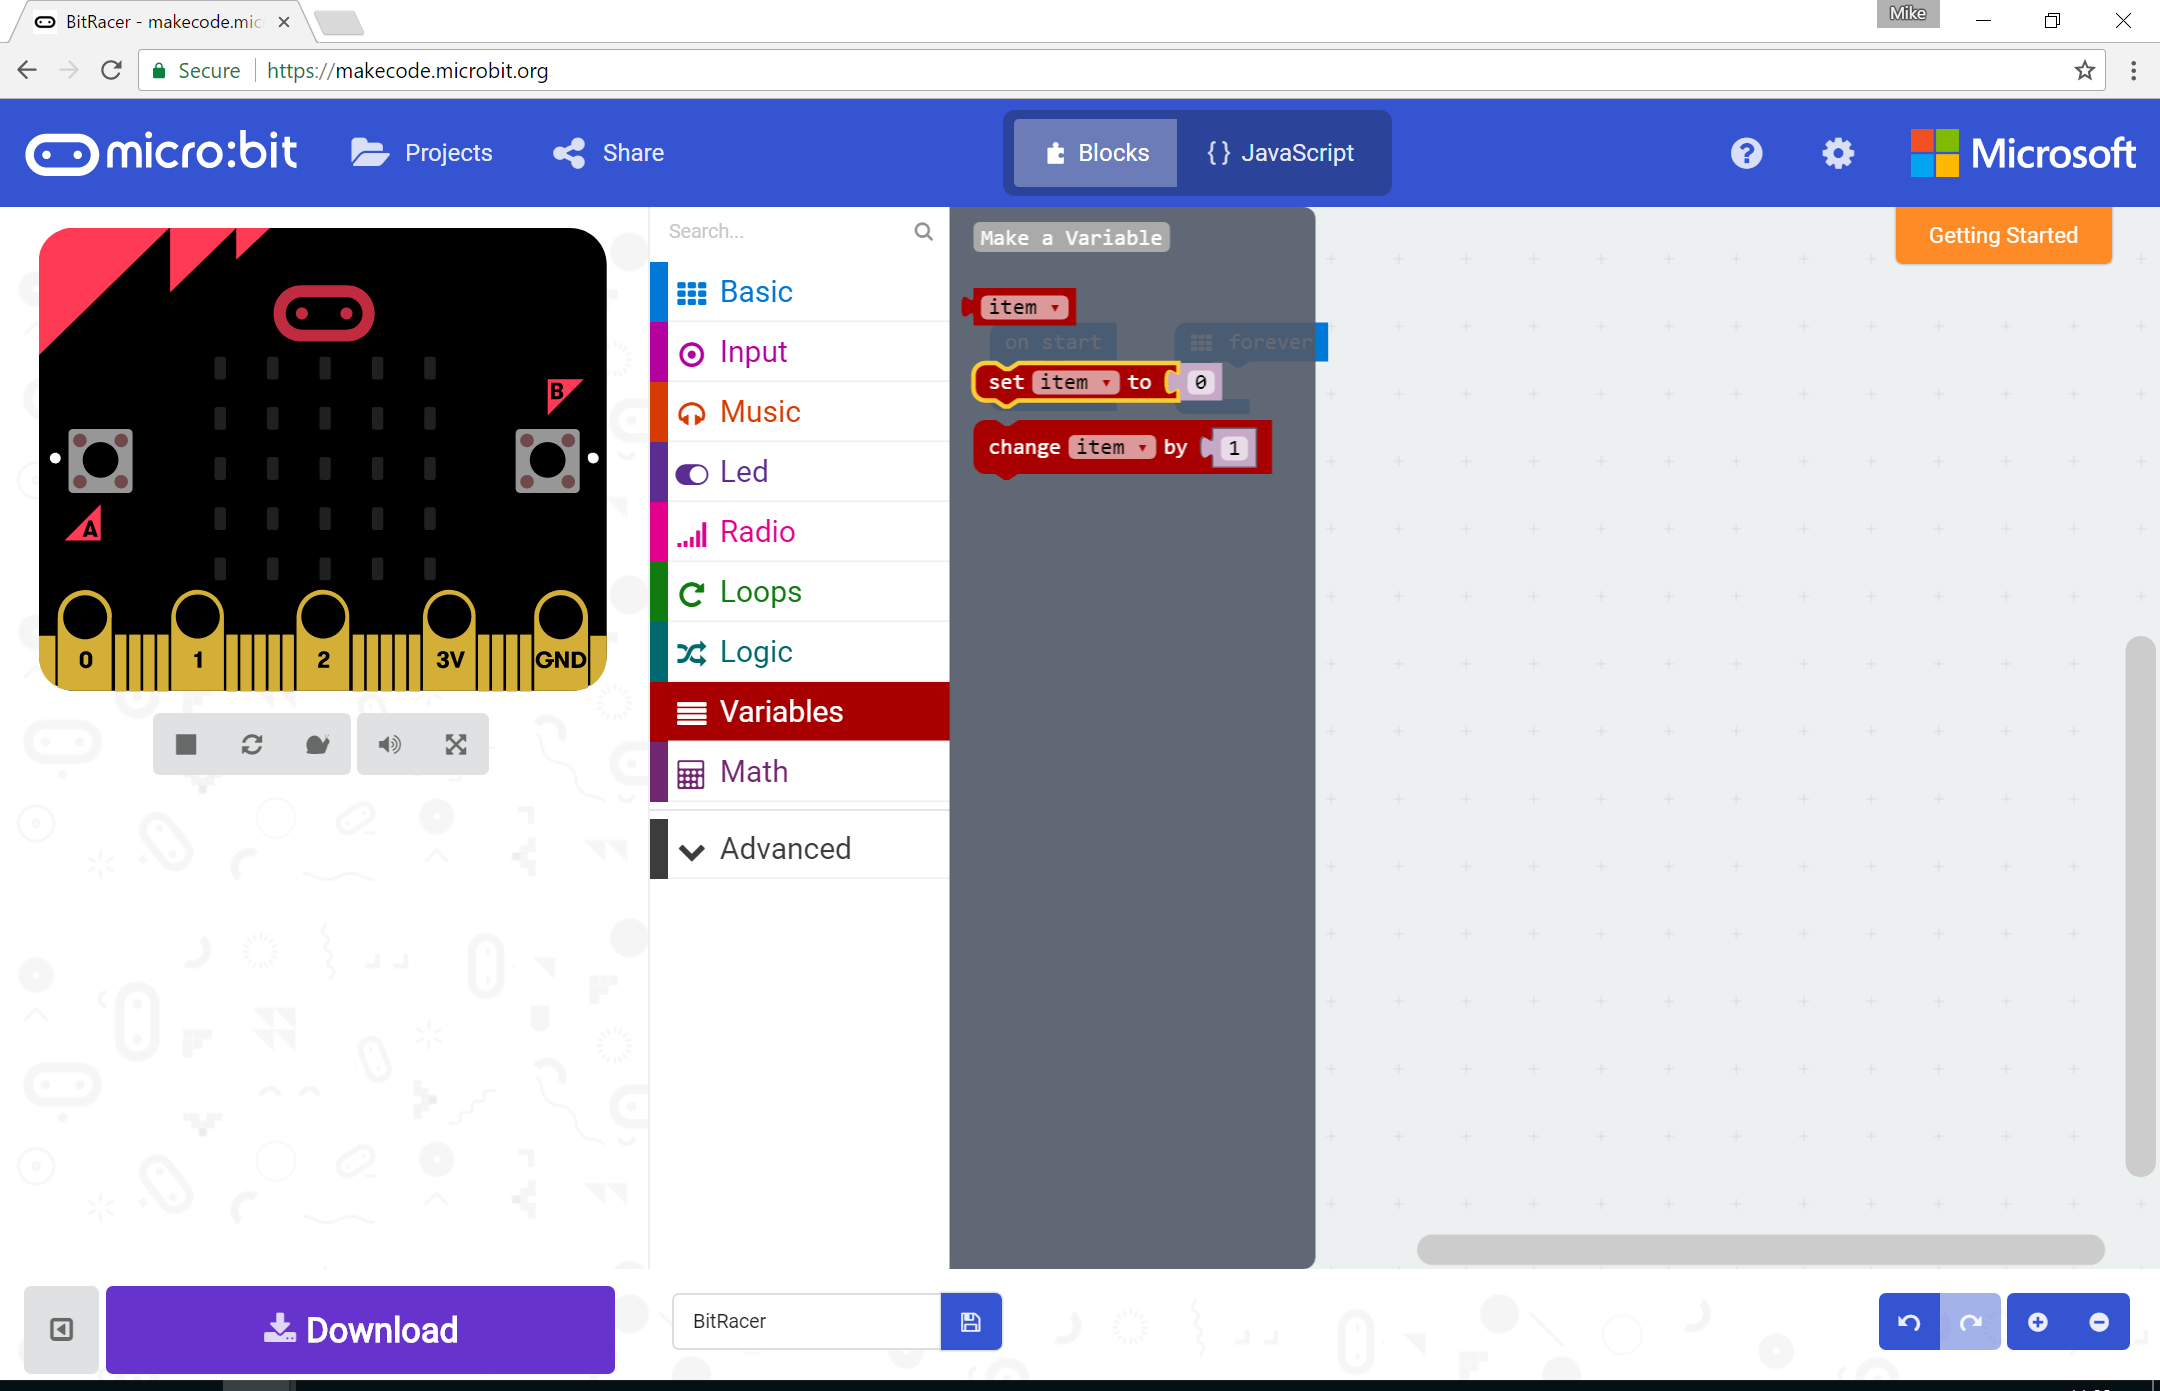
and enter the variable name playerCar in the pop-up box
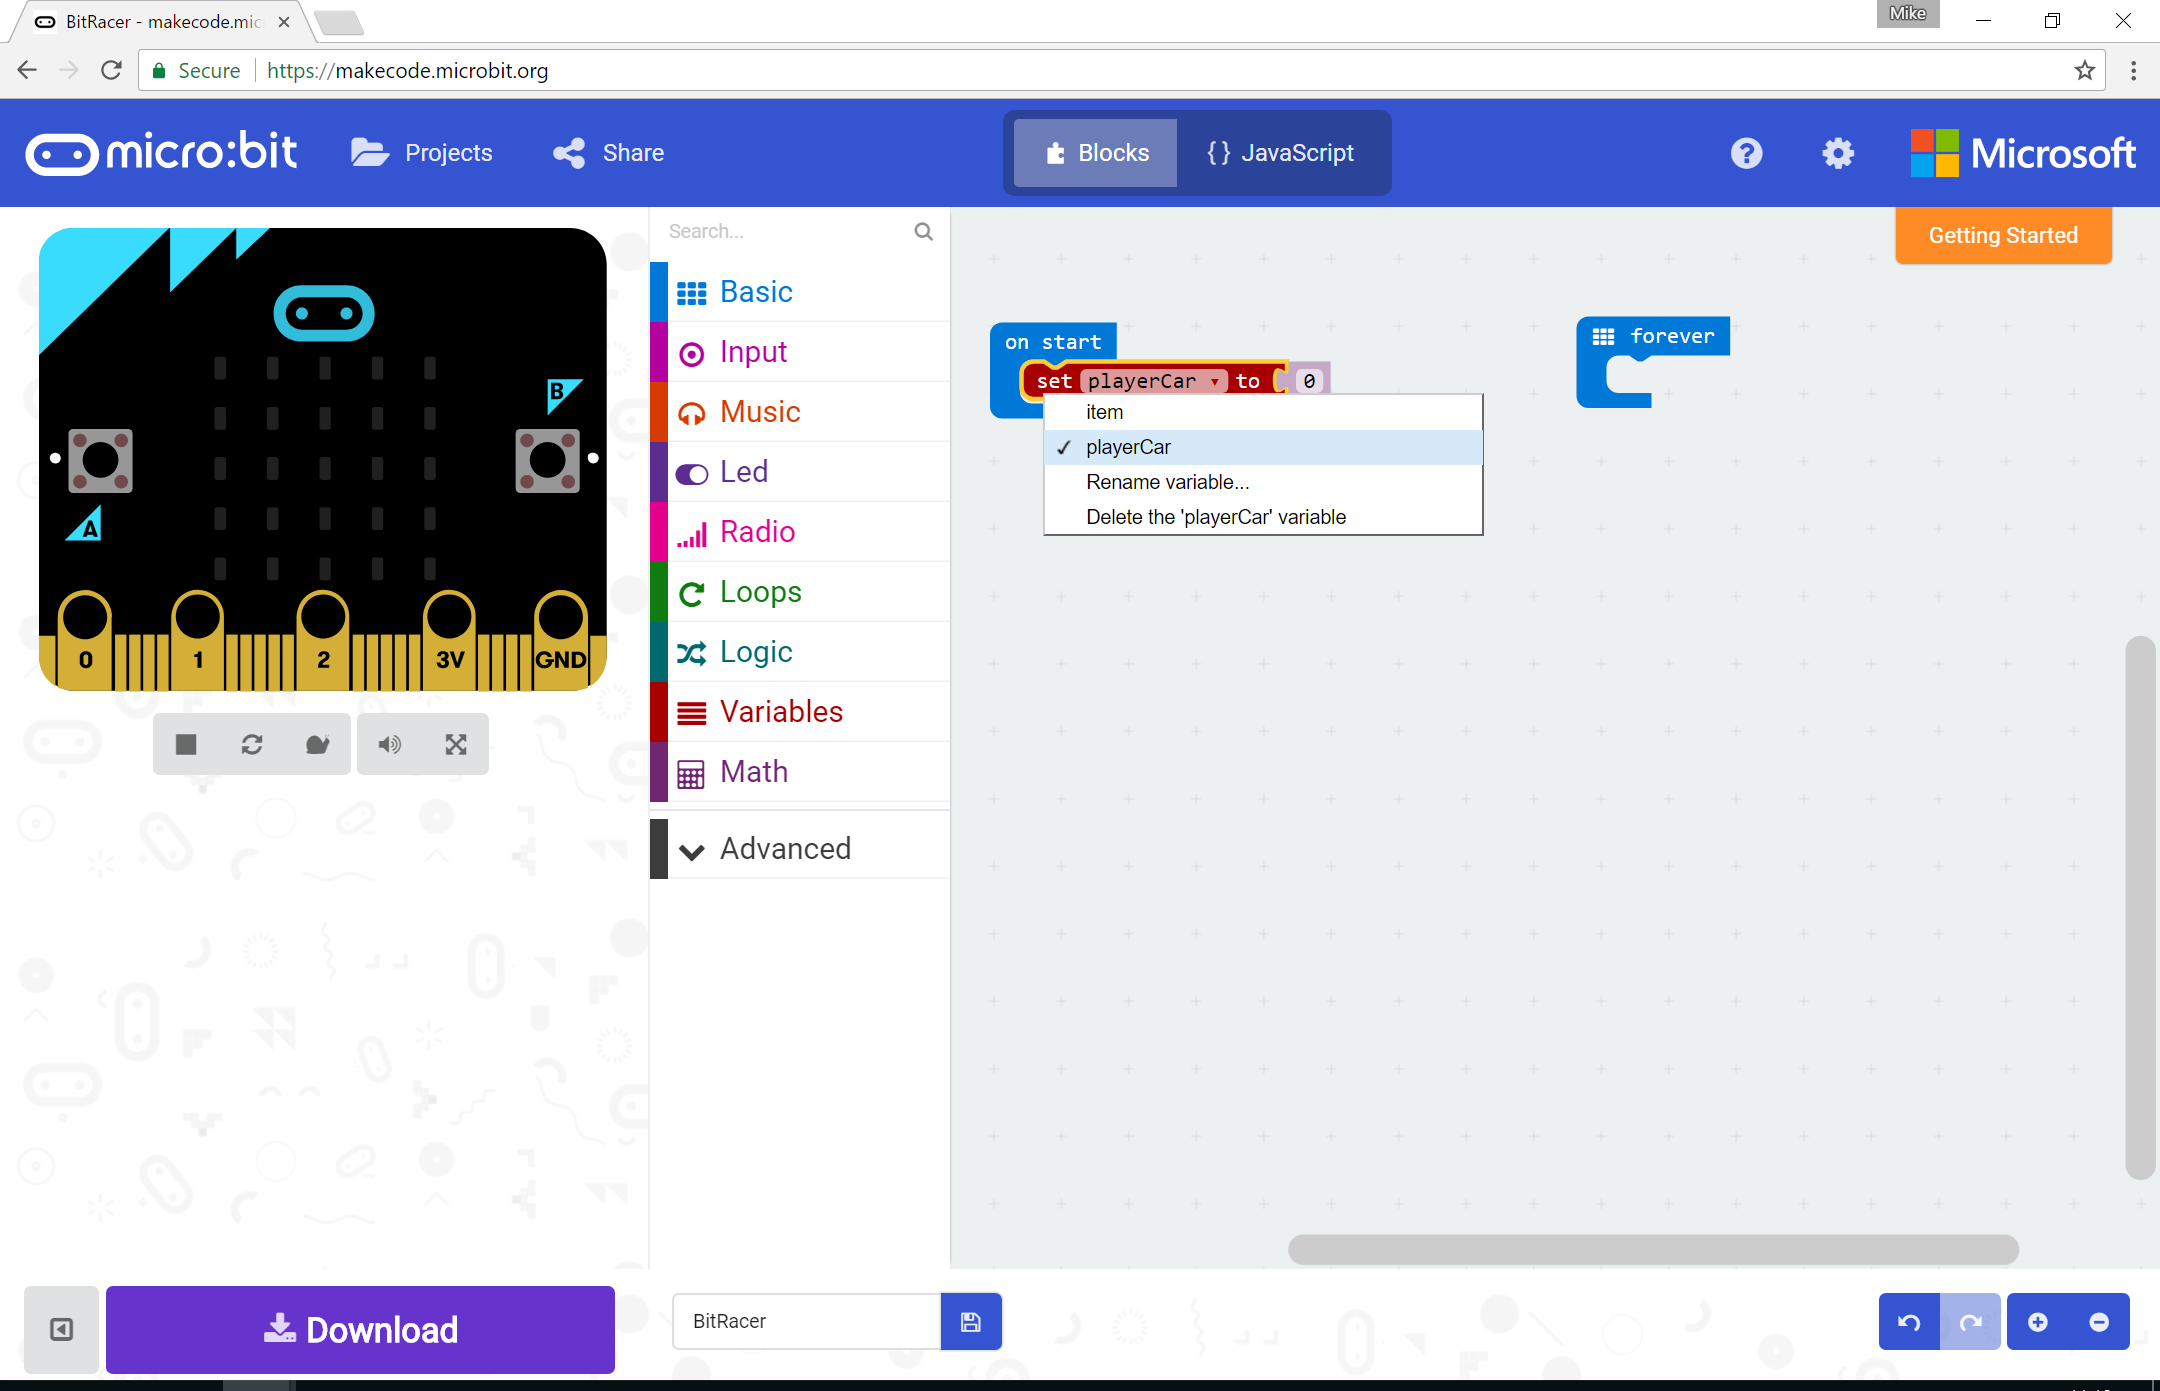
next drag in the Set item to block
and drag it into the on start block. Click on item and choose playerCar from the drop down.
Next click the Advanced menu and choose the create sprite at block from the Game menu
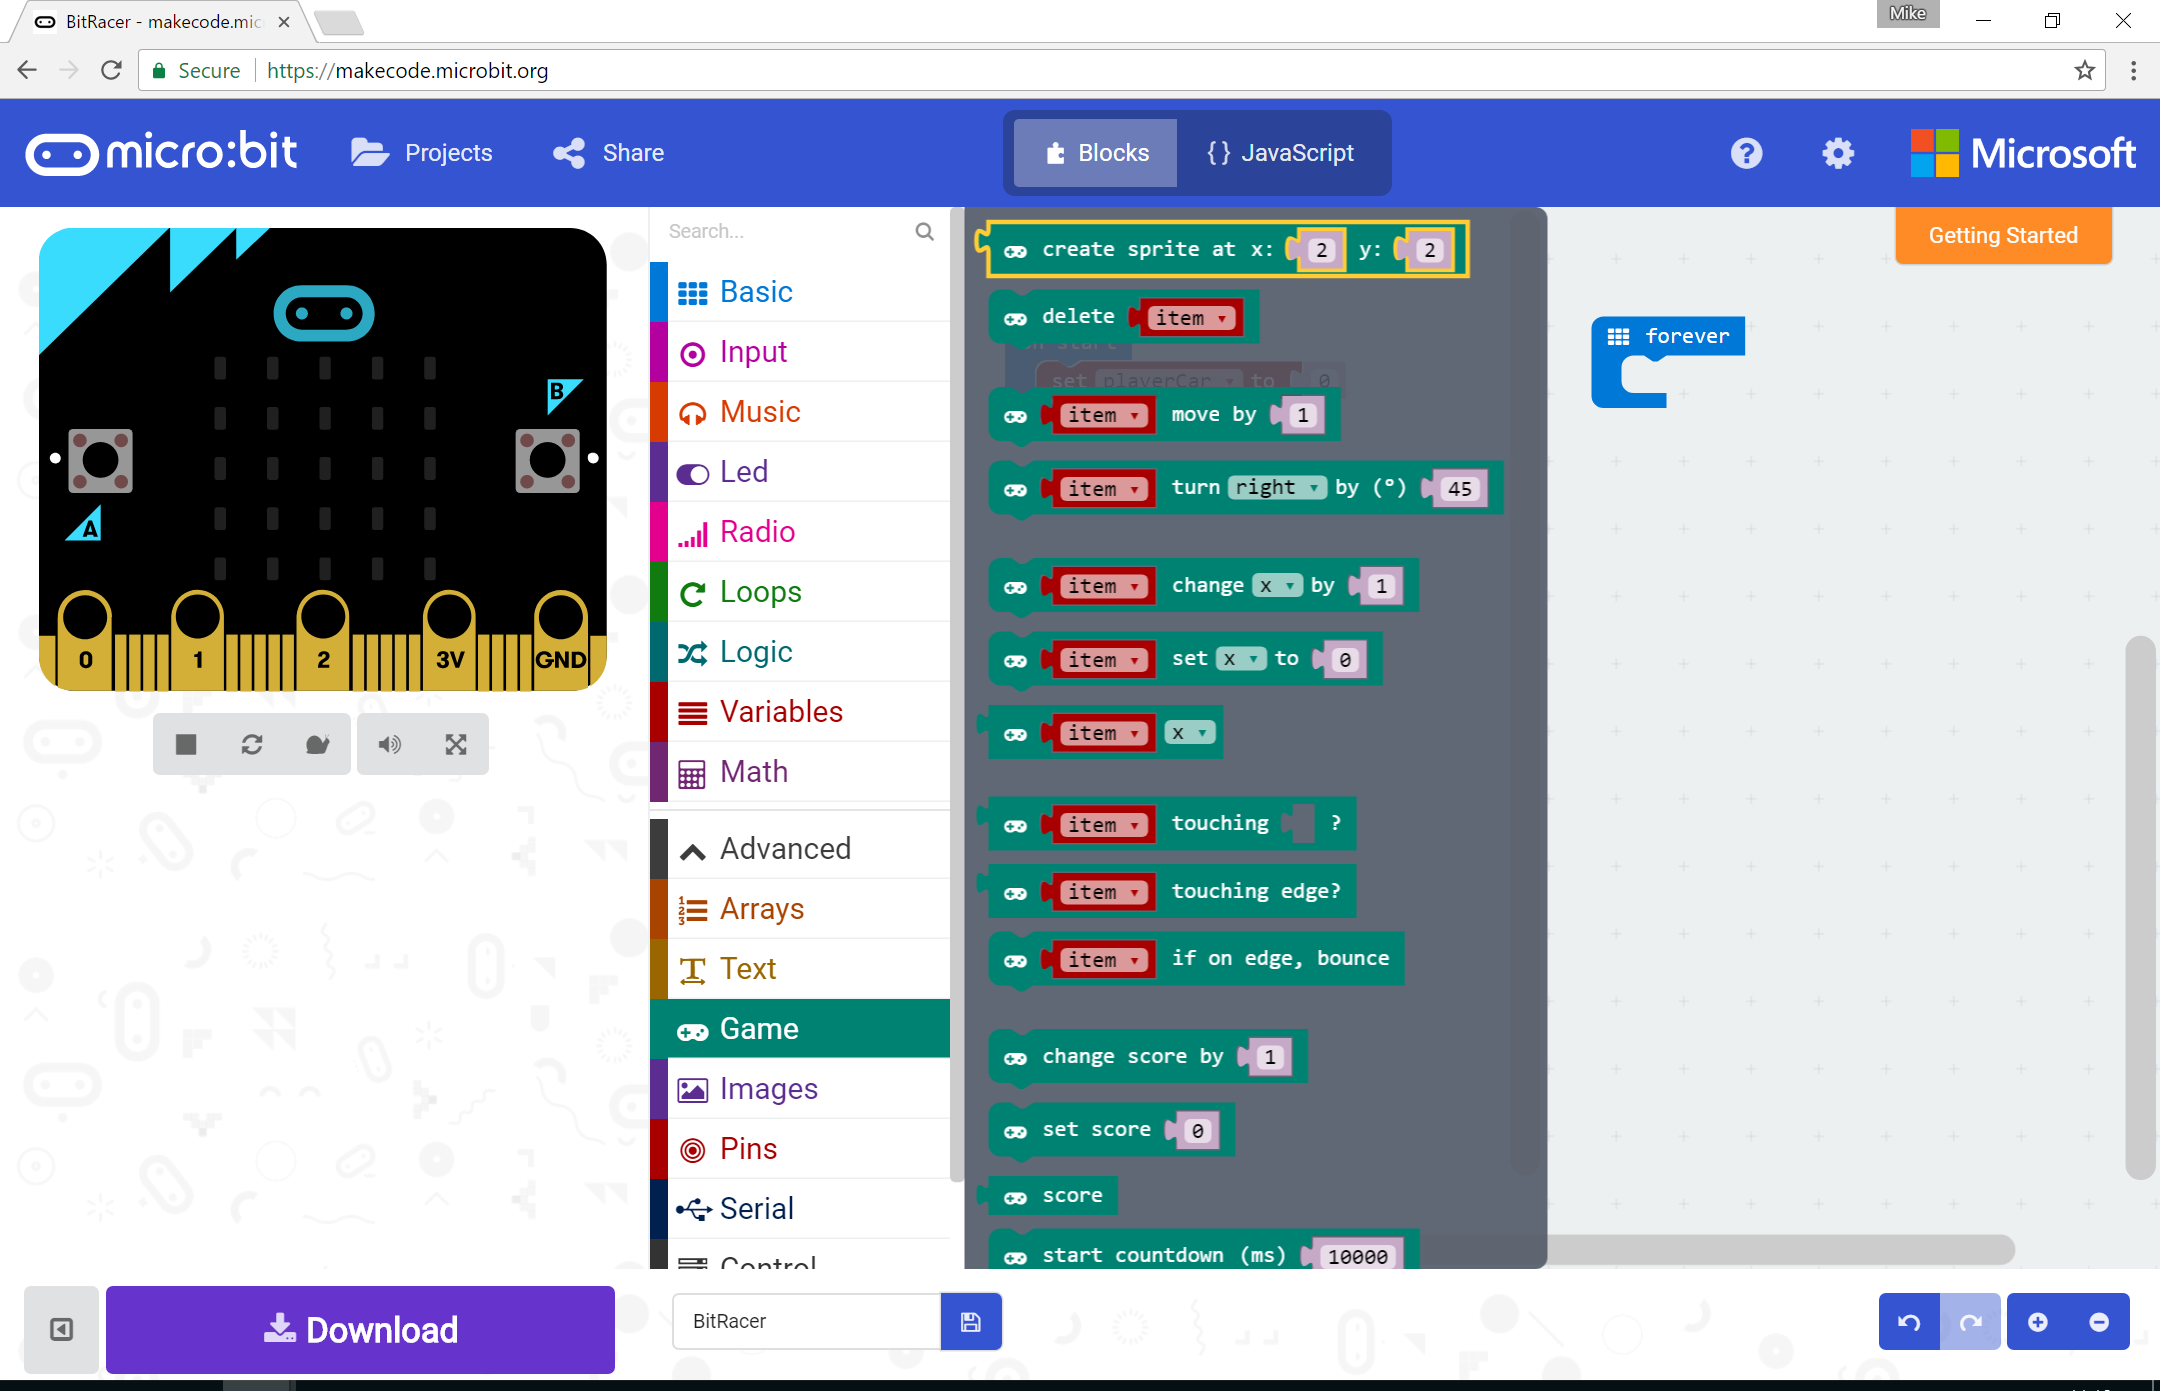
connect it to the set playerCar to block and enter the correct values for x and y
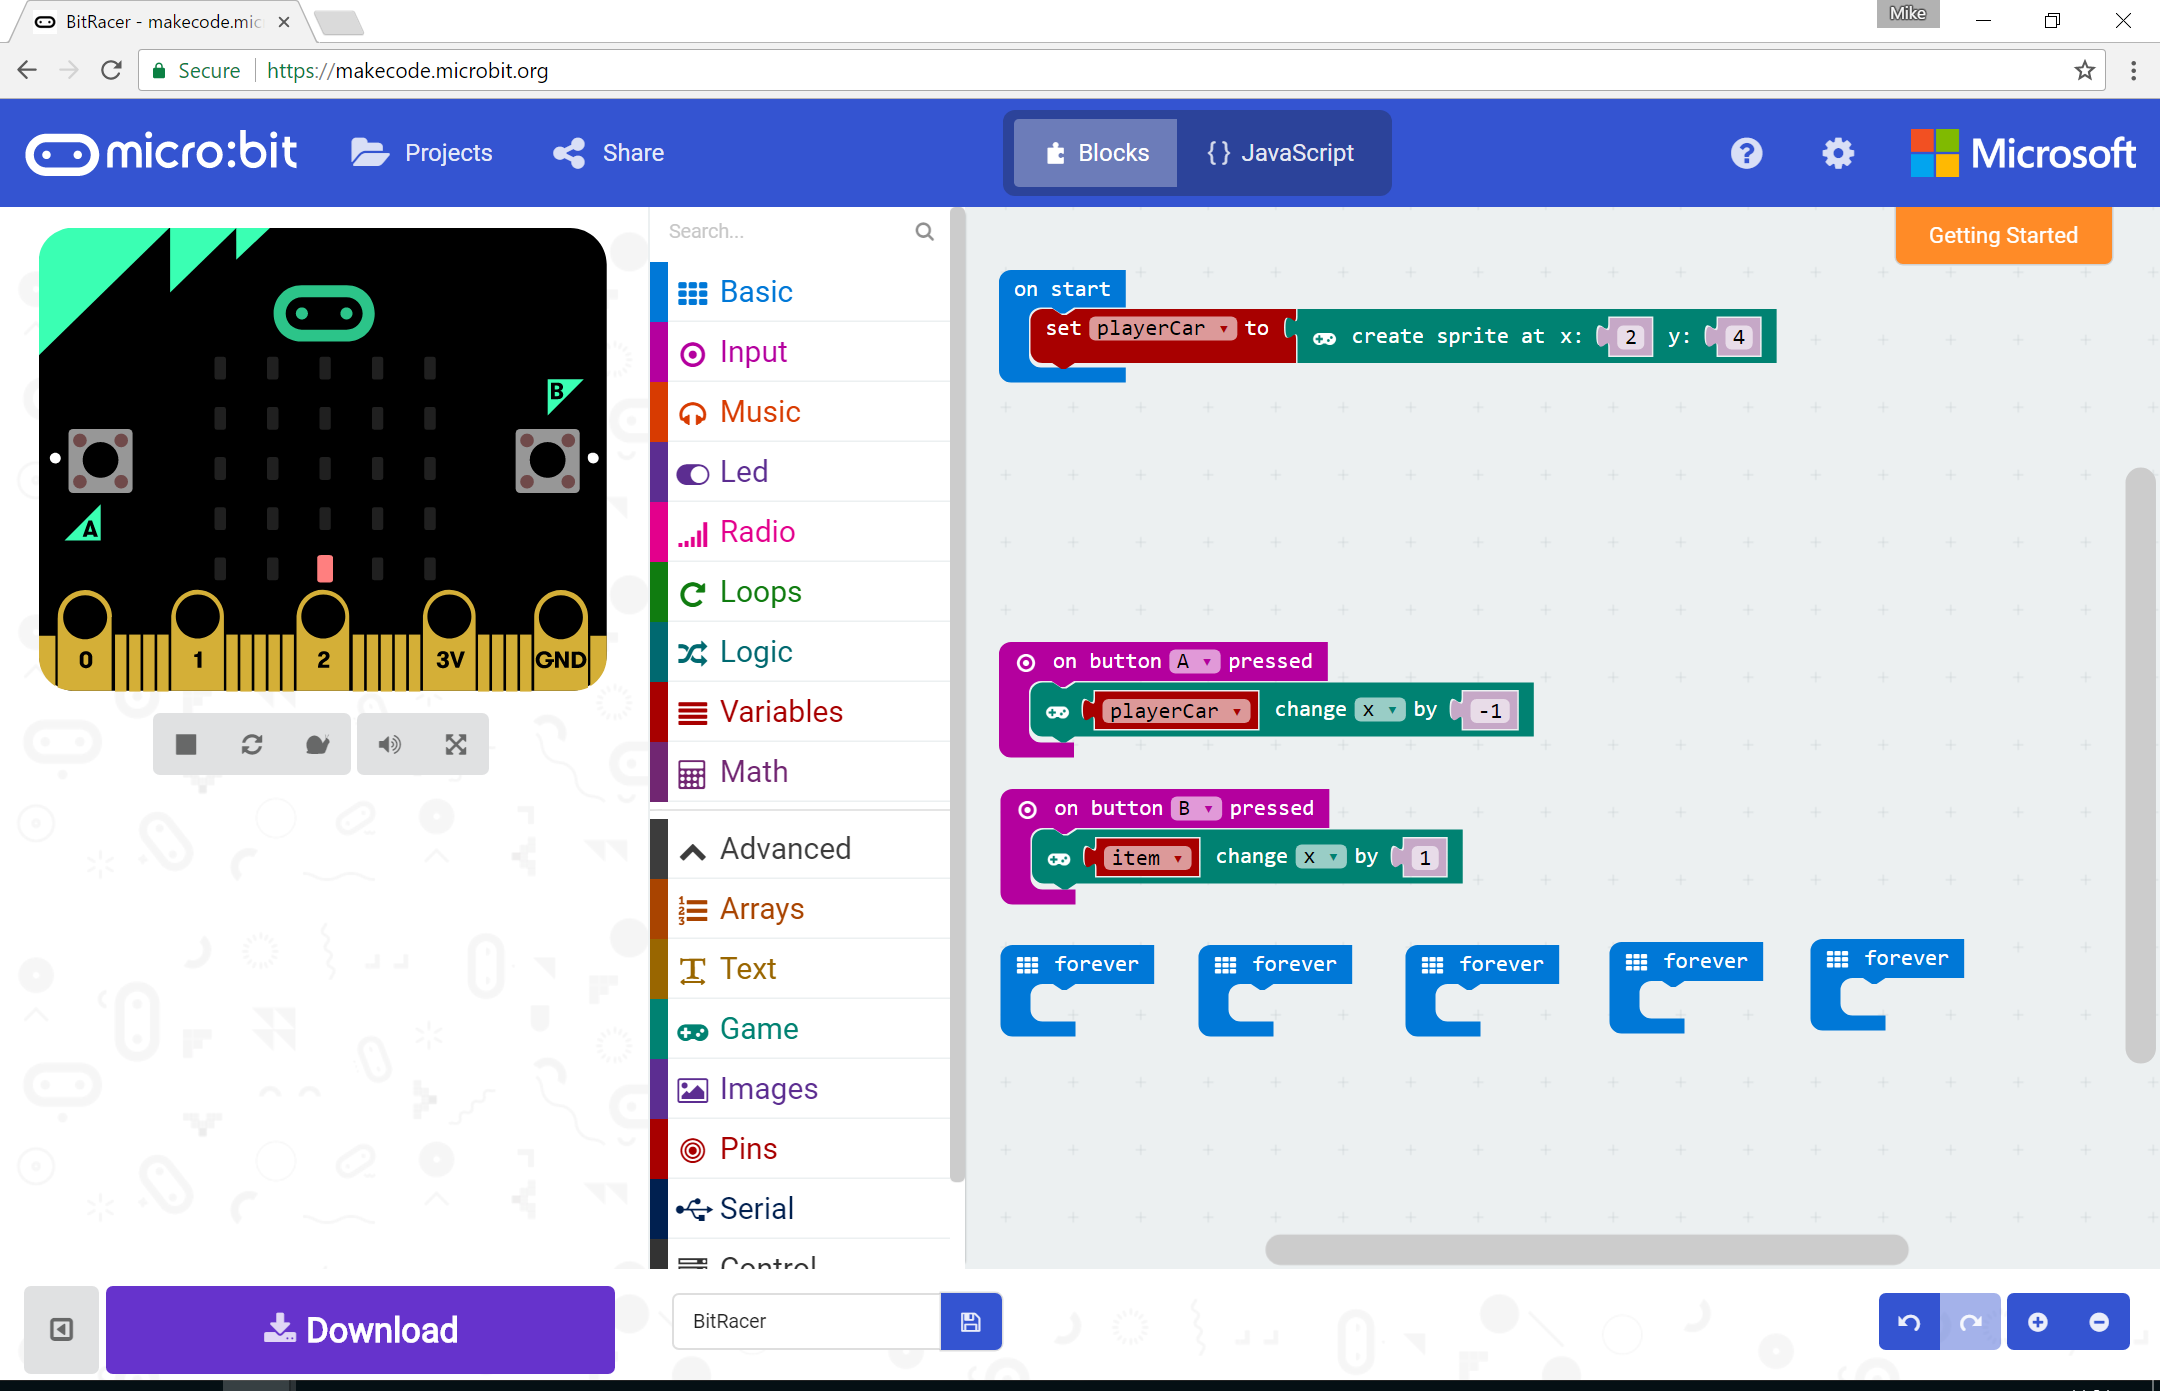
Notice at this point that there is now an LED switched on in the simulator microbit! This is the car that we will be controlling in our game.
Listening for Events
We want to be able to steer our car left and right using the A and B buttons. Let’s add the code for that next.
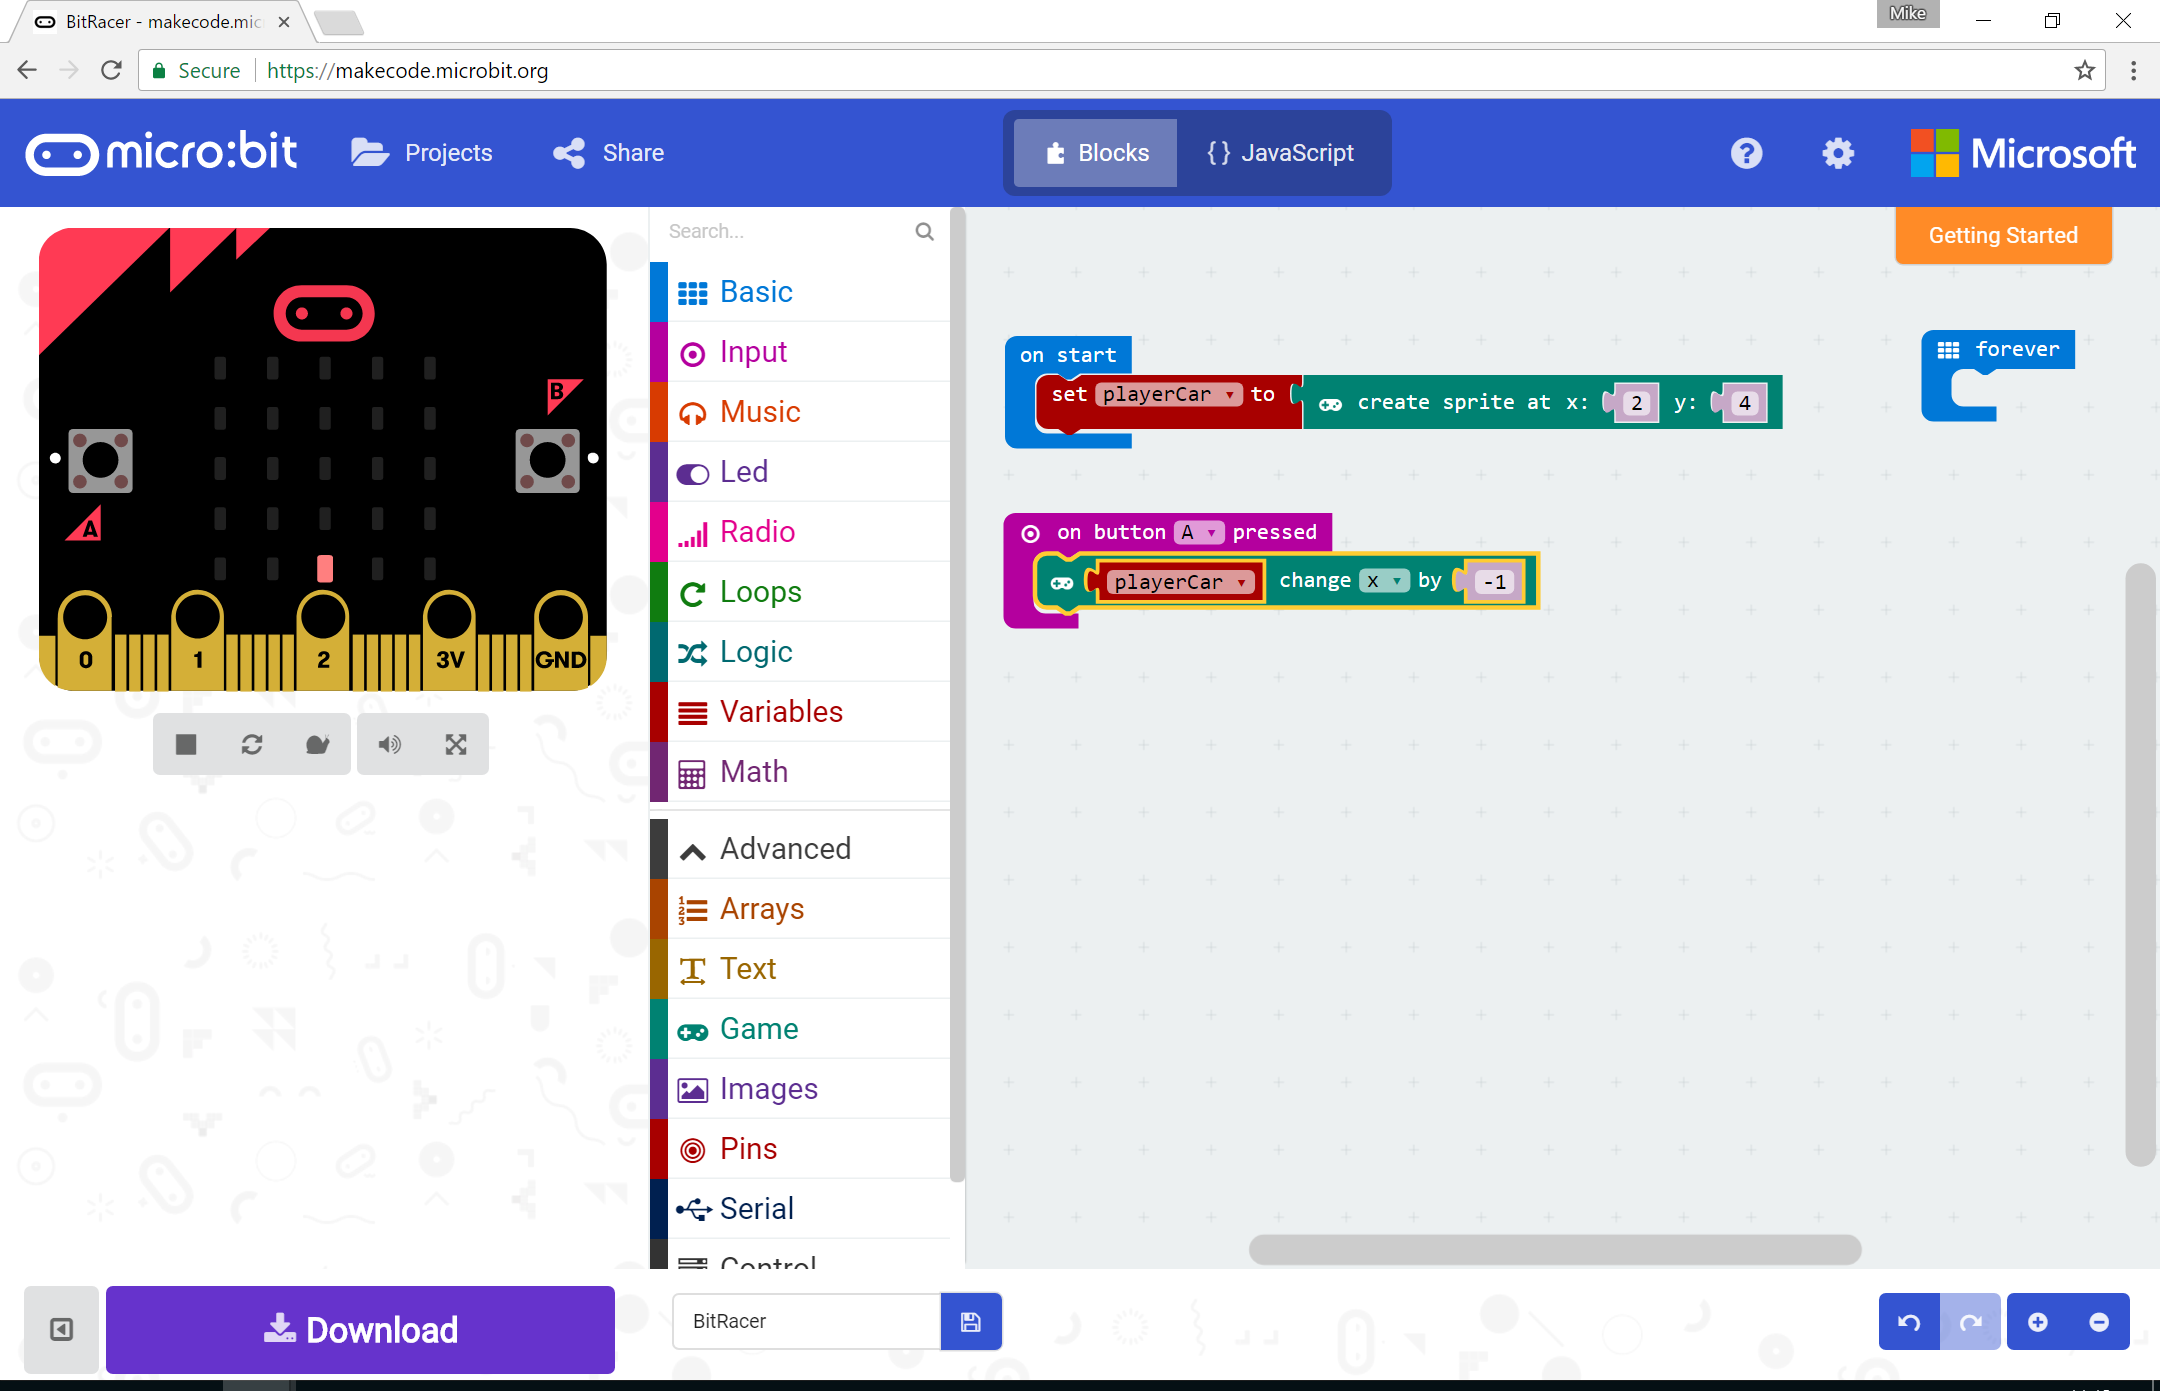
Start by dragging an on button A pressed block from the Input menu.
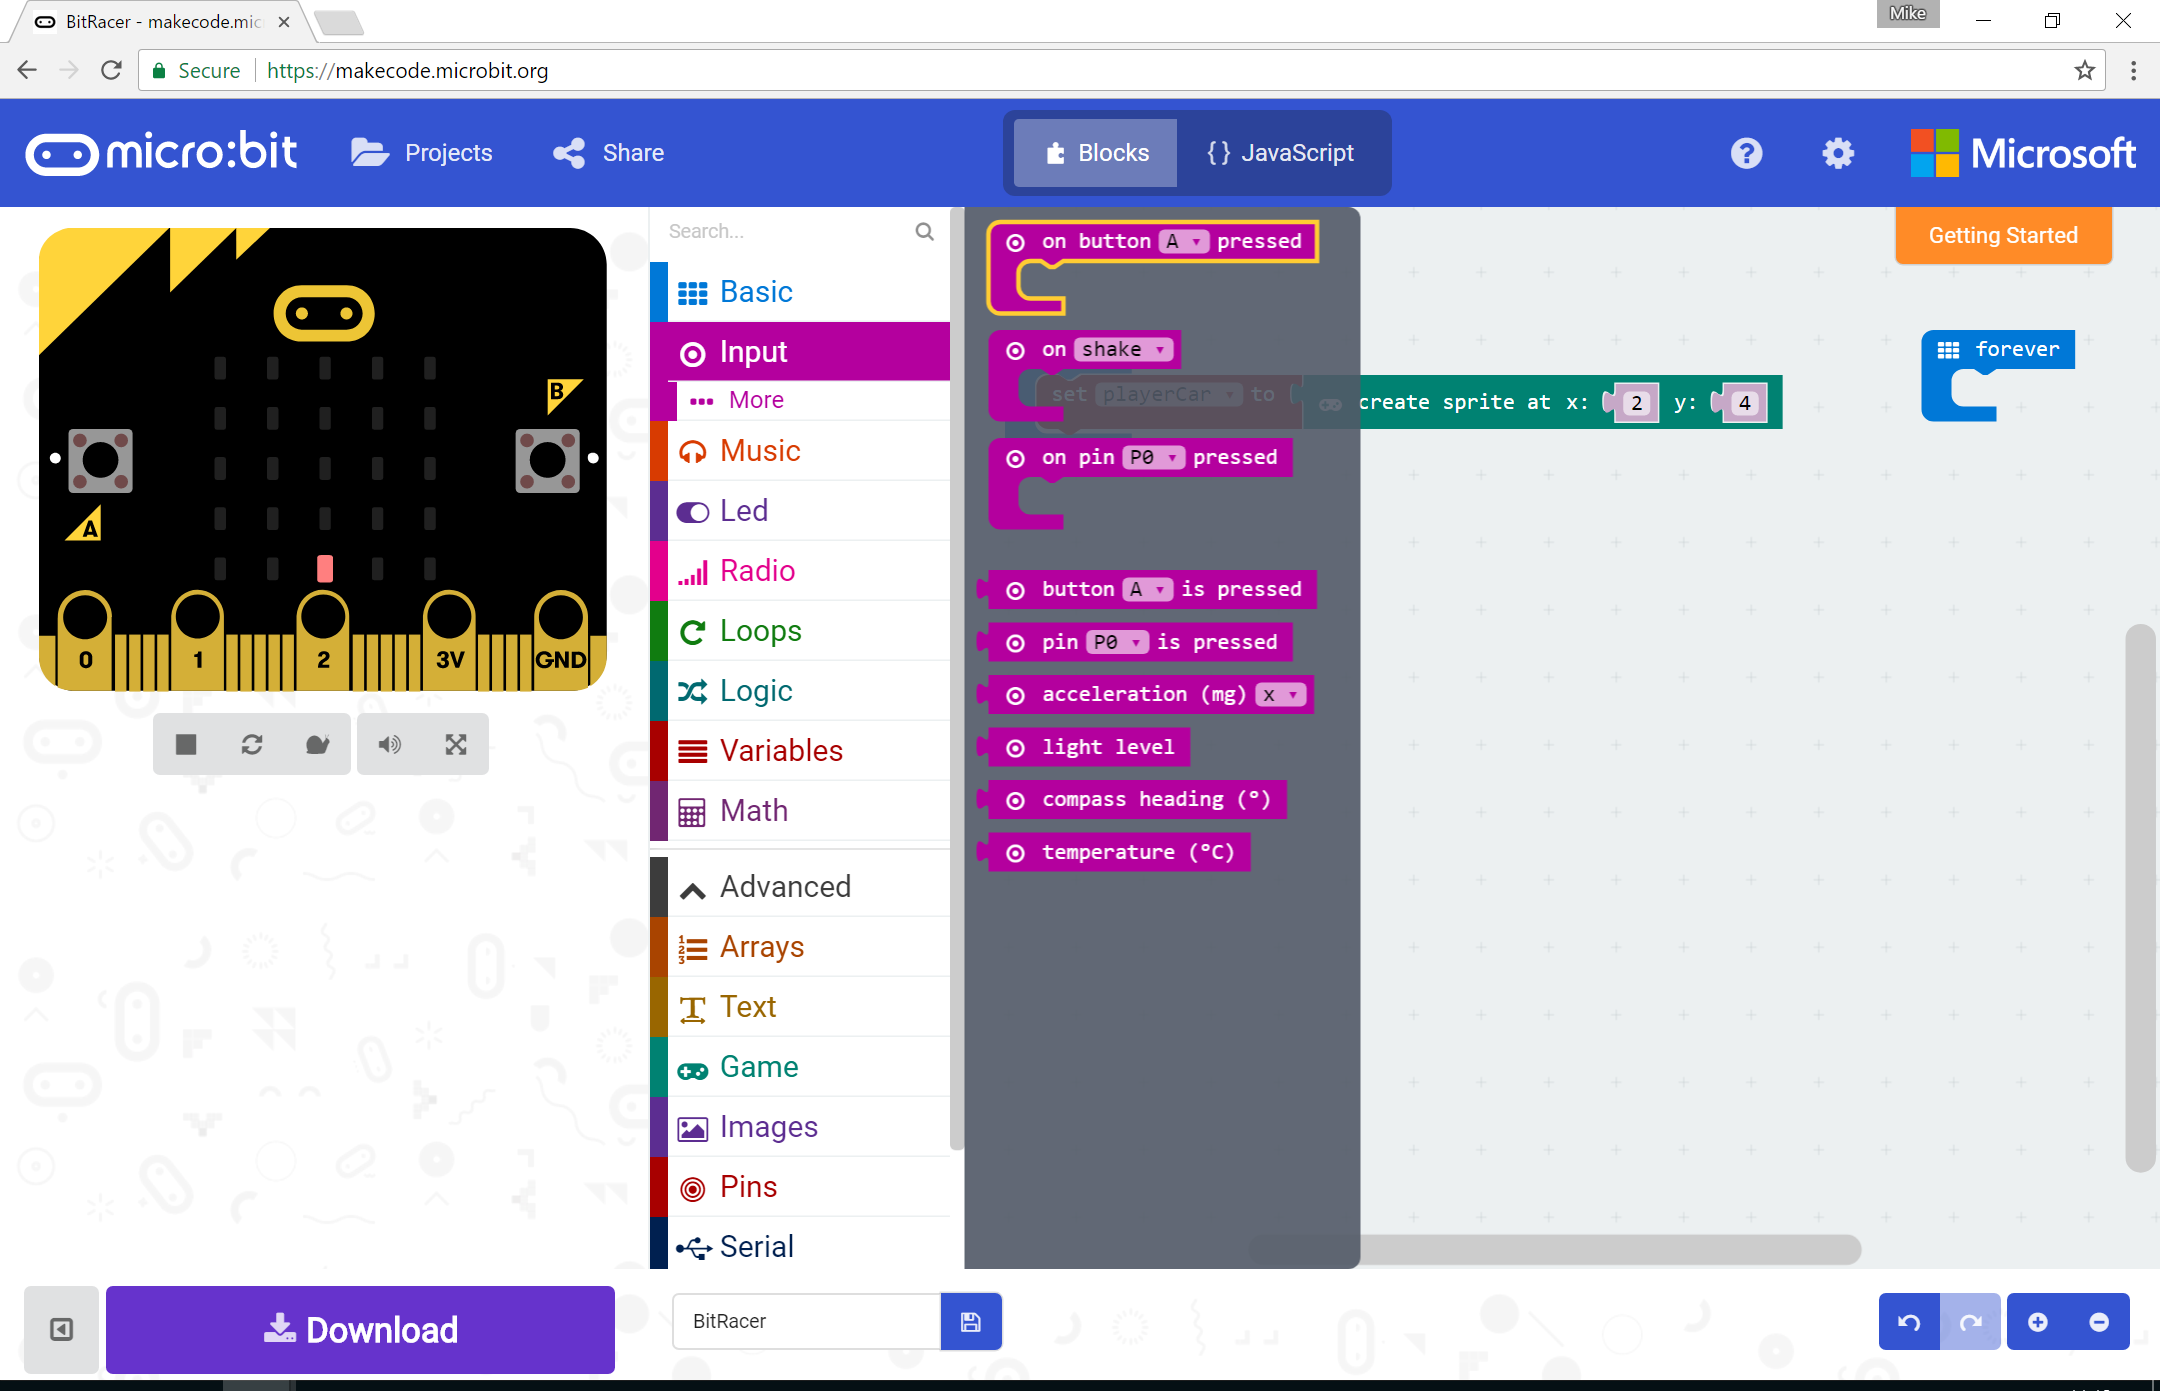
These blocks sit separately to the on start and forever blocks and set up what are called event listeners. Code inside these blocks only runs when a matching event occurs.
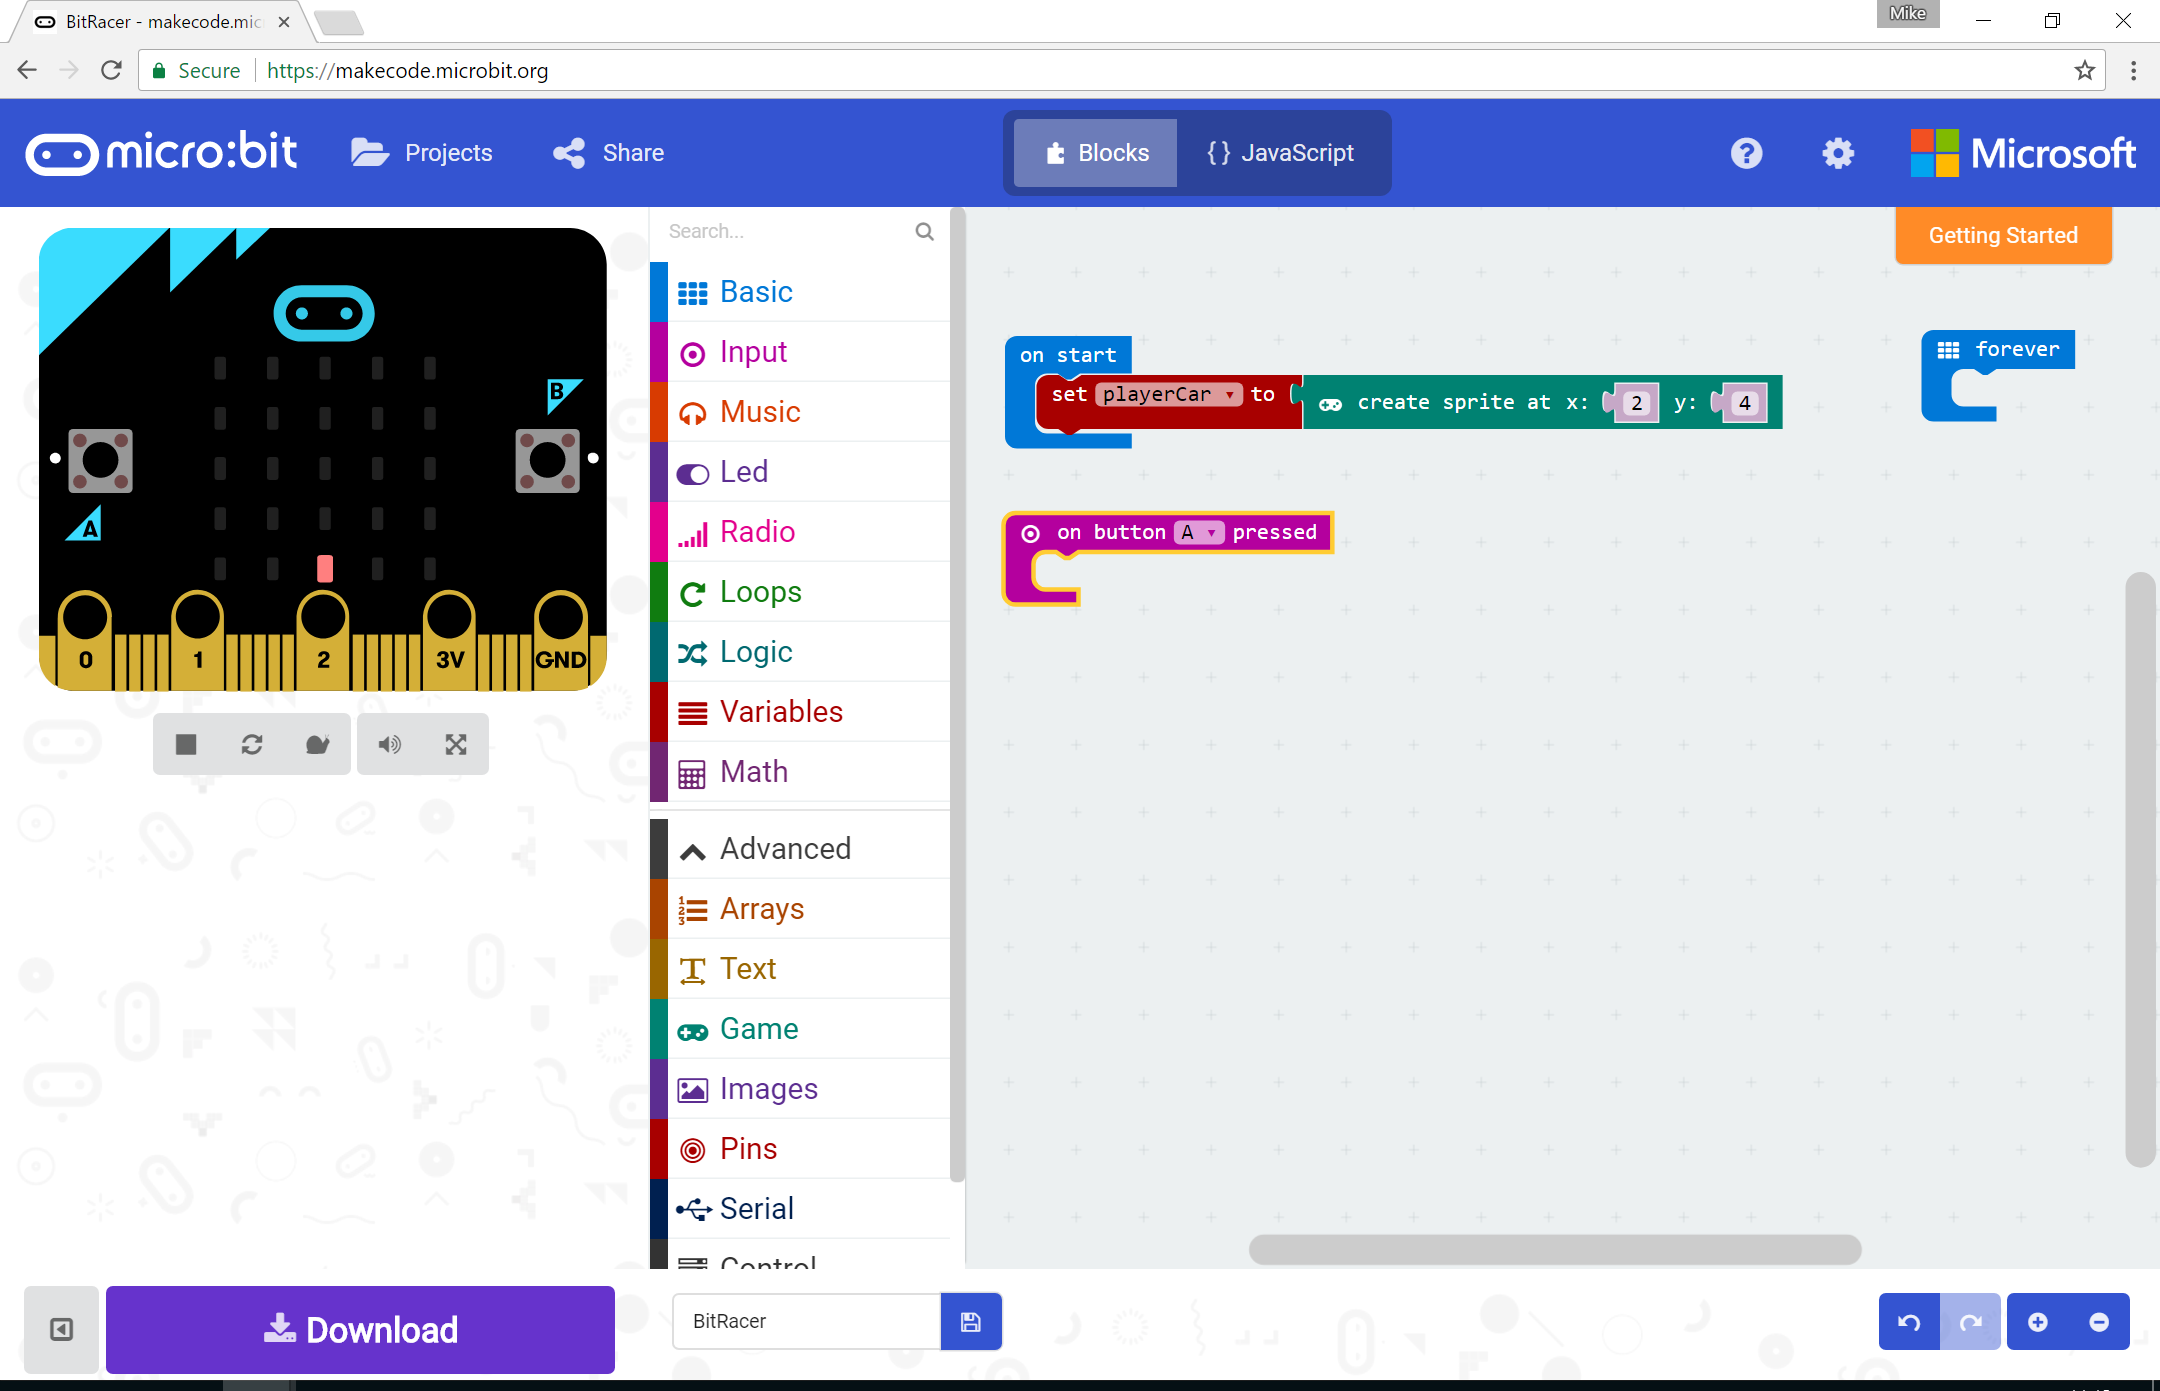
When button A is pressed, we want our car to move left. We do this by changing the x value of our car sprite.
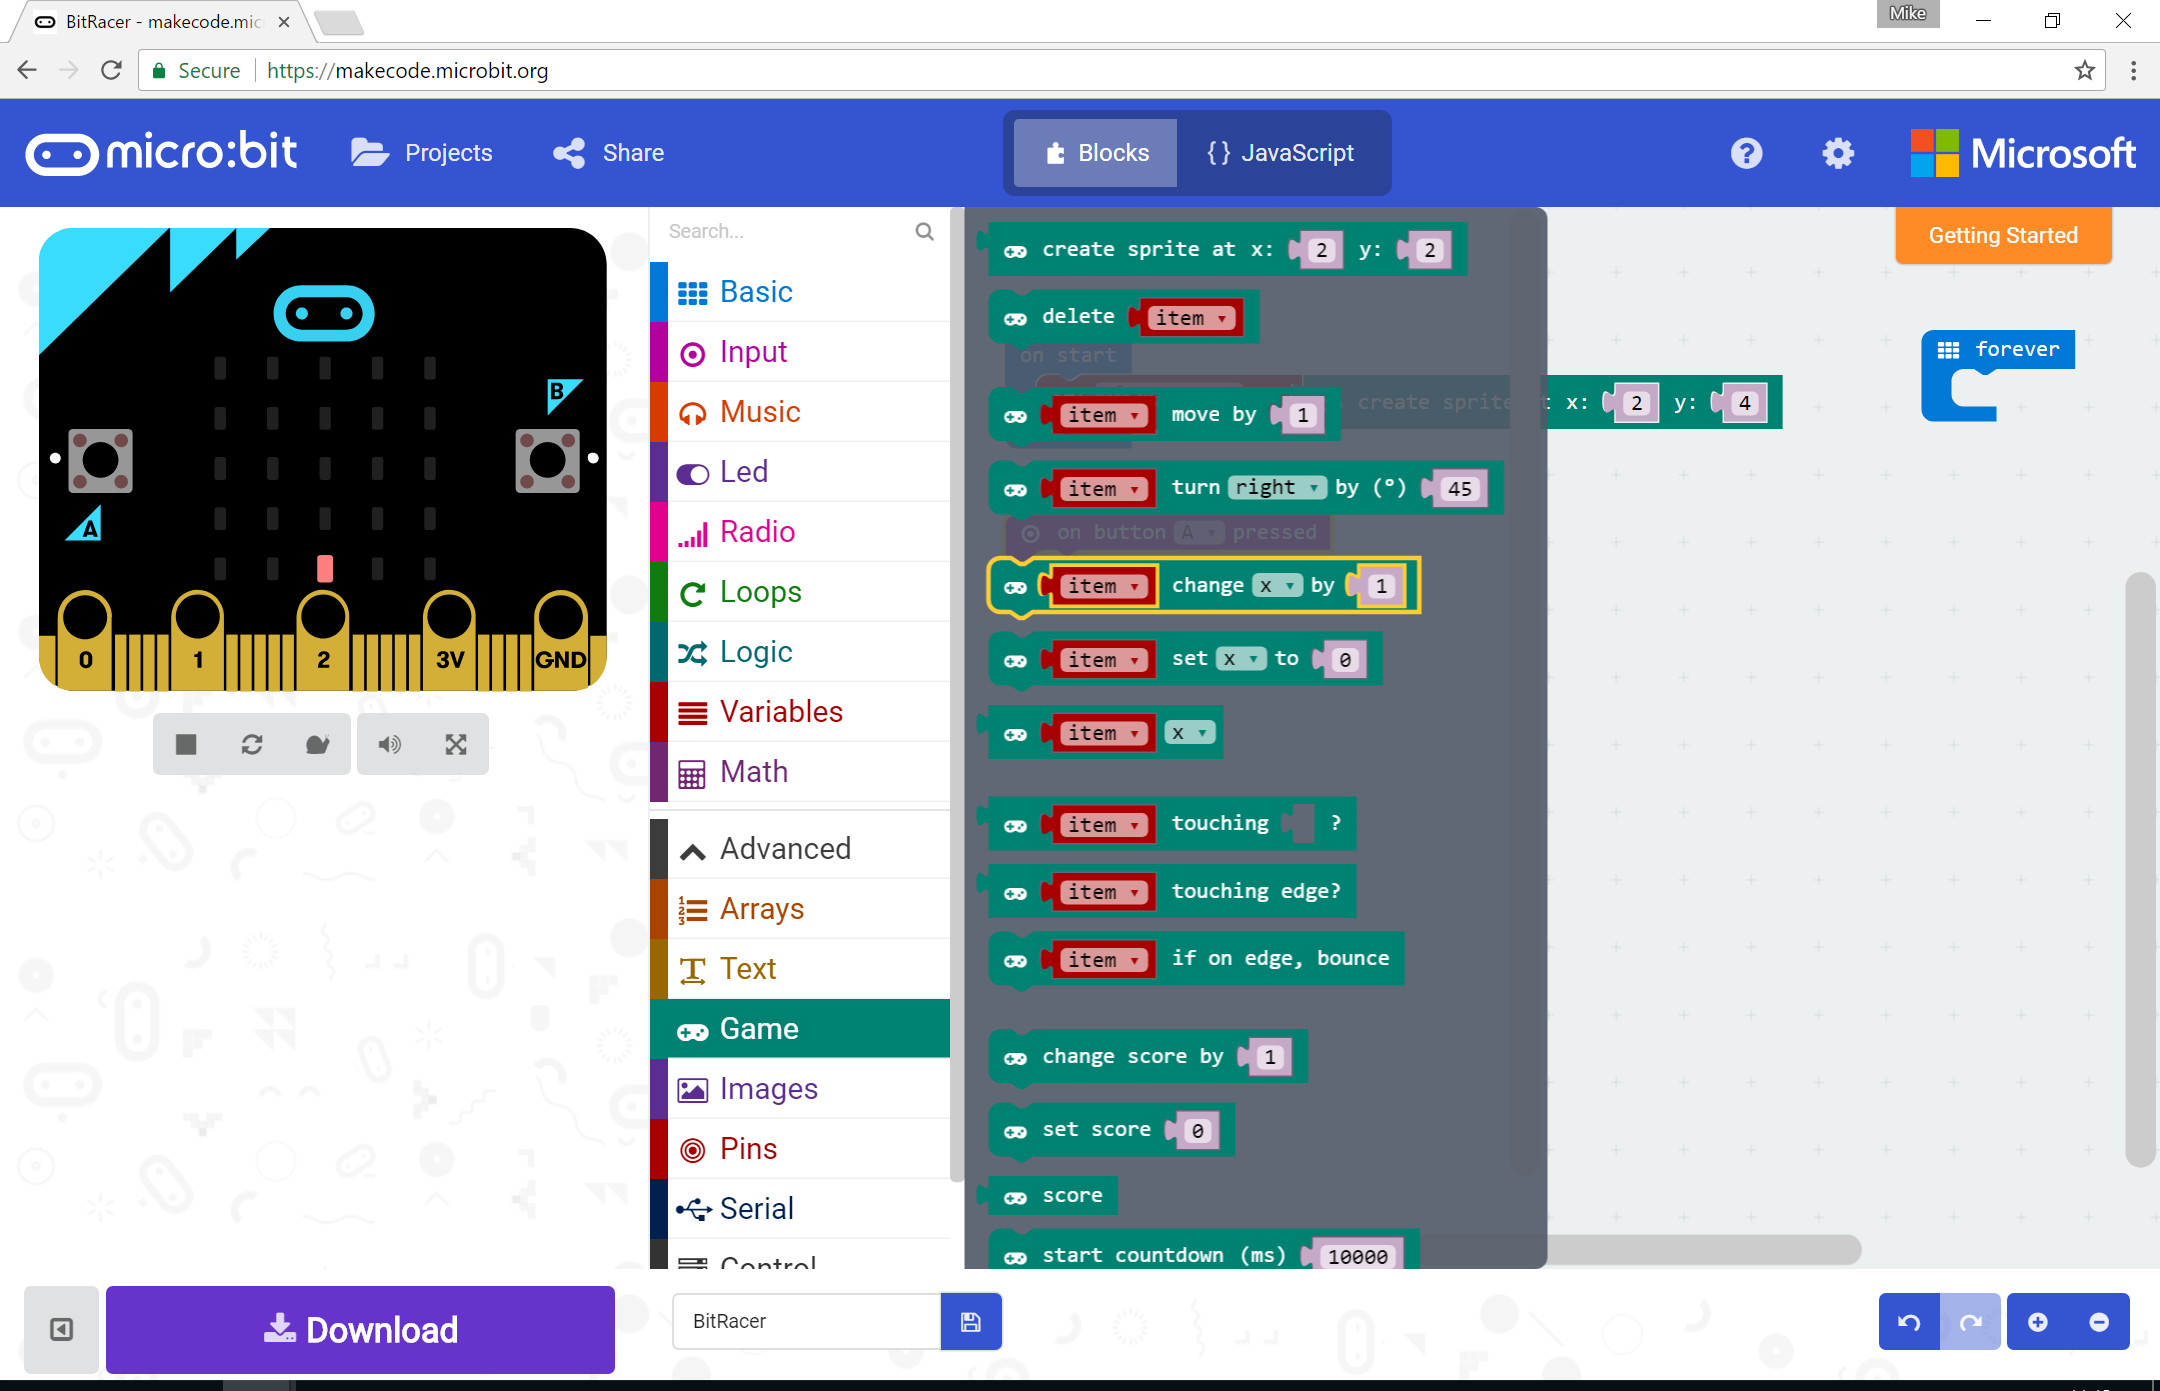
You can think of the grid of LEDs a bit like a graph - the x axis runs across the microbit left-to-right and the y axis runs top-to-bottom. Since our car starts in the middle, and we want to move to the left, we need to decrease the car’s x value:
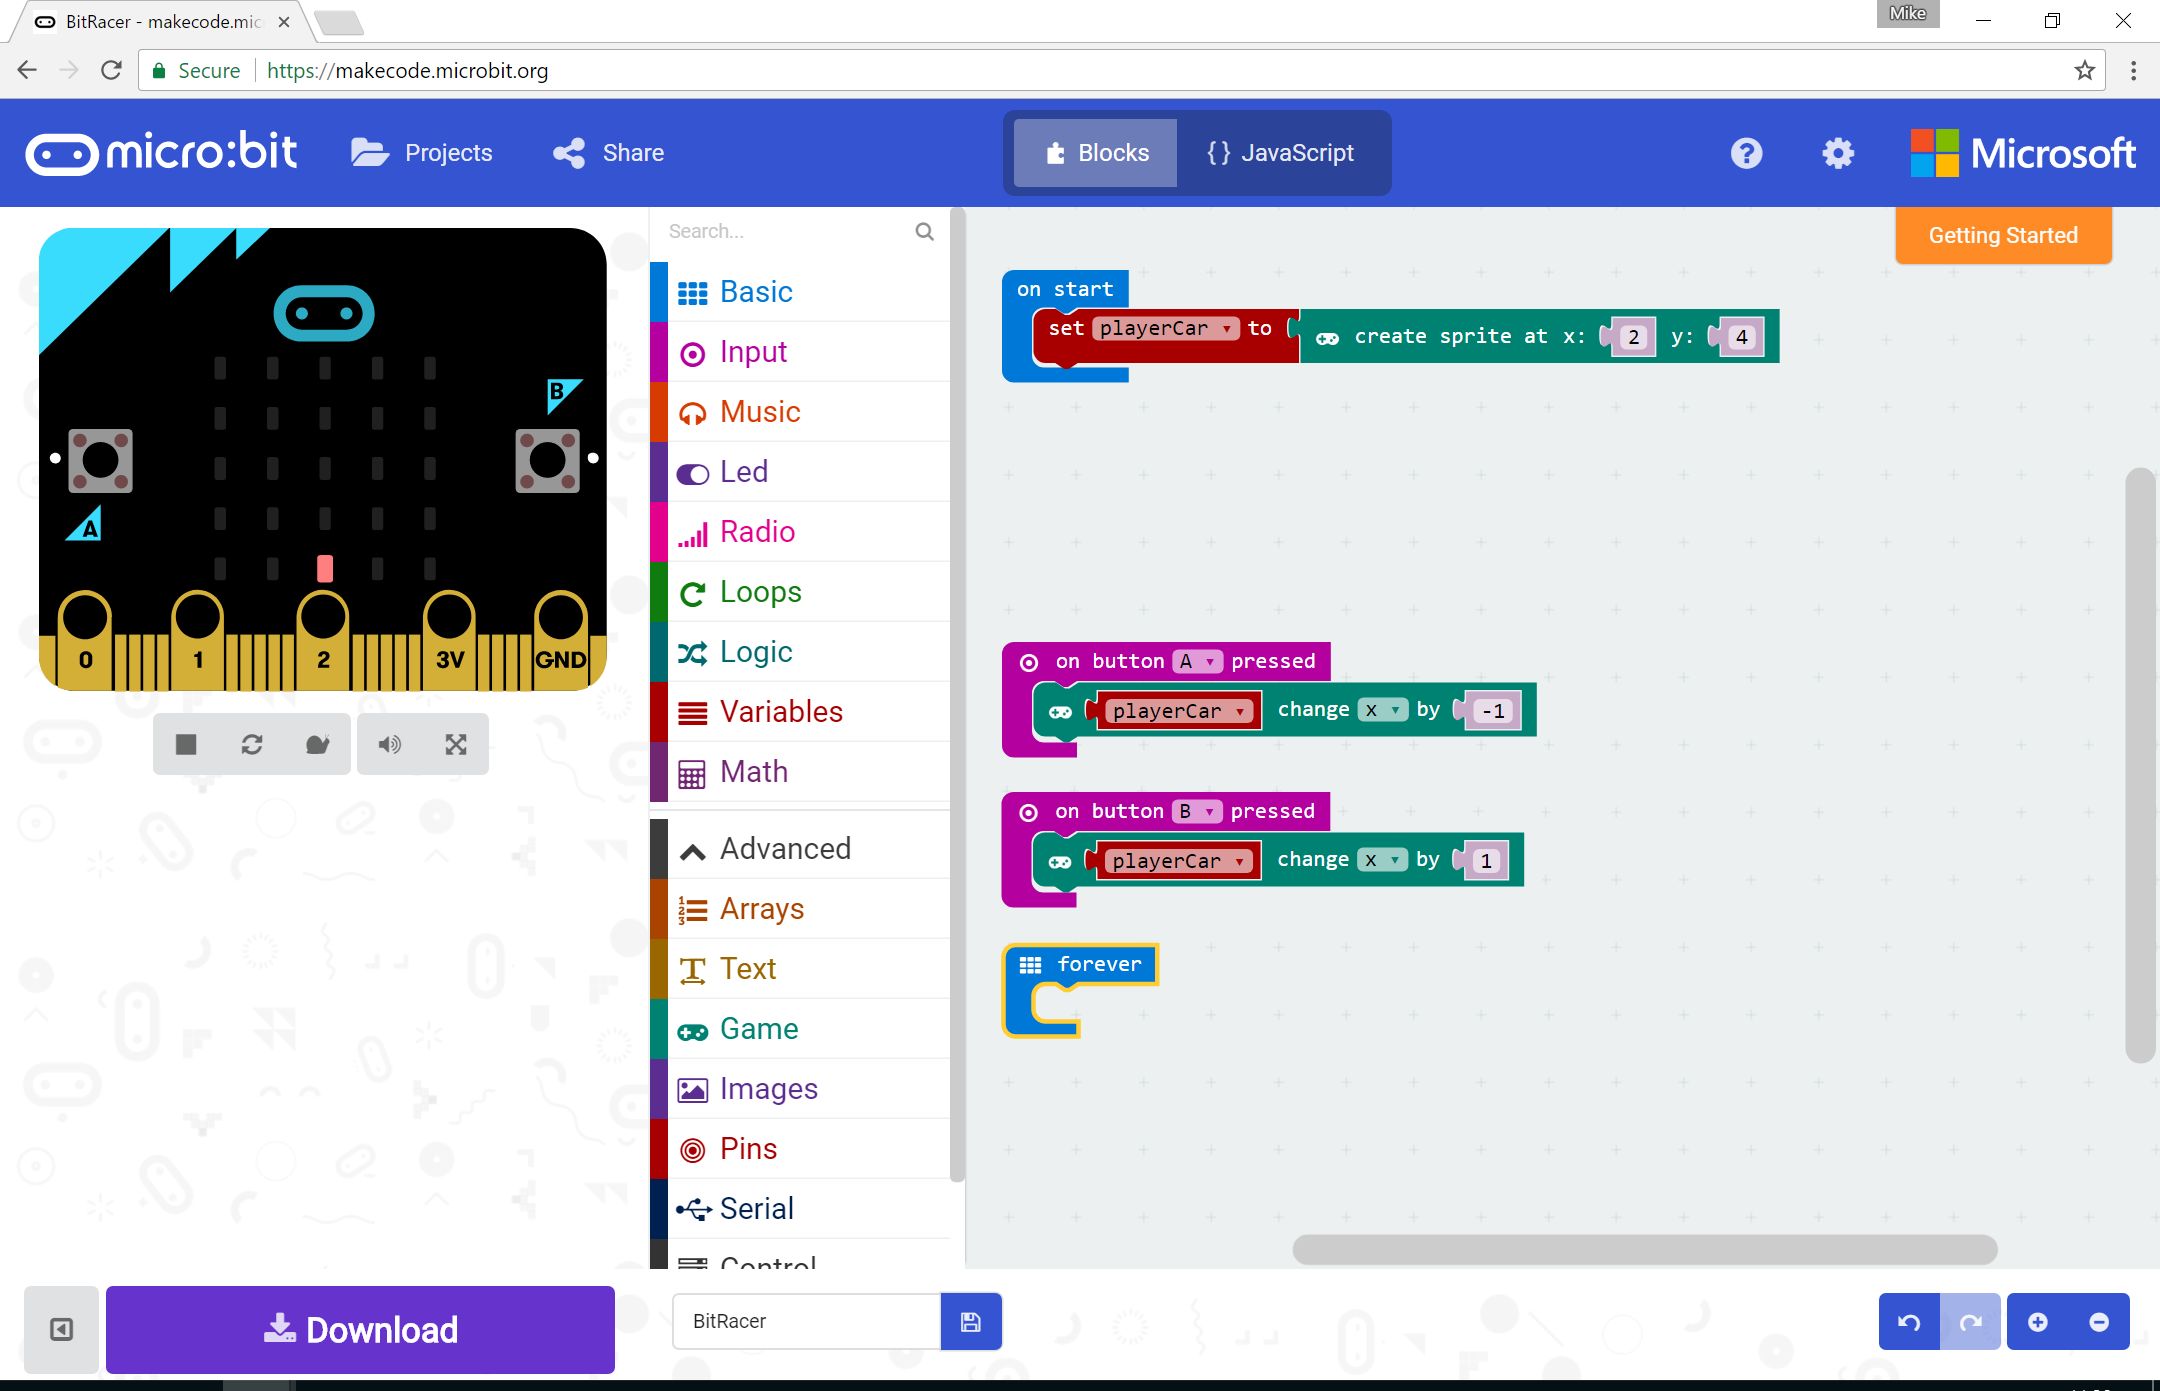
Do the same again, but change the on .. pressed button to listen for an event from the B button
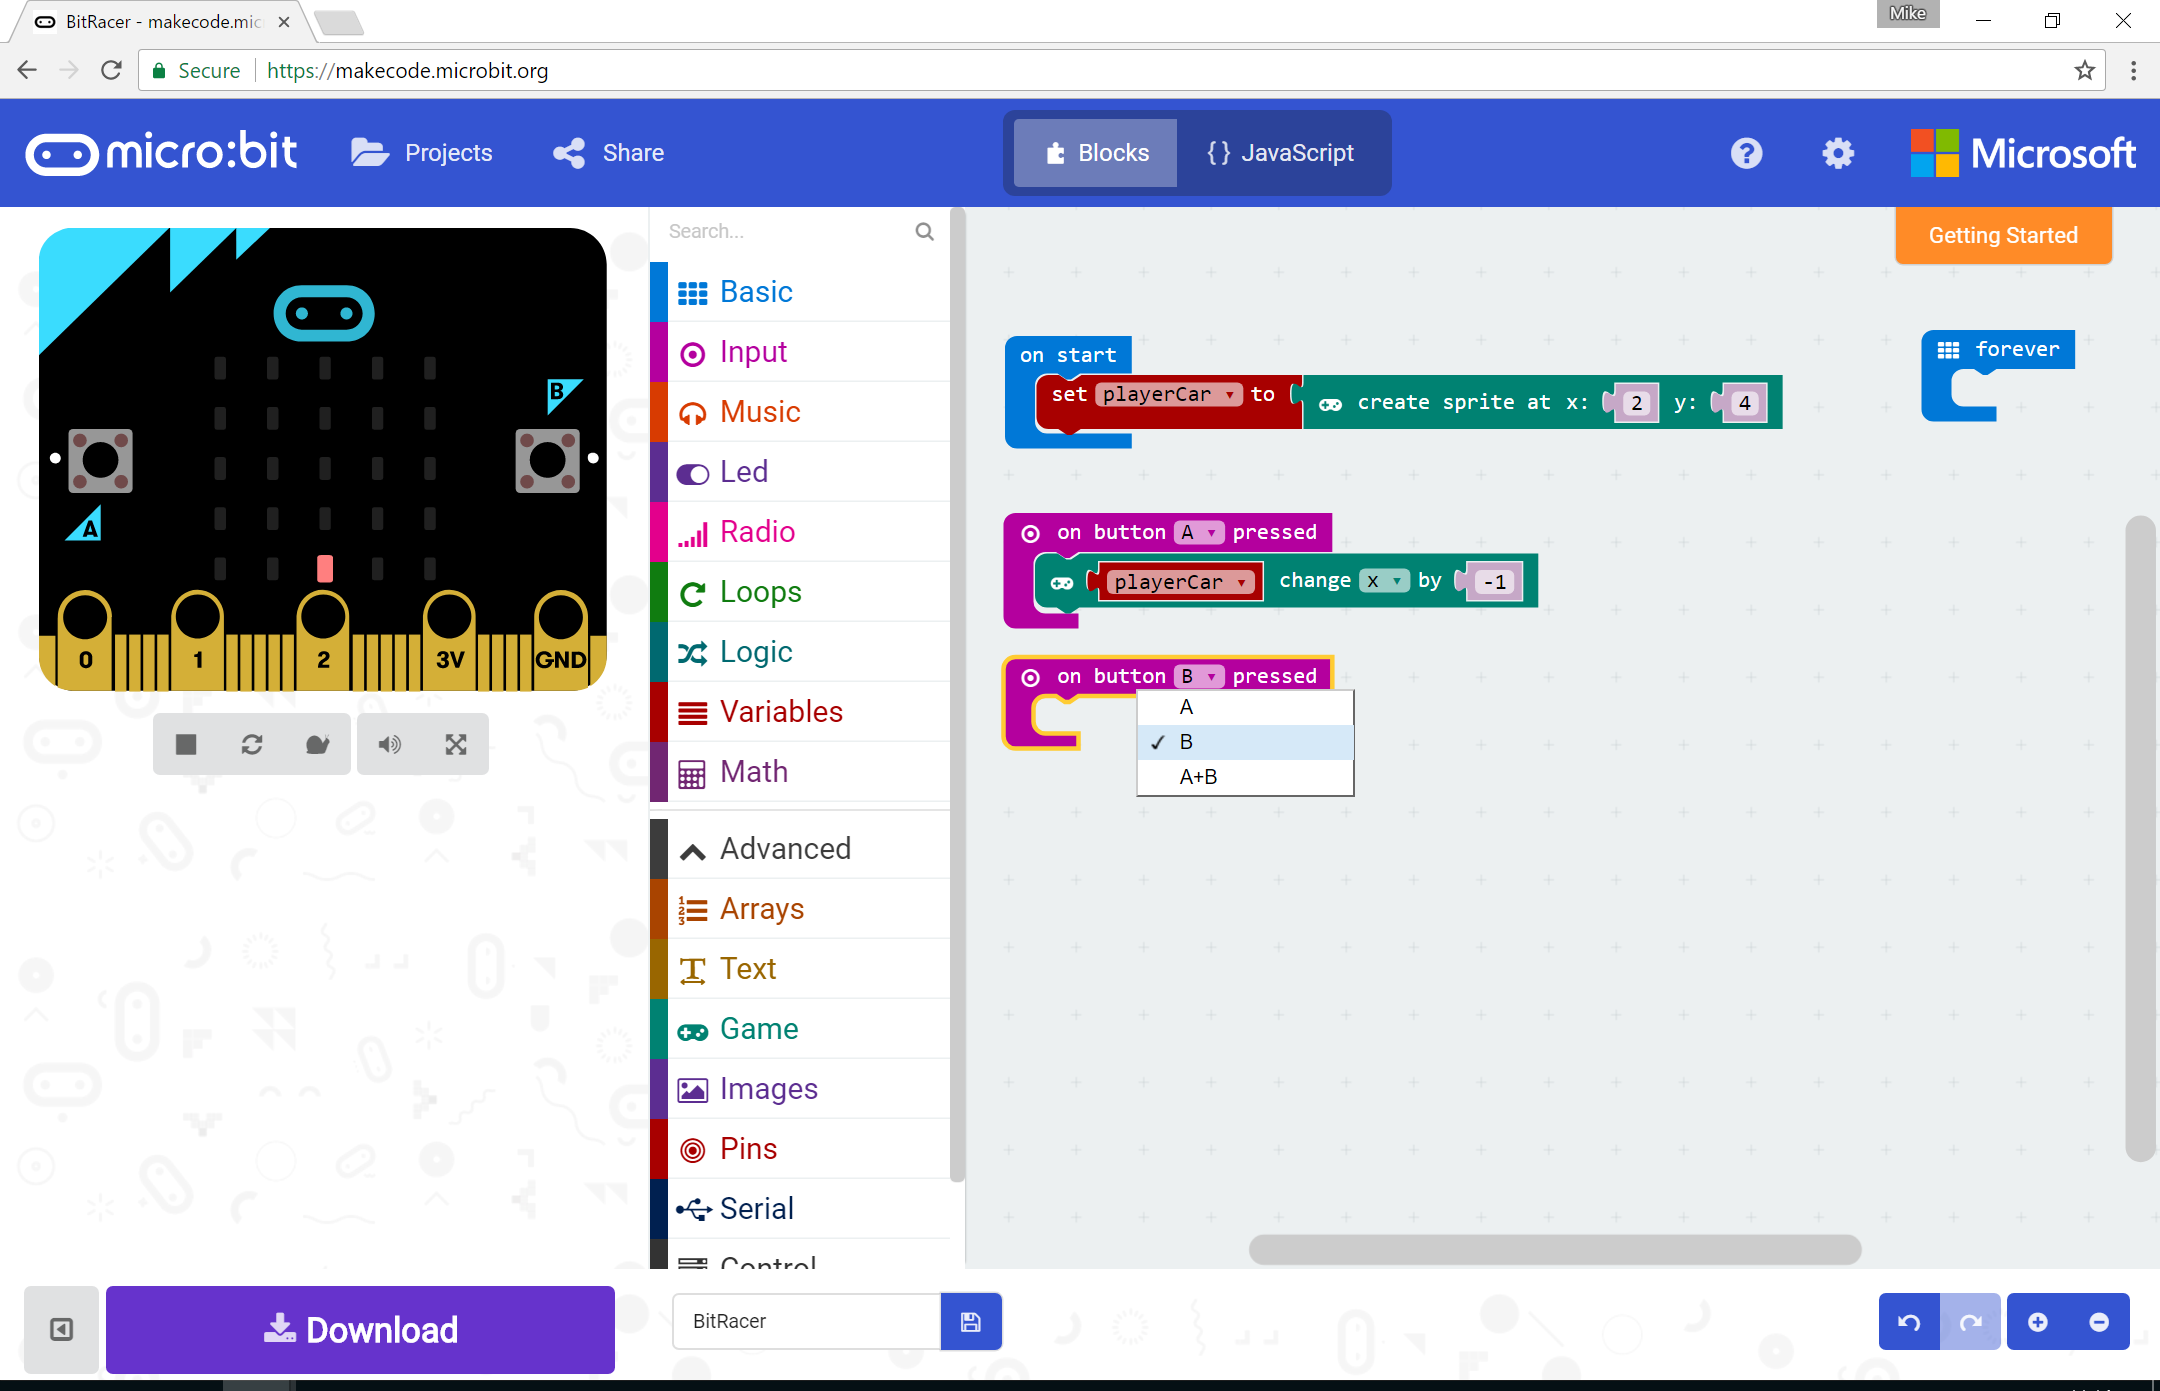
and instead of decreasing x we want to increase it
Creating the competition
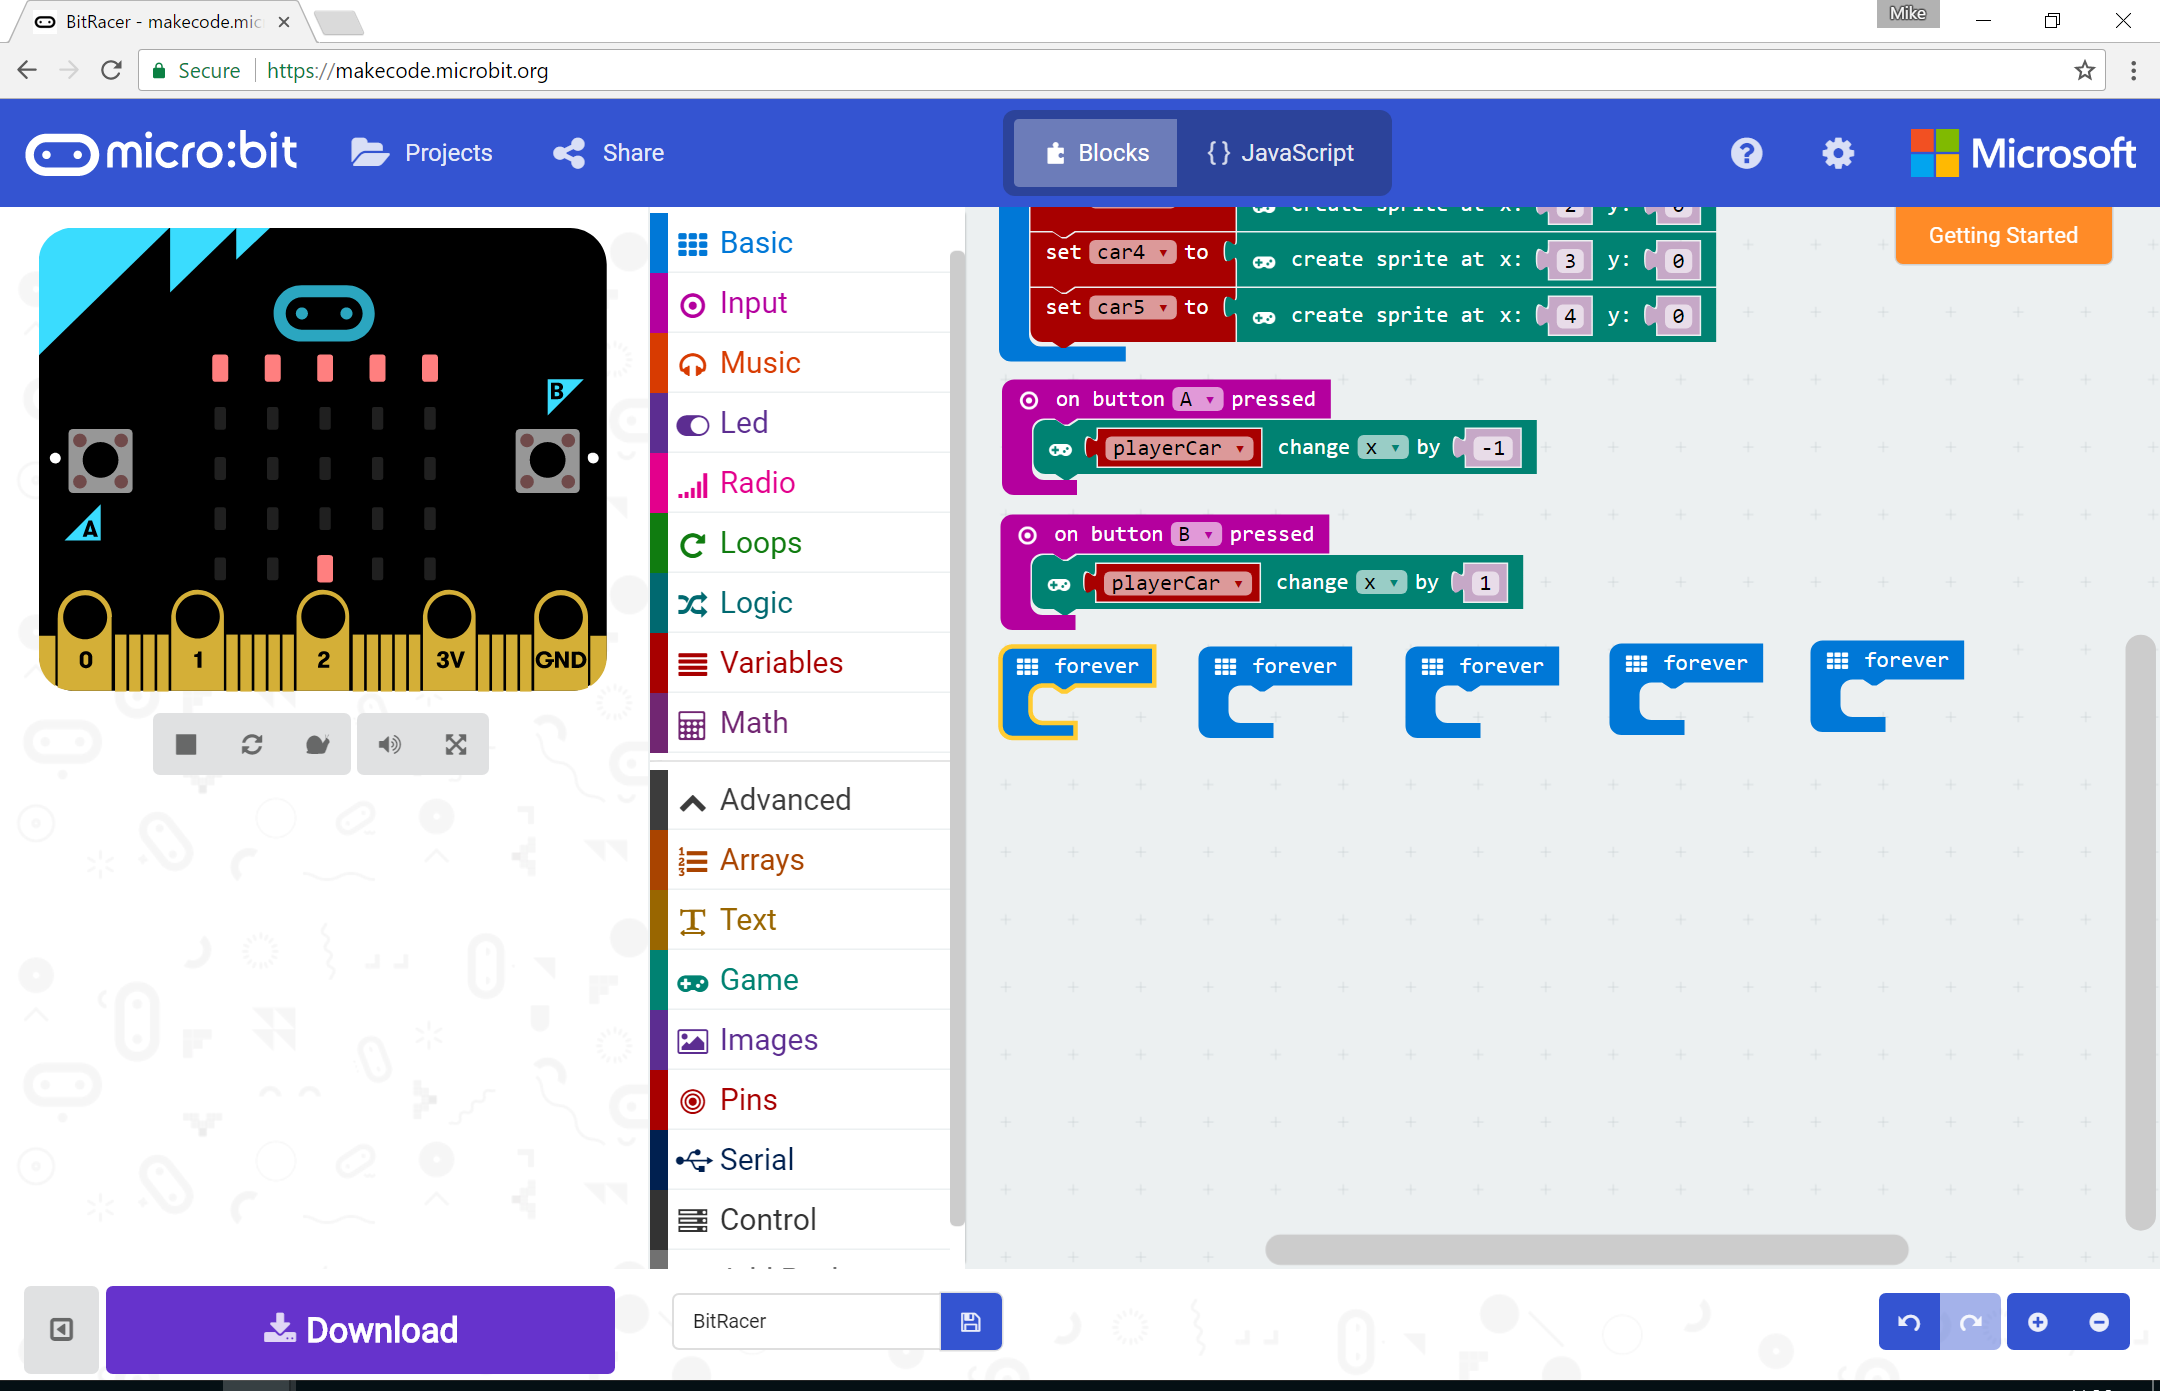
Next we need to create some cars to race against. There are going to be 5 in total (one for each column of LEDs). Each car will need to be controlled separately, so we’re going to need 4 extra forever loops from the Basic menu
Set them out however you want - you’ll probably need to shuffle things around as you add new blocks anyway!
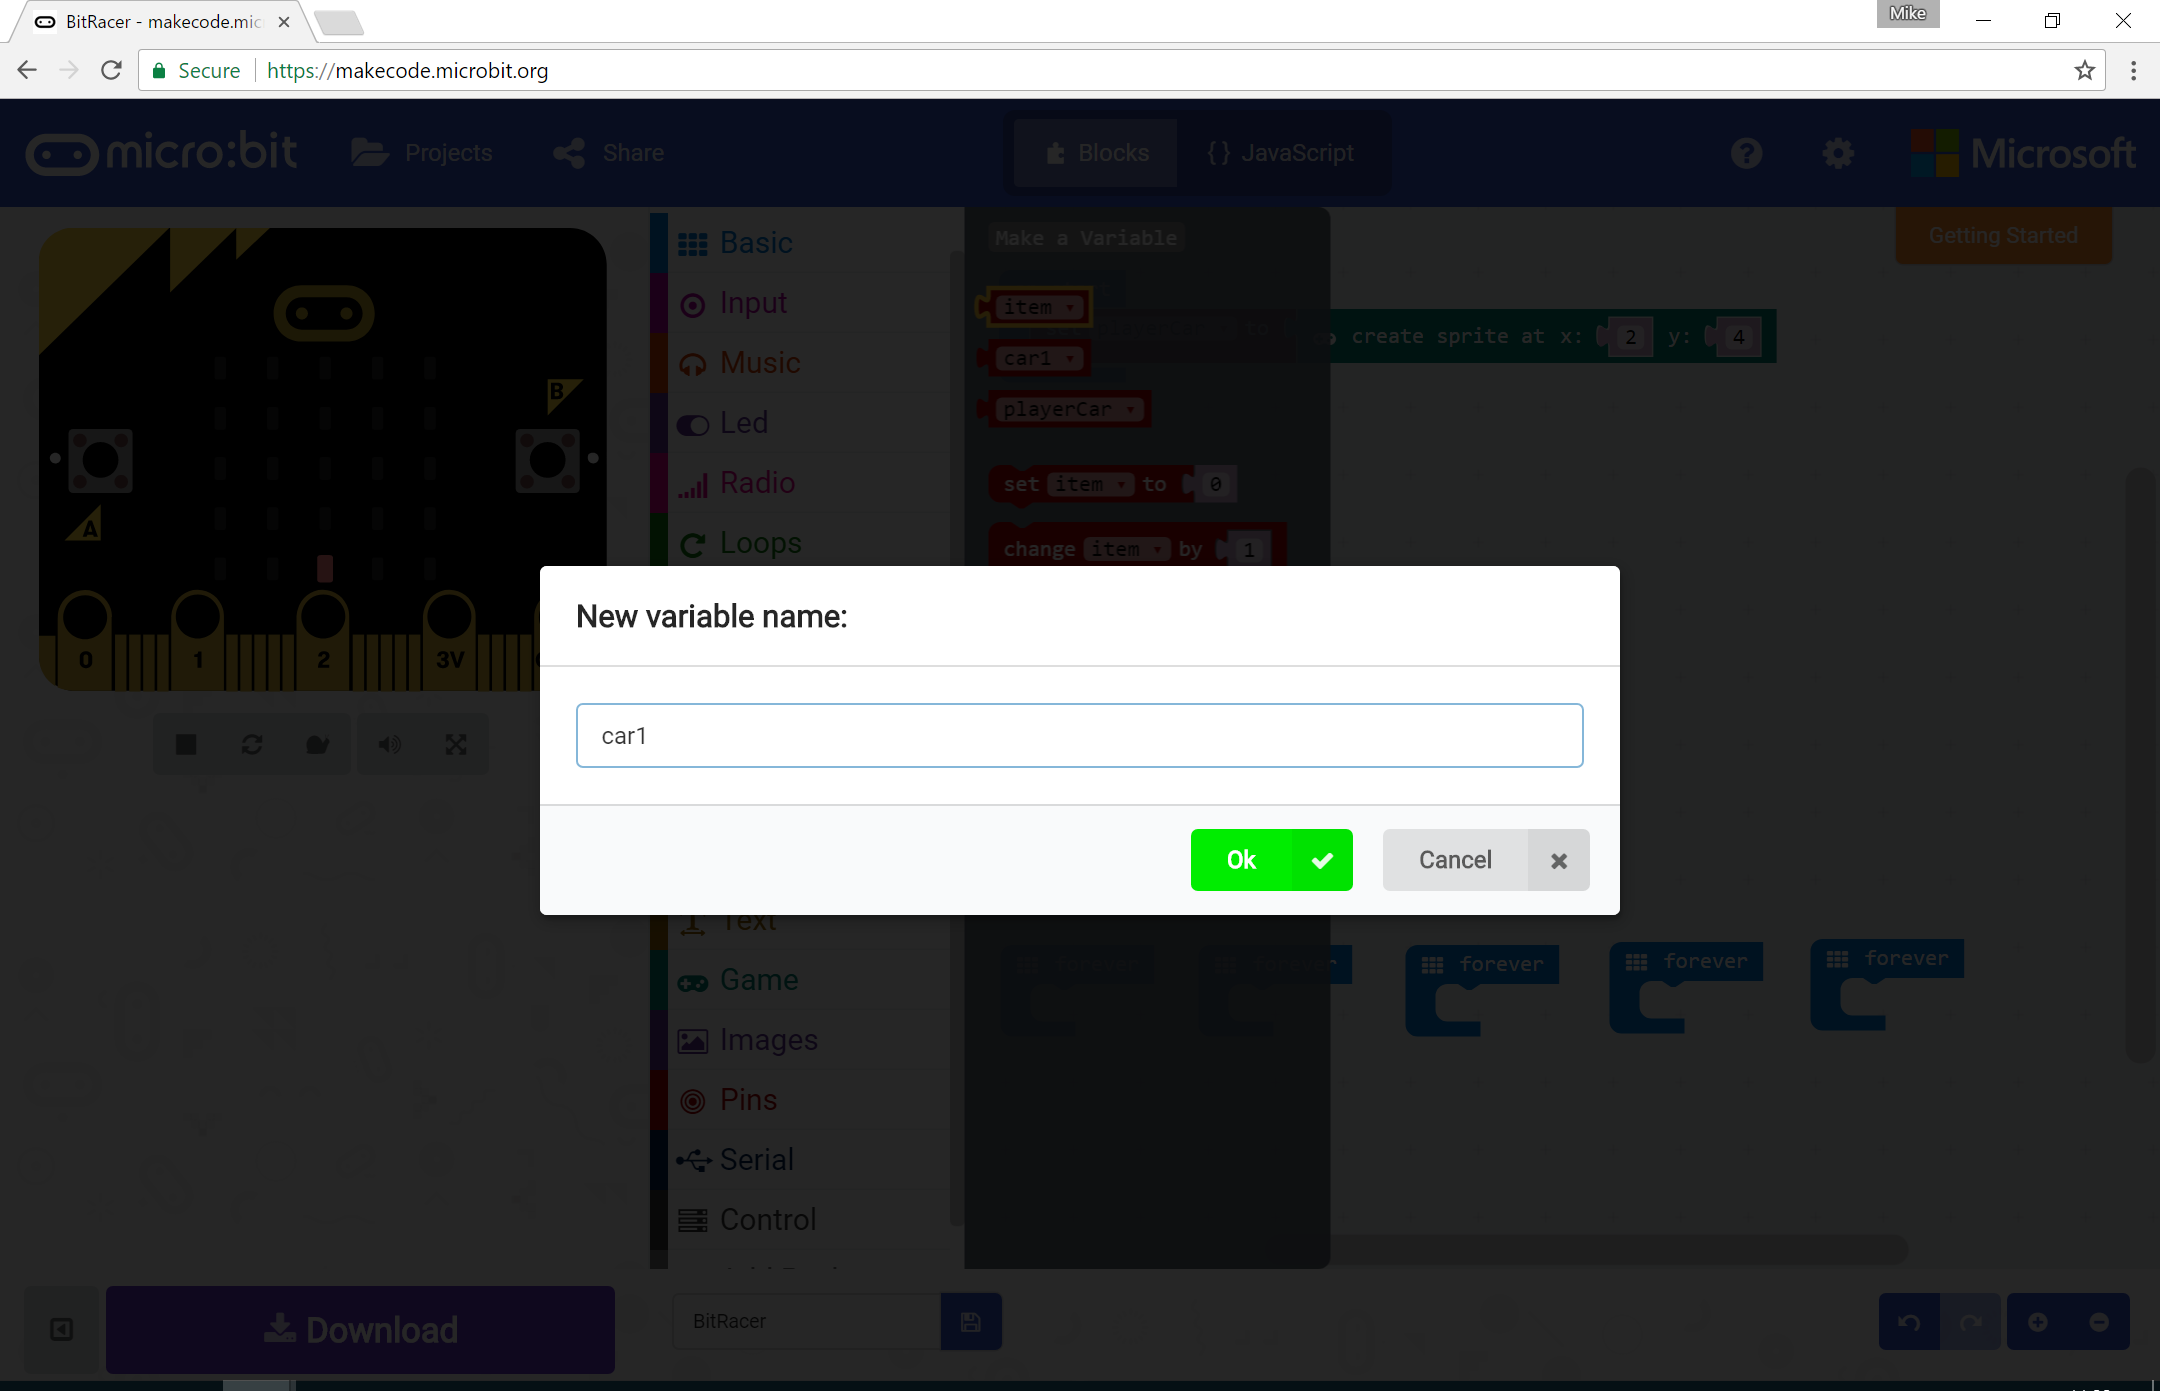
next we need to create 5 car variables and initialise them
Choose Make a Variable from the Variables menu and call it car1
and add a set car1 to block to the on start initialisation block

connect a create sprite at block to the set car1 to block, and enter the correct x and y values
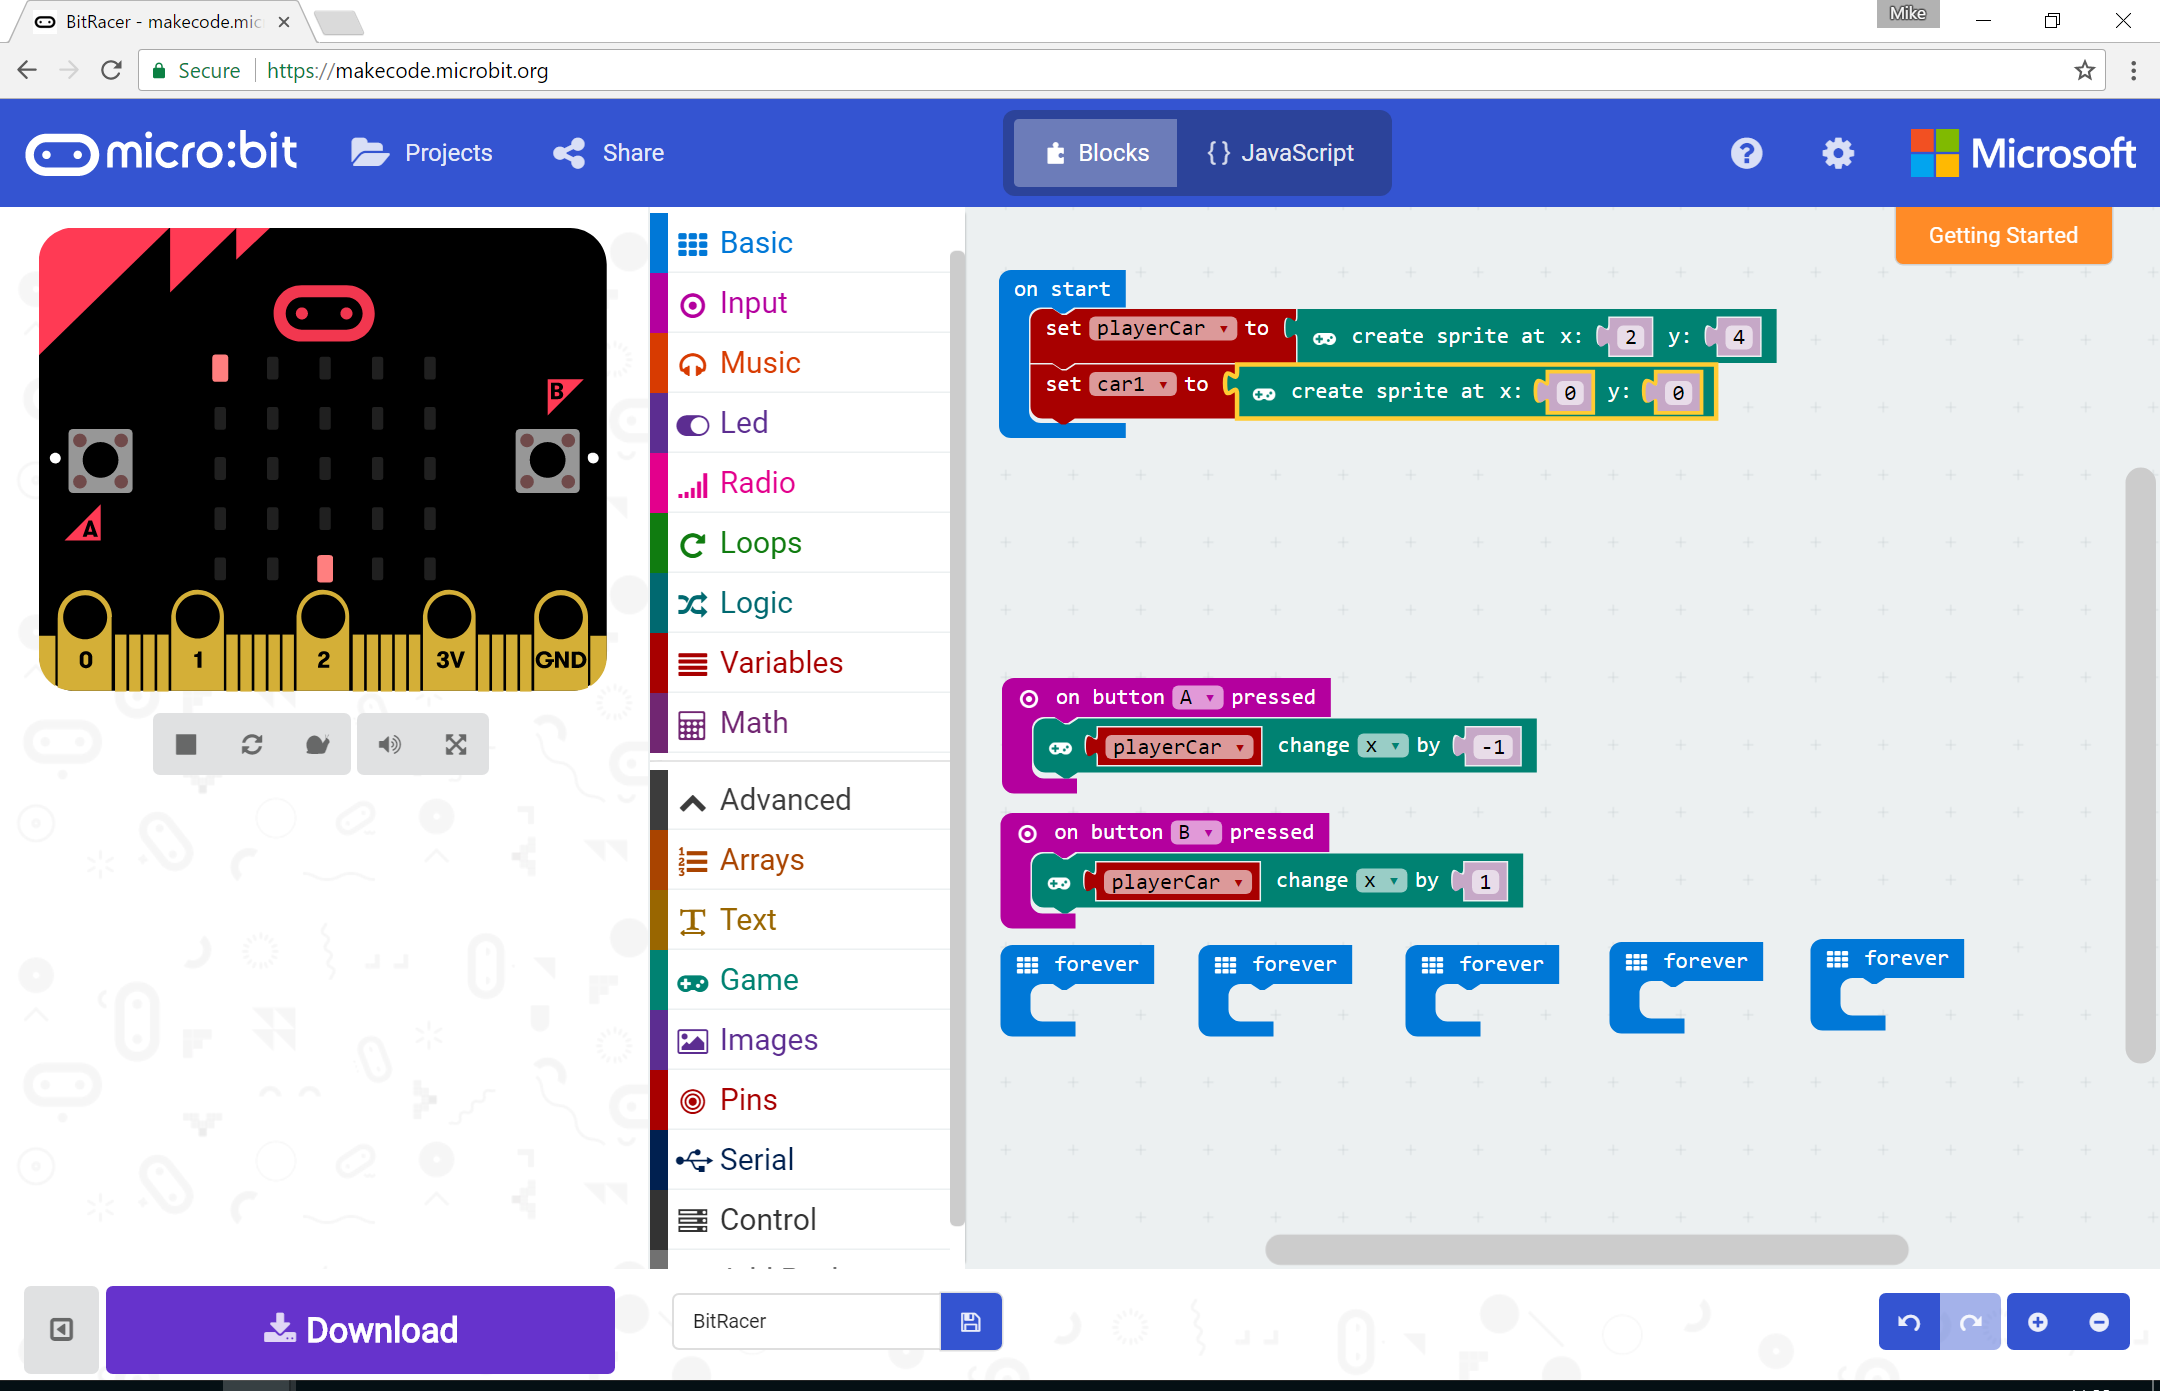
repeat this for 4 more cars, creating a new variable for each (car2, 3, 4 and 5) and making sure you set their x and y values correctly
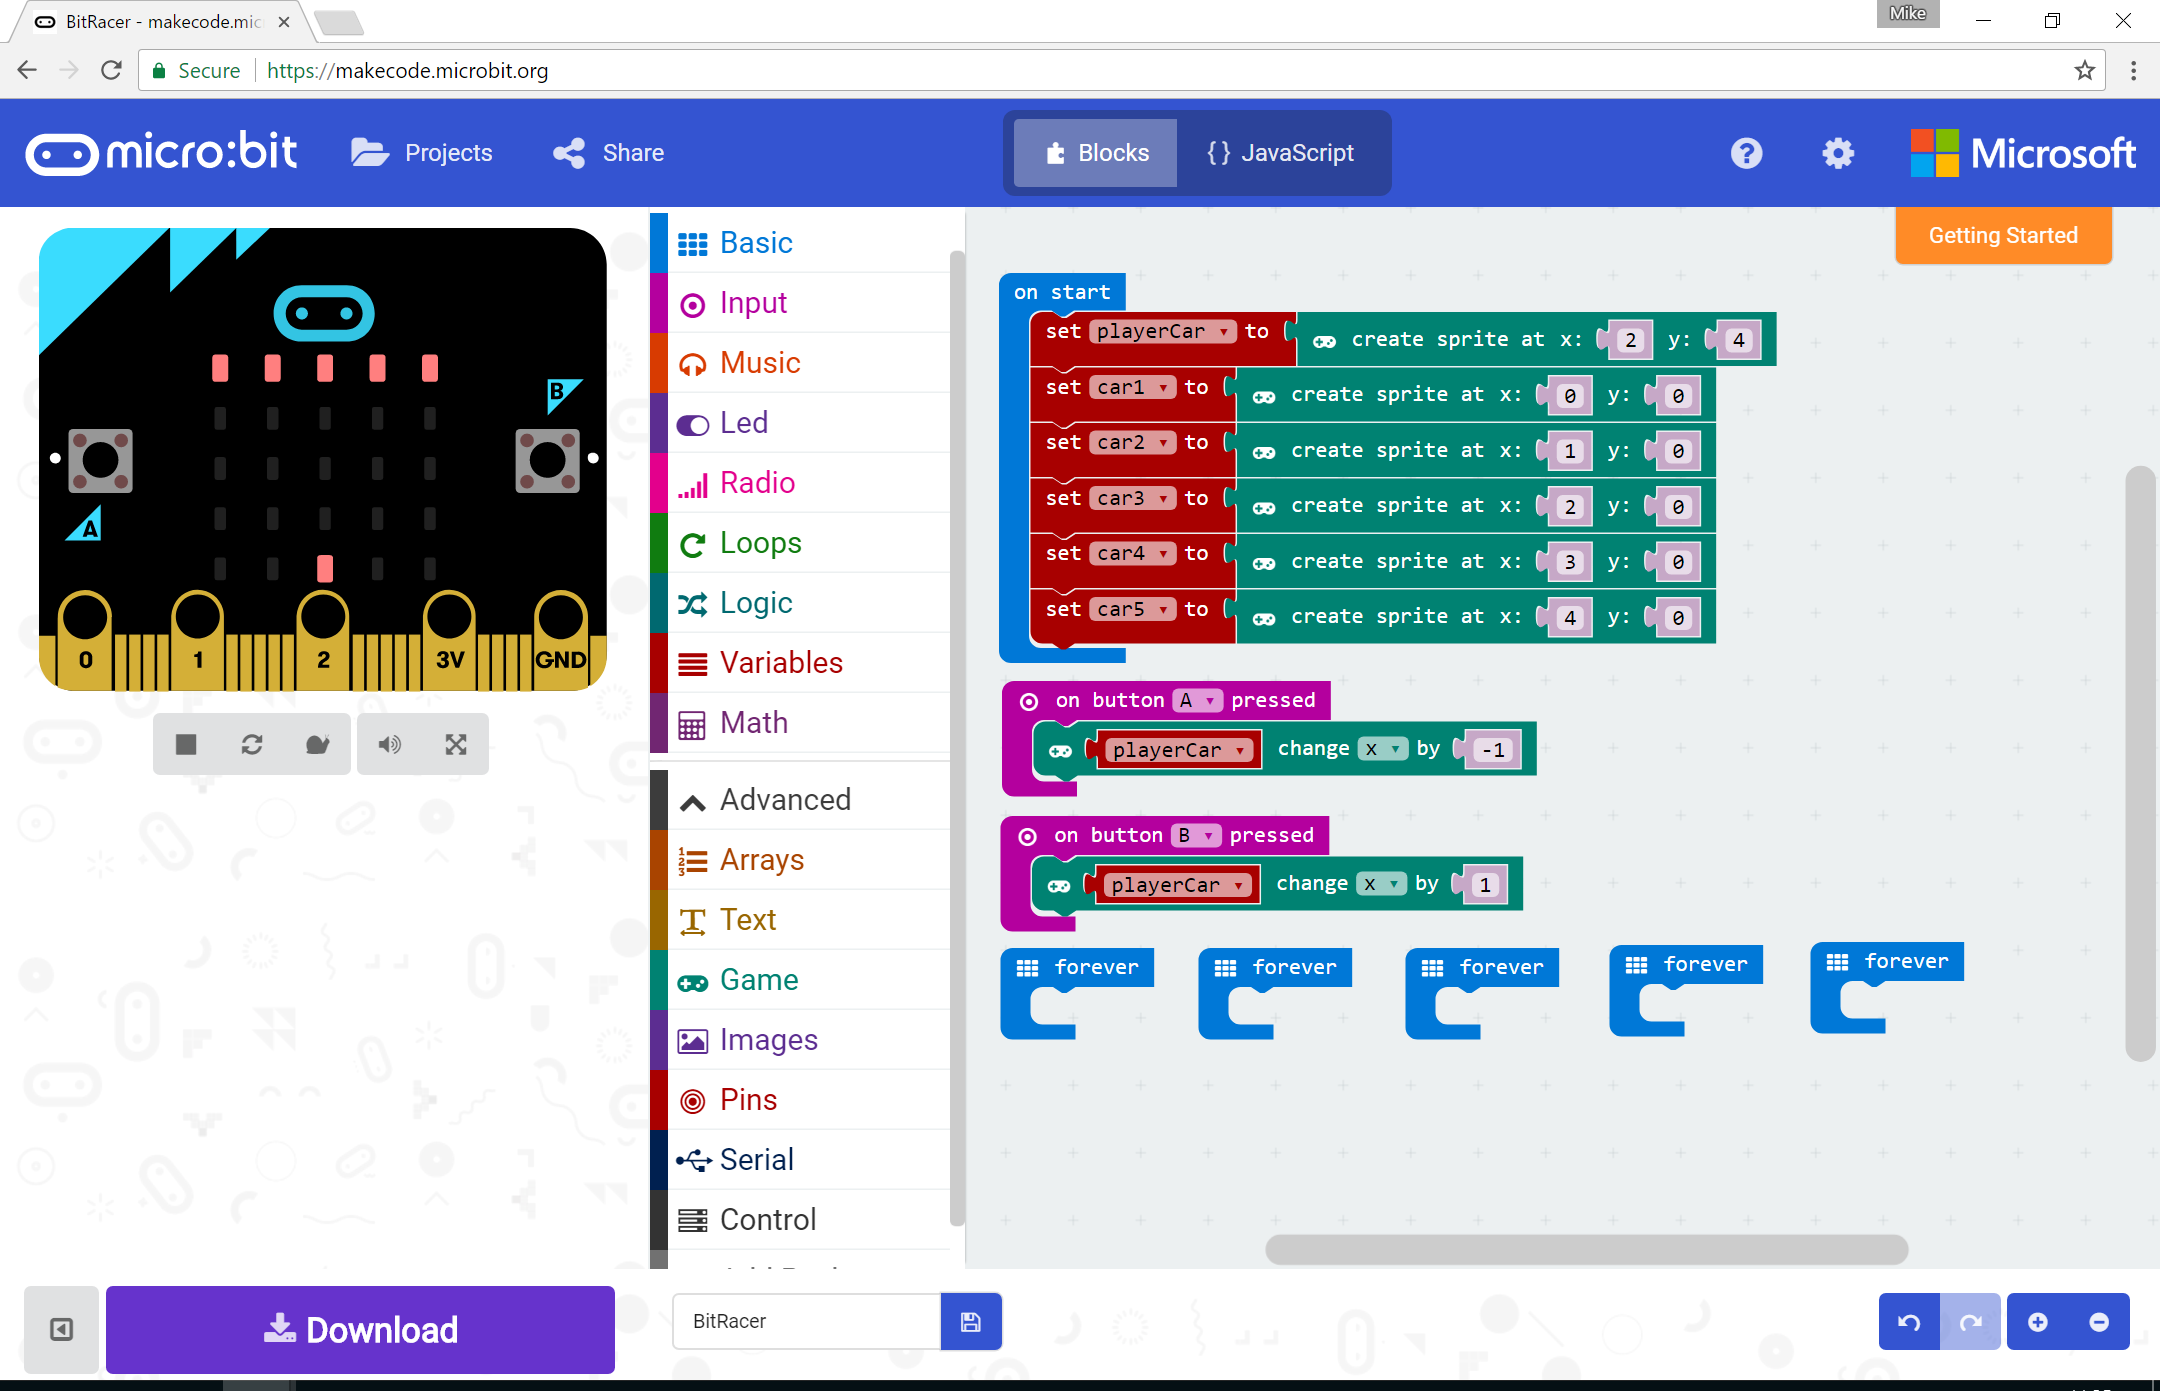
you should have a row of LEDs lit along the top of the microbit, as well as the player car at the bottom now.
Artificial Intelligence
The cars along the top row are controlled by the microbit. They behave very simply and appear ‘drop down’ from the top (actually, you’re looking at the road from above, the player car is overtaking each of the other cars!).
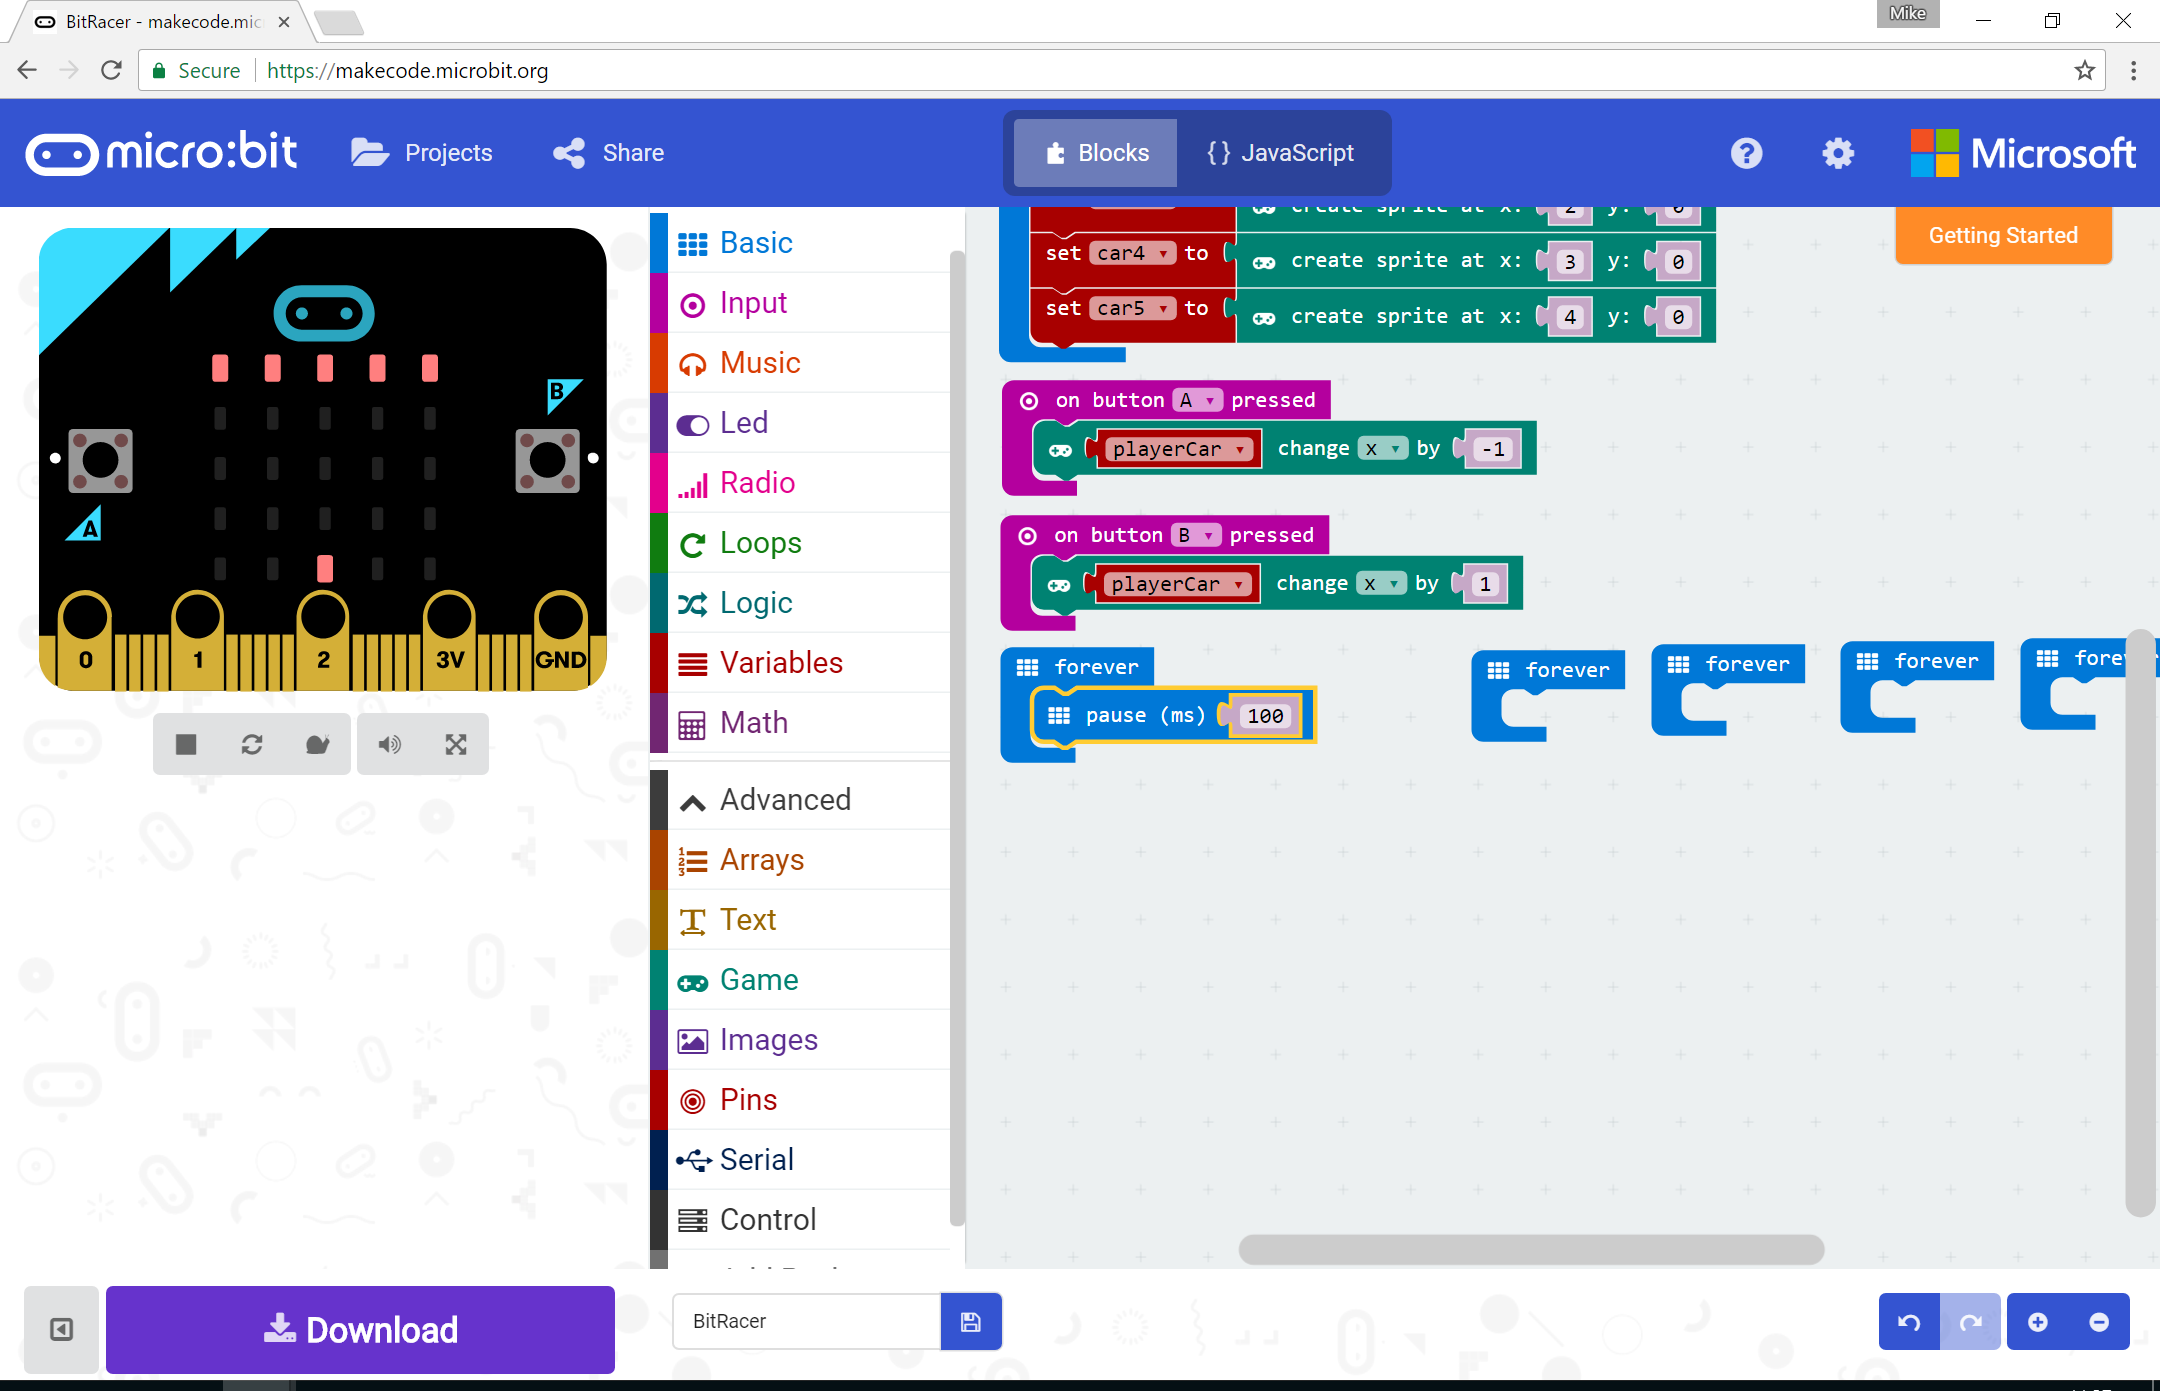
Let’s start by adding the code for car1. Find an empty forever block
At the start of the game, we want each car to pause for a different amount of time before moving - if they all began moving towards the player car at the same time, there would be no gaps for us to dodge between!
We can do this by adding a pause block that waits for a random amount of time. Start with the pause block
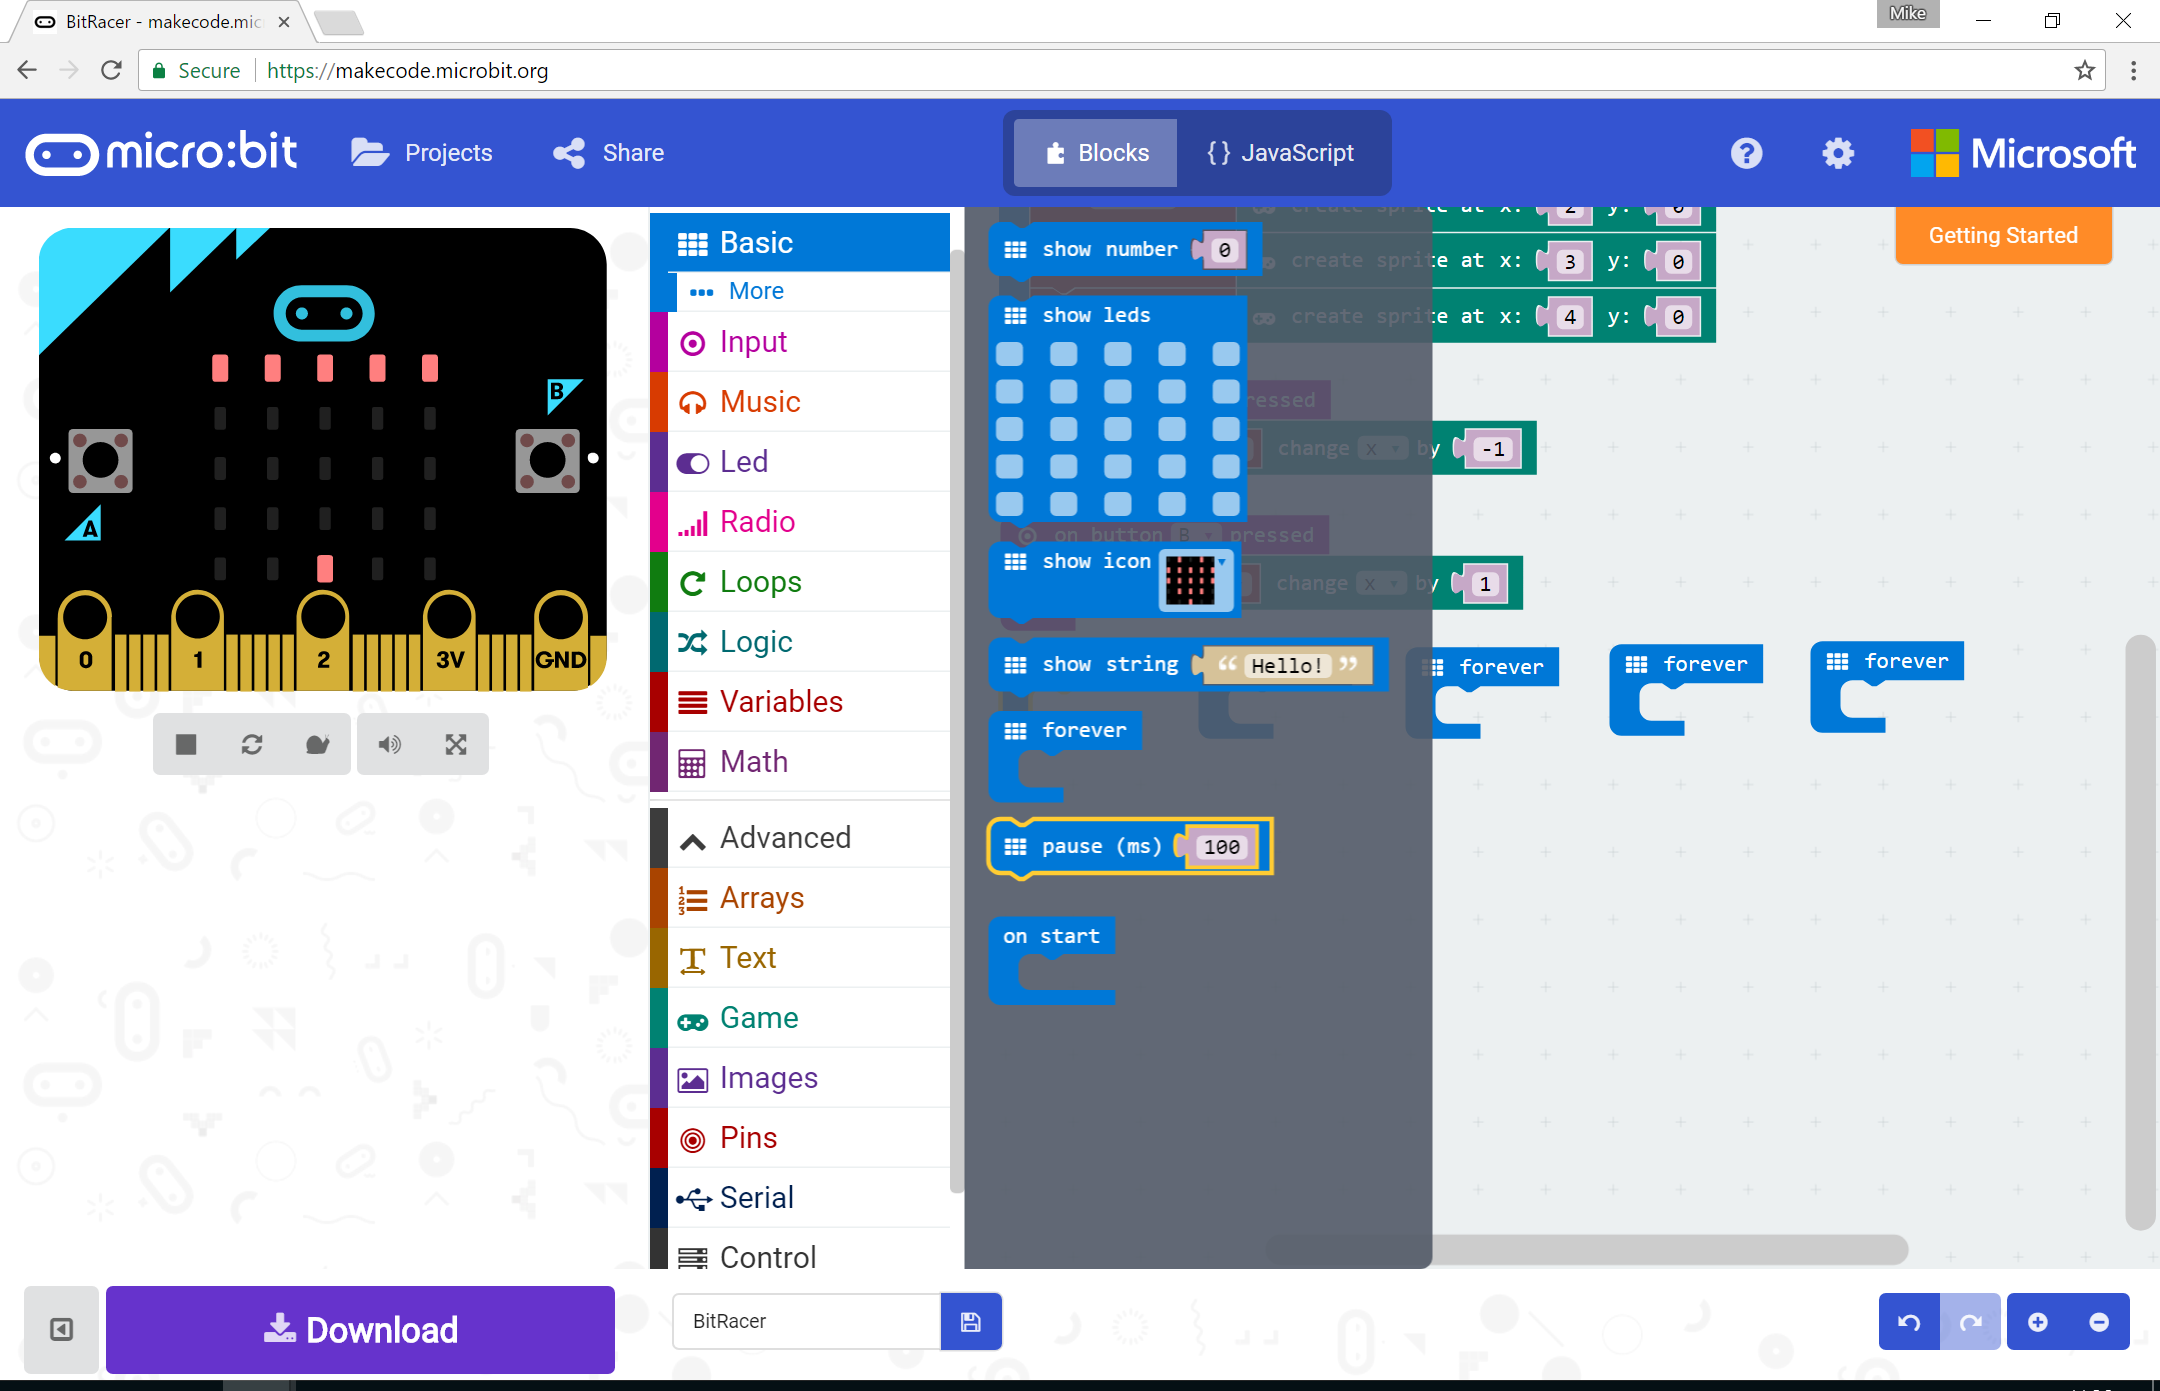
and attach it to one of the empty forever loop blocks
next, find the pick random block from the Math menu
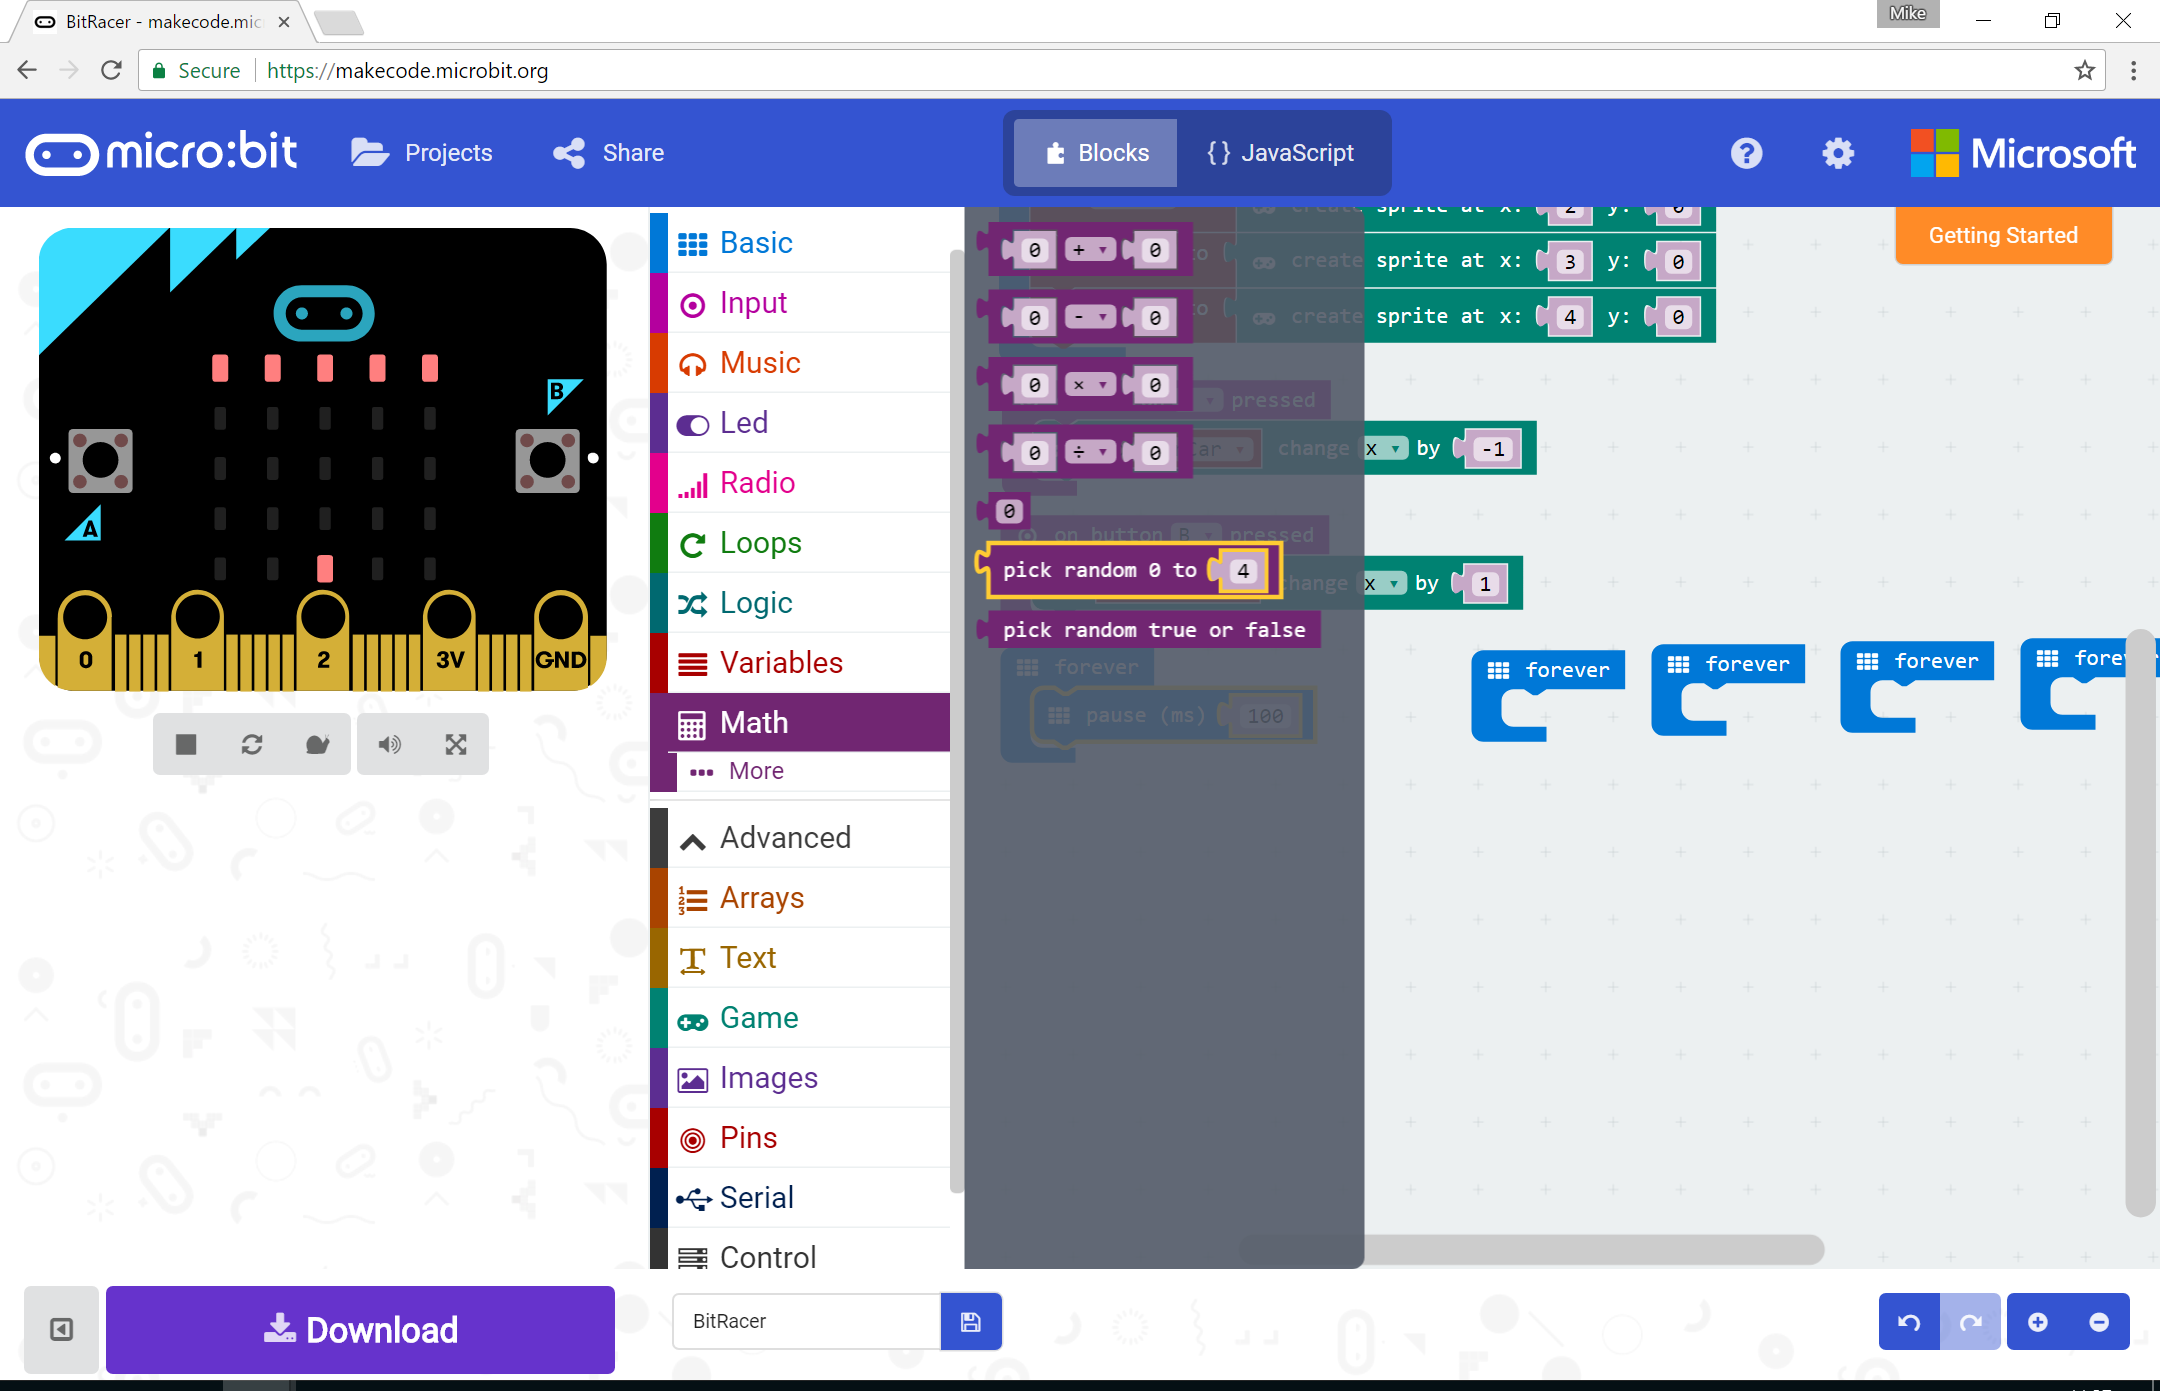
and insert it into the value part of the pause block. Enter the values shown below
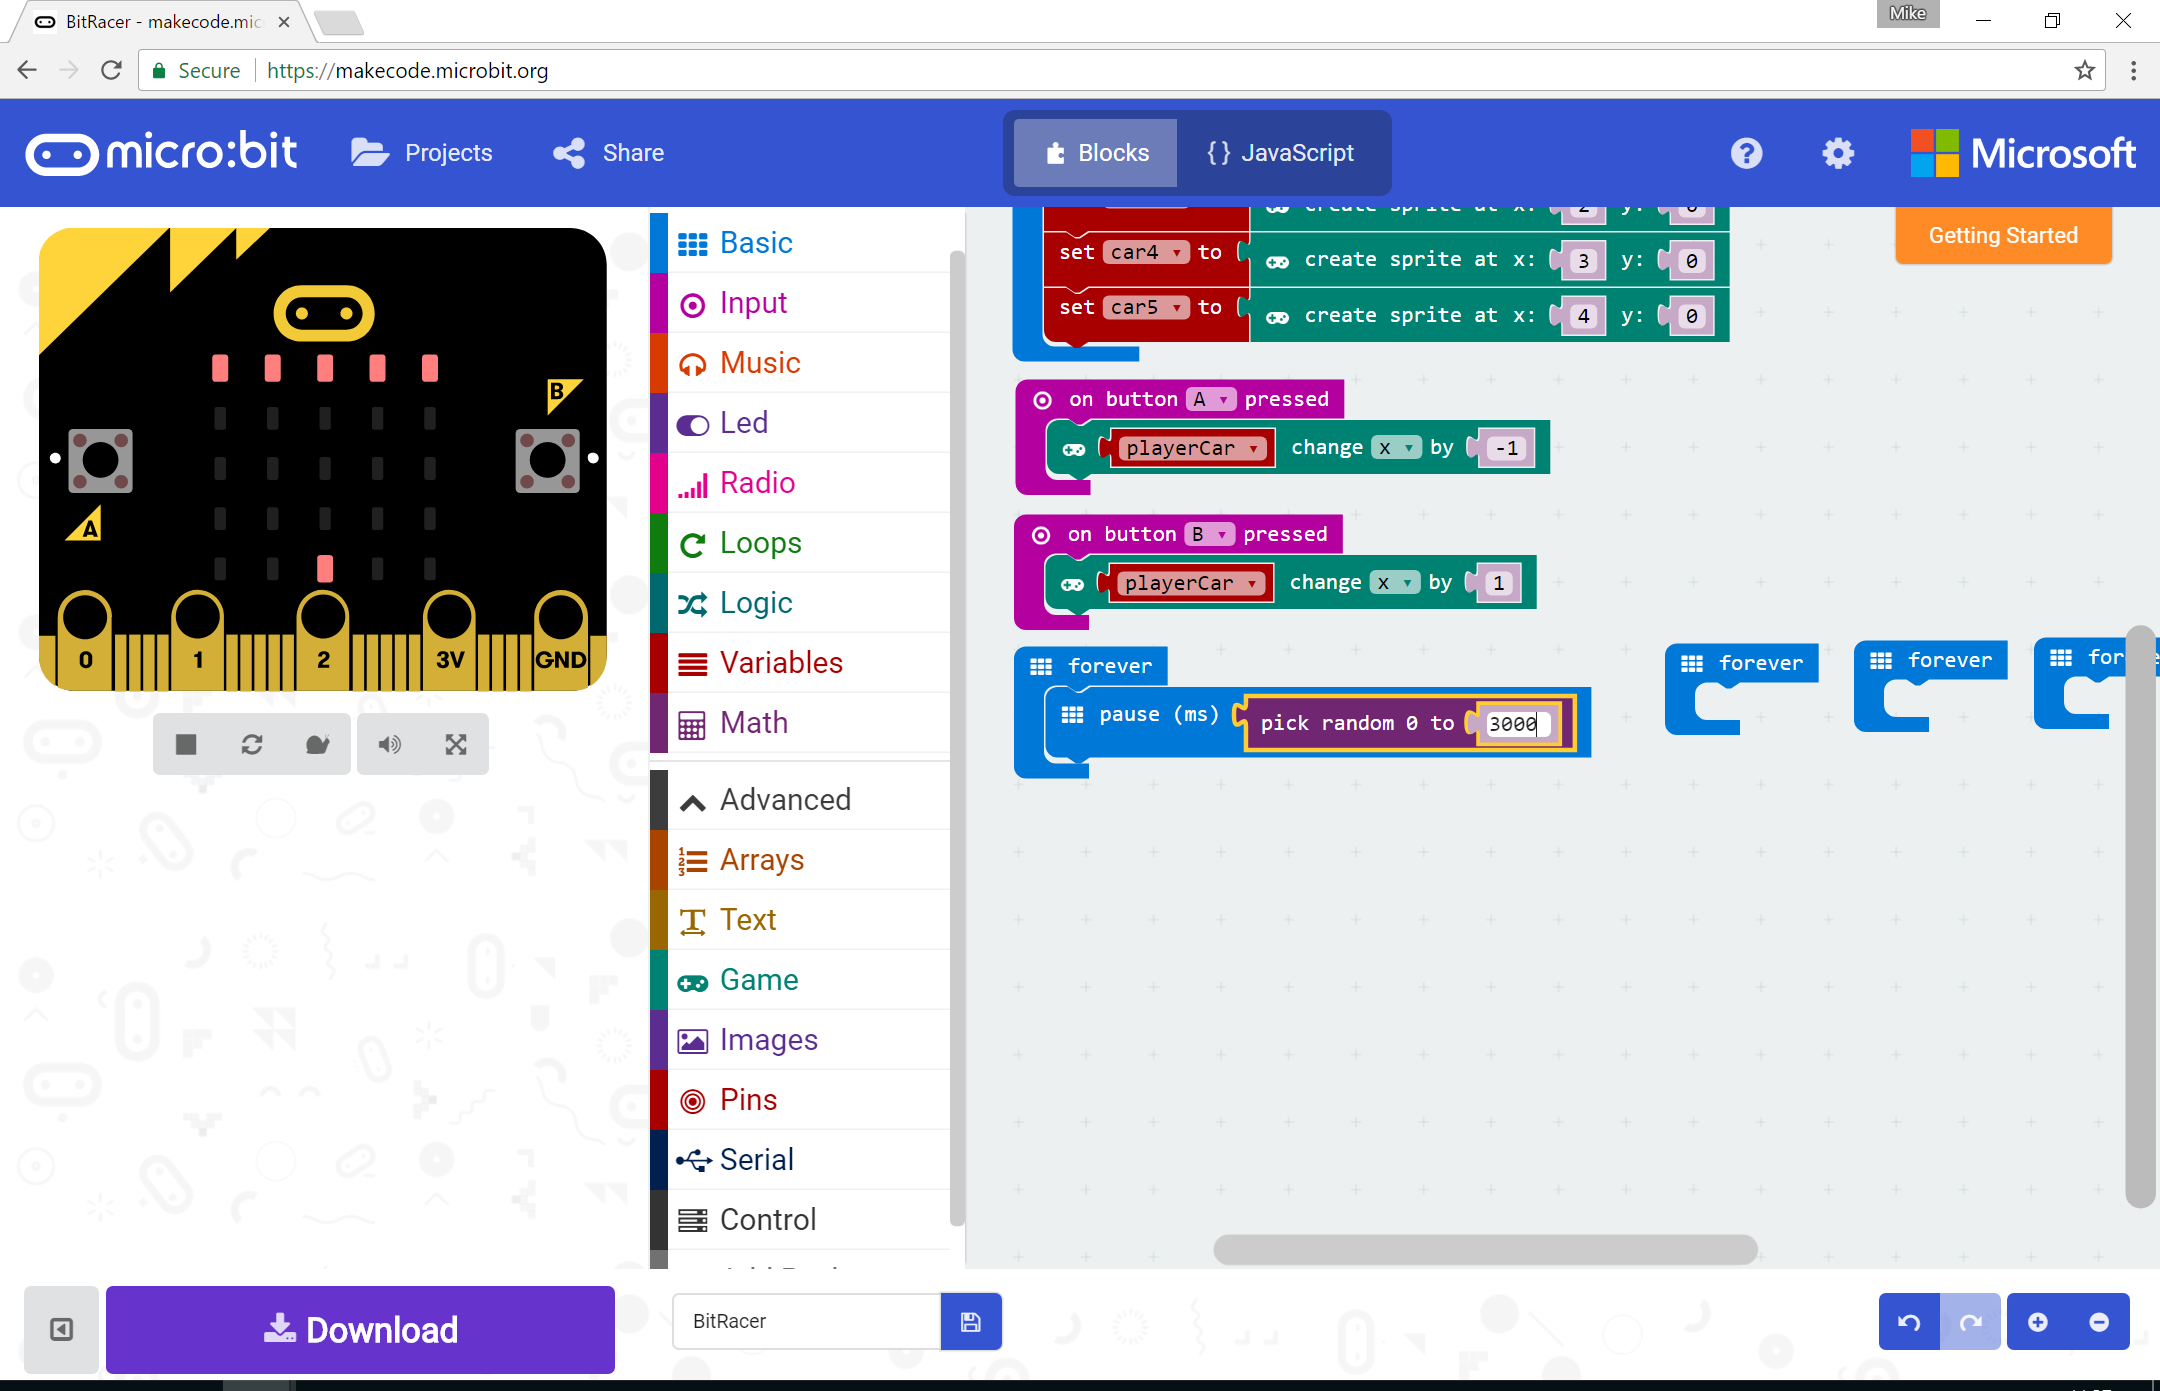
This will cause each car to wait for a random amount of time between 0 and 3000 milliseconds before moving for the first time.
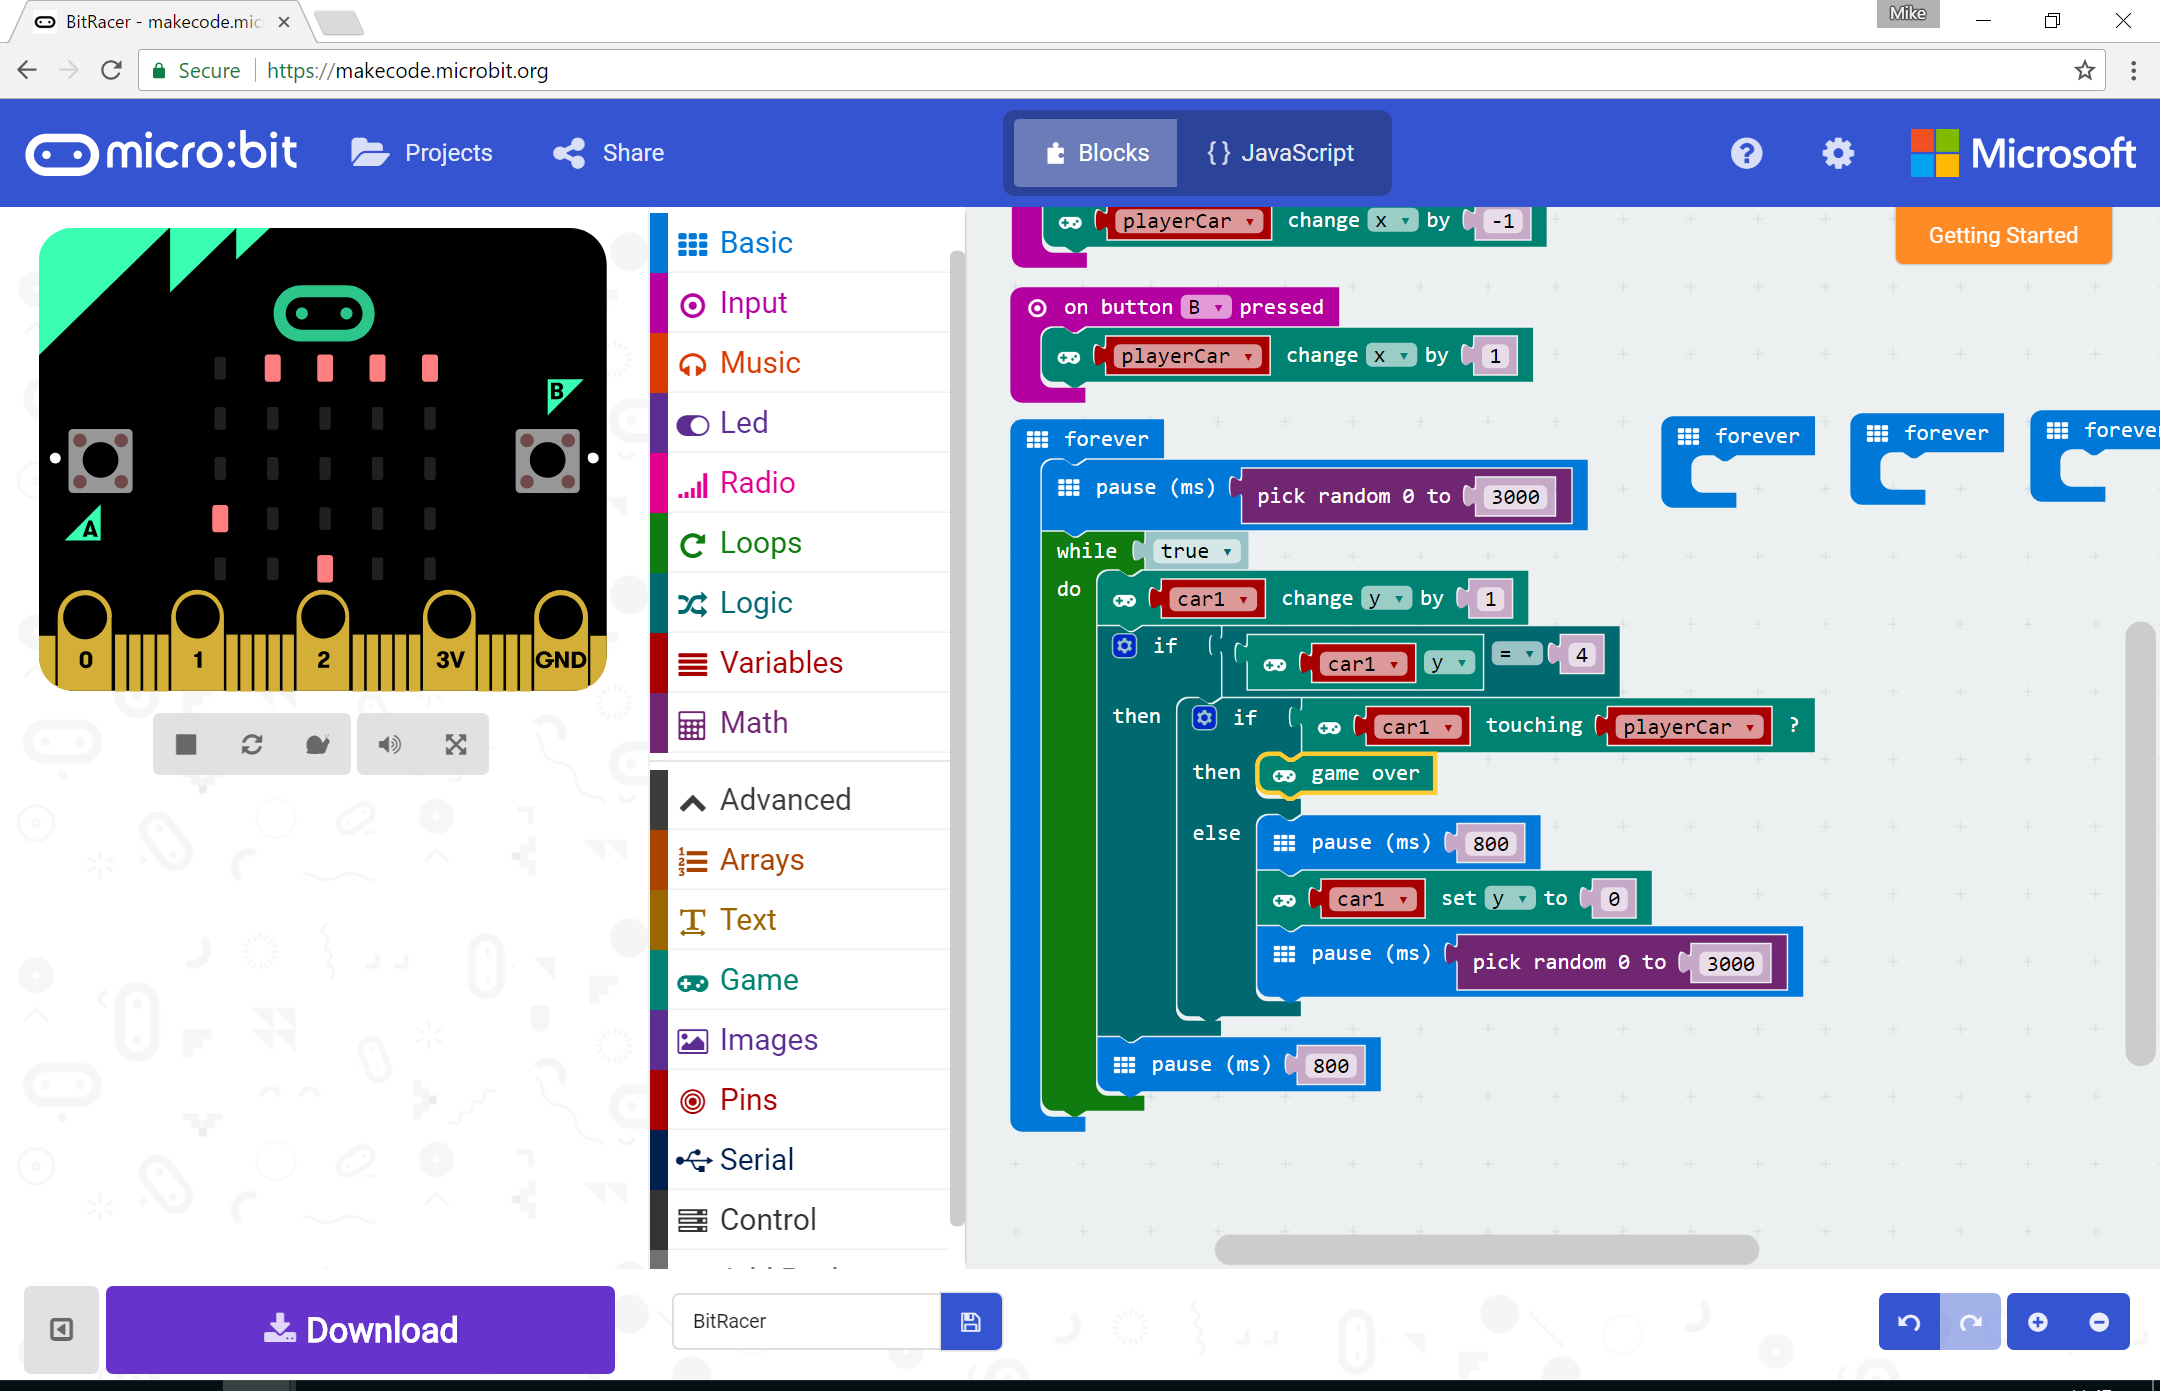
Flying Solo
At this point you should be comfortable finding blocks and connecting them together, so it’s time to apply what you’ve learnt.
Use the image below to write the code that controls the first car. Use the colours of the blocks to help you find the right menus.
Going further
Once you have car 1 working, duplicate the blocks for each of the other 4 cars.
Test your game using a microbit.
If you’re happy that it’s working correctly, here are some extra features you can try adding:
Score
In the Game menu, you should see a change score by block. Add this to the code for each car so that if the player successfully overtakes a car, the score is increased by 1.
Speed
The code blocks for each car have a pause block at the bottom, waiting for 800ms. This controls how quickly the cars move down the screen.
Can you create a new variable that starts with a value of 1000 but slowly decreases each time a car is successfully overtaken? If you use the value of this variable in that pause block, the game should get harder as it progresses!