Learning Objectives
- Working with images in Java
- Object Oriented Programming Techniques
Getting Started
Alright, we’re going to build a simple game in an effort to learn how to work with images in Java and develop our programming skills along the way.
Your first task will be to get everything installed and working. There are a whole bunch of ways to do this, but the easiest thing to do is to go and download Eclipse.
Activity 0
Write a simple Hello, world! program. Take a screenshot of the output and code together and email it to me.
Activity 1
Alright, now that we have a working development environment, we’re going to create a new project - it’s good practice to keep things in their own project, rather than always dumping code for everything in the same project.
To start with, our new project is going to have 3 classes:
JDojoMaster.javaScene.javaSprite.java
Create JDojoMaster.java as the class with the main() method in it. It should look something like this:
// JDojoMaster.java
package covid19;

import javax.swing.JFrame;

public class JDojoMaster extends JFrame {

    static final long serialVersionUID = 0;

    public static void main(String[] args) {

        JDojoMaster window = new JDojoMaster();
    }

    public JDojoMaster() {

        setTitle("JDojoMaster");
        setResizable(false);
        setDefaultCloseOperation(EXIT_ON_CLOSE);

        setVisible(true);

    }
}
Compile and run that code and you’ll get a tiny, empty little window. Nice.
Alright, next up we’ll make a Scene class which extends JPanel. Create a new source file called Scene.java:
// Scene.java
package covid19;

import javax.swing.JPanel;
import java.awt.Dimension;

public class Scene extends JPanel {

    static final long serialVersionUID = 1;

    private int width;
    private int height;

    public Scene() {
        super();              // Make sure to call the JPanel constructor

        width = 256;          // Default width
        height = 256;         // Default height
    }

    public Dimension getPreferredSize() {
        return new Dimension(this.width,this.height);
    }

}
Now, pay attention here because I see lots of you making mistakes when I do things like this. We want to create a Scene object and add it to our JFrame in the JDojoMaster class. The code below needs to be added to the JDojoMaster() constructor. Don’t just copy and paste it somewhere in the file! I’ll labour the point this time and maybe next time, but after that I’m going to make things easier for me to type:
// JDojoMaster.java
package covid19;

import javax.swing.JFrame;

public class JDojoMaster extends JFrame {

    static final long serialVersionUID = 0;

    protected Scene scene;                      // This line is new

    public static void main(String[] args) {

        JDojoMaster window = new JDojoMaster();
    }

    public JDojoMaster() {

        setTitle("JDojoMaster");
        setResizable(false);
        setDefaultCloseOperation(EXIT_ON_CLOSE);    // This line was already here

        scene = new Scene();                //
                                            //    These lines are new put them
        add(scene);                         //    between the two lines that
        pack();                             //    are already there.

        setVisible(true);                          // This line was already here

    }
}
Compile and run and you should see a neat little window with a title and a blank area that represents our Scene object. It’s still quite small, because we’re making a small game. Small games are something that people can make by themselves or in small groups. Big games like World of Warcraft, Fortnite or Call of Duty are not. They need large teams and massive budgets.
Let’s build a simple Sprite class, we’ll start off with a default fuchsia rectangle for our sprites:
// Sprite.java
package covid19;

import java.awt.image.BufferedImage;
import java.awt.Graphics;
import java.awt.Color;

public class Sprite {

    protected BufferedImage image;
    protected int x;
    protected int y;

    /* Default constructor */
    public Sprite() {
        x = 0;
        y = 0;

        image = new BufferedImage(32, 32, BufferedImage.TYPE_INT_RGB);
        Graphics g = image.getGraphics();

        g.setColor(new Color(255, 0, 255));
        g.fillRect(0, 0, 32, 32);
    }
}
Simple class here with a constructor that makes a new BufferedImage, grabs its Graphics context and draw a 32px x 32px rectangle in it.
Let’s extend that slightly to enable it to draw itself onto any Graphics context (we want to be able to draw it onto the Scene later). Add a new method to the Sprite class:
// Sprite.java << you don't need to put this in,
// ^^^ it's just to help make it clear which files we're working with

    public void draw(Graphics g) {
        g.drawImage(image, x, y, null);
    }
Nice.
Next we want to create a simple Sprite as part of our main JDojoMaster class. The player is a special sprite that we probably want to be able to keep track of, so first off, create a property at the top of the class:
// JDojoMaster.java

protected Sprite player;
Let’s keep our game stuff a bit separate. Create a new init() method in JDojoMaster:
// JDojoMaster.java

private void init() {
    player = new Sprite();

}
and be sure to add a call to it once we’ve finished setting up the window:
// JDojomaster.java

public JDojoMaster() {

    setTitle("JDojoMaster");
    setResizable(false);
    setDefaultCloseOperation(EXIT_ON_CLOSE);

    scene = new Scene();
    add(scene);
    pack();

    setVisible(true);

    init();      // Only this line is new. Don't add a whole new constructor!!

}
Our Scene object is where we track and draw sprites (and other stuff). Let’s add some code to keep a list of Sprites and draw them:
// Scene.java

import java.util.List;                  // add these at the top
import java.util.ArrayList;

public class Scene extends JPanel {     // this is already here

	// width and height are declared here

	private List<Sprite> sprites = new ArrayList<Sprite>(); // this is new
Lists and ArrayLists in java are handy datastructures that allow us to easily add and remove objects without having to keep track of empty slots in a regular array and all that jazz. They use a funny syntax where the <Sprite> part is telling Java what type the list is going to store.
Now add a new method to add a sprite to the list:
// Scene.java

public void addSprite(Sprite s) {
    sprites.add(s);
}
Next we need to add some code to JDojoMaster to add the sprite to the scene:
// JDojoMaster.java

private void init() {
    player = new Sprite();

    scene.addSprite(player);
}
Finally, let’s add some code to draw each sprite. We can do this as part of Scene’s repaint method:
// Scene.java

@Override
protected void paintComponent(Graphics g) {
    super.paintComponent(g);

    sprites.forEach((s) -> s.draw(g));
}
don’t forget to add import java.awt.Graphics; up at the top too ;)
There’s some more odd syntax here. the List type has a method called forEach. That’s easy enough to understand. But then we’ve got the whole (s)->s.draw(g) part!? This is called a Lambda Expression, and here’s a Stack Overflow answer about what they do. Clear? Good. Moving on…
(You’ll never be asked to work with these as part of any coursework or exam, just treat them as magic and move on for now. Basically, it’s looking at each of the objects stored in the list and calling a method for it. In our case, it calls the draw() method we wrote for our Sprite class earlier, passing in the Graphics context of the JPanel that is Scene. Cool).
Save everything. Compile and run. You should get a window appear with a pretty fuchsia square in the top corner:
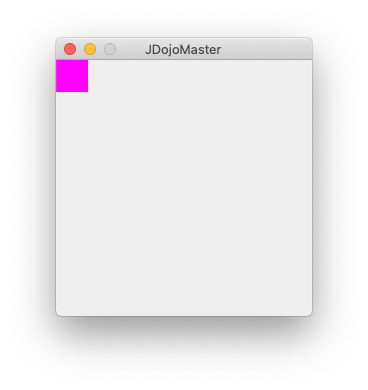
That’s it for Part 1. How could you modify the Sprite.java class to allow you to put the square at a different location? Can you change the colour of the square?
Try it, and tune in to part 2 soon!